If you’ve ever come back from a trade show with a spreadsheet full of badge scans, you know the feeling: great leads, and no quick way to email them. Those contacts aren’t in Salesforce CRM yet, and you don’t want to wait on a full integration just to send a follow-up.
That’s where Actionable Lists in Marketing Cloud Next come in. They let you upload a file of records straight into the Marketing app so you can start marketing to them right away. If you’re coming from Marketing Cloud Engagement, think of an Actionable List as the Next version of importing a file into a data extension.
There’s one catch. Marketing Cloud Next checks consent before every send, so uploading the records is only half the job. They also need consent records before they can receive email.
In this blog we’ll cover how to:
1. Import consent records for your new leads
2. Open the Marketing app
3. Import leads into a new Actionable List
4. Check the list and its members
5. Choose the right subscription for consent
Part I: Import Records into an Actionable List
First, we need to navigate to the Marketing app in your org.
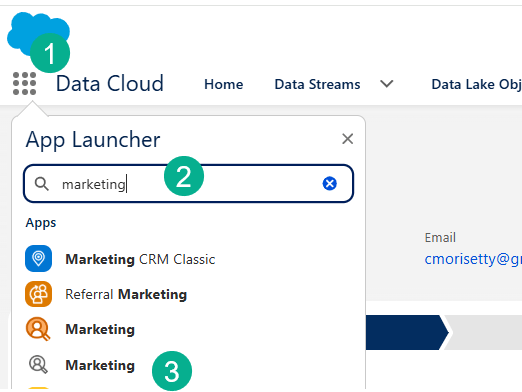
(1) Click the App Launcher (the nine dots) in the upper left.
(2) Search for “Marketing.”
(3) Select the Marketing app. Skip the other apps that have “Marketing” in their name.

(1) Click the Leads tab in the top navigation.
(2) Click Import in the upper right.
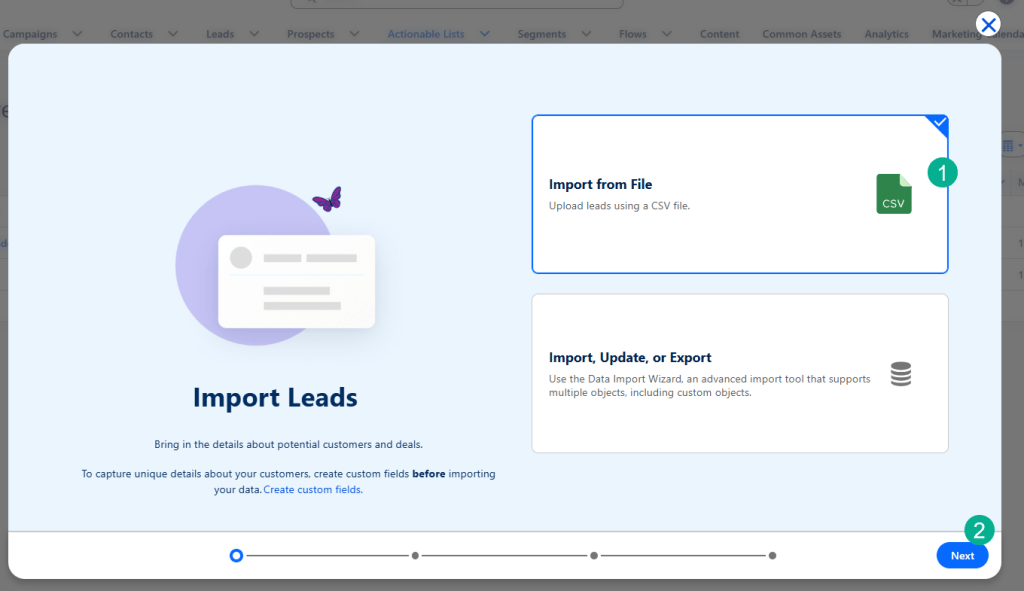
(1) Select Import from File to upload a CSV.
(2) Click Next.
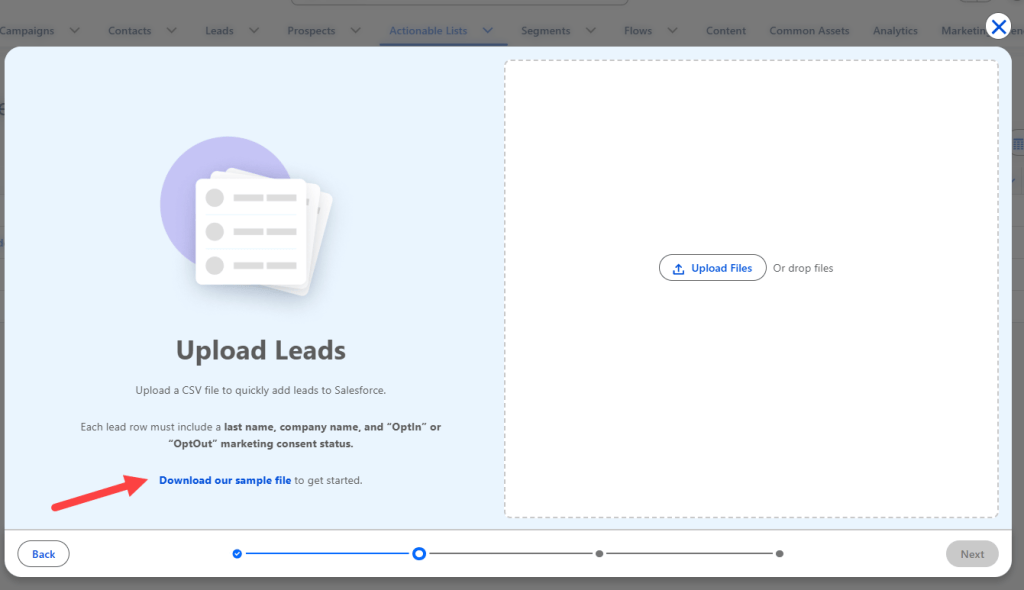
(1) Click Download a sample file to get a template with the correct column headers.

(1) Open the sample file and leave the header row as is. Each column maps to a Lead field in Salesforce. You may only need a few columns based on your use case.

Trim down your table to match your use case and add records. Don’t forget to save it as a csv!
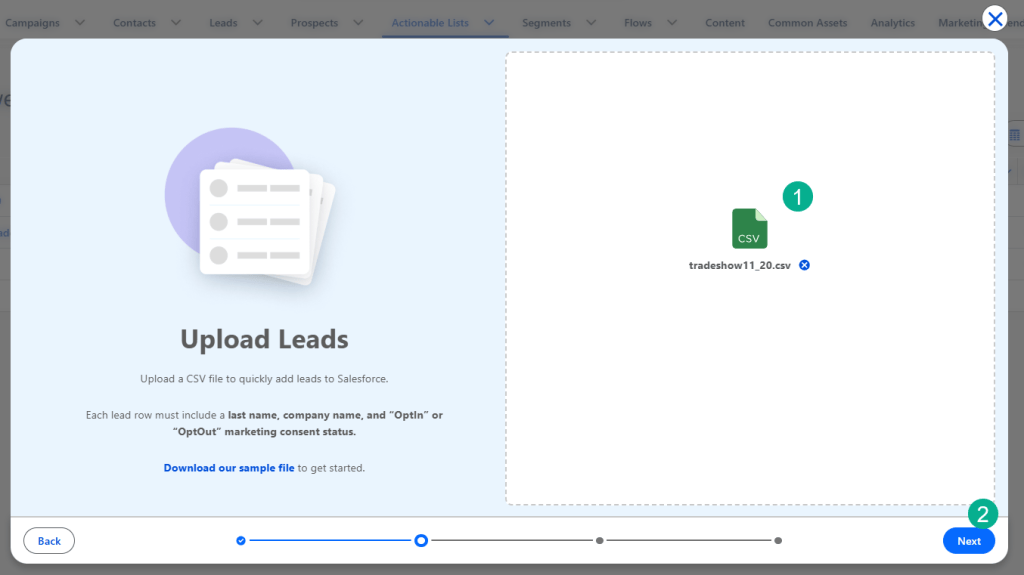
(1) Back in Salesforce select your csv file.
(2) Click Next.
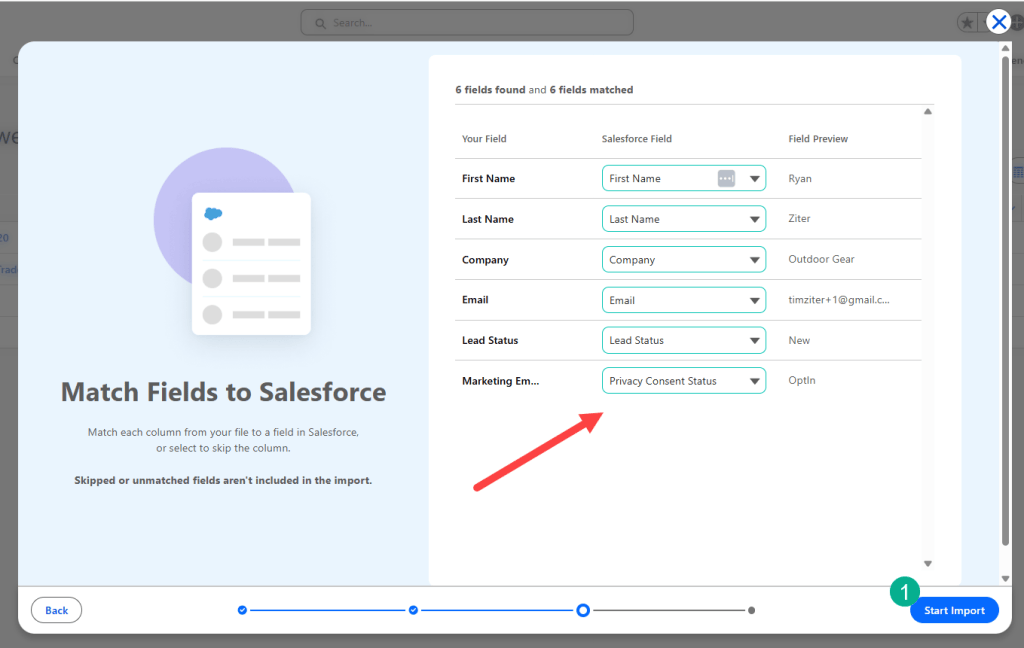
Verify your fields and adjust fields on the lead if necessary. Select Start Import.
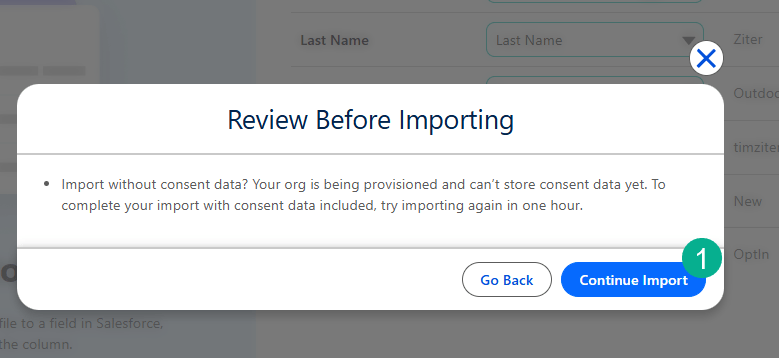
(1) Click Continue to Import. You may not see this pop up.
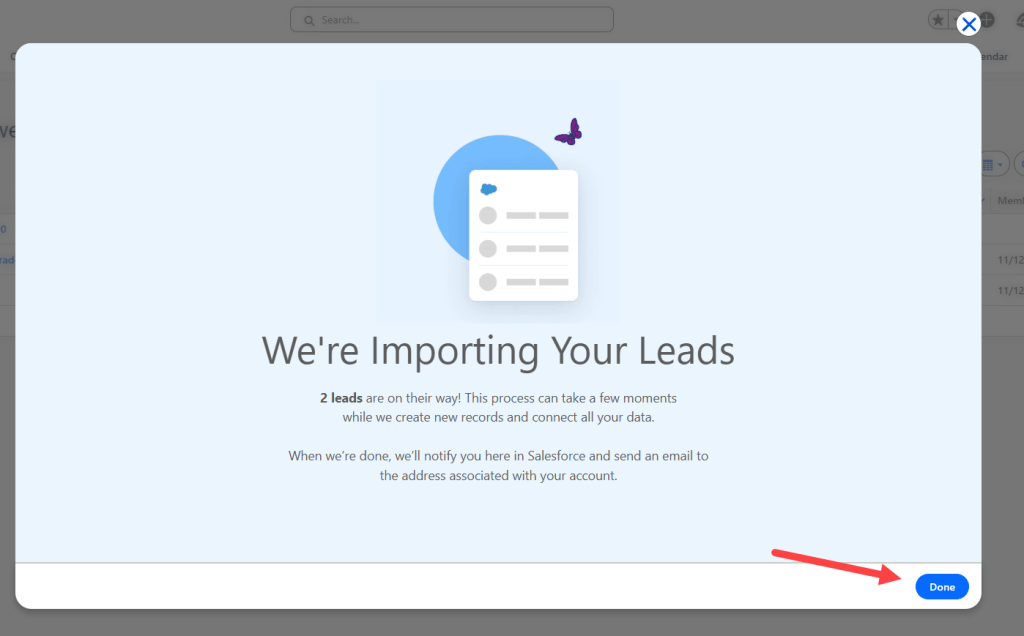
Click Done and your records will start importing.

Once they are processed you’ll be able to see the Actionable list and counts on the tab.
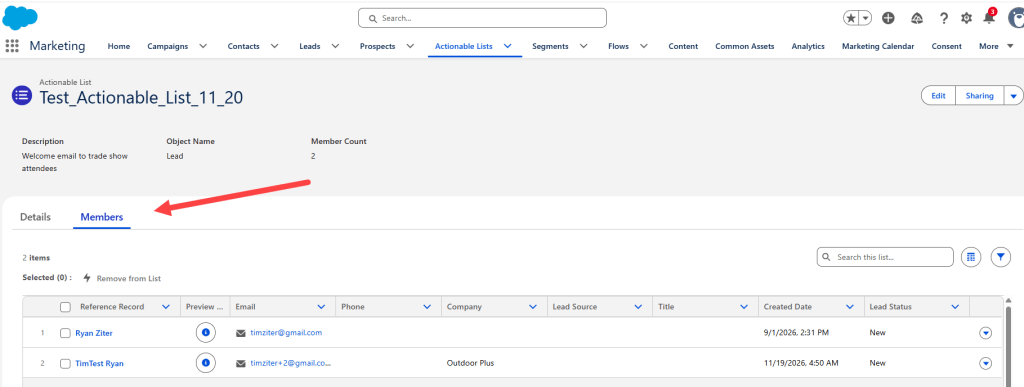
If you click into the Actionable list and select the Members tab you’ll be able to see each record.
And you should be able to see the leads that were created as well.

(1) Select the Leads tab or search leads in the nine dots.
(2) Select Todays Leads on the related list.
(3) View your leads that should have been created.
Part II: Uploading records to create Consent records
Your work isn’t finished yet. Because Marketing Cloud Next checks consent before every send, these new leads need email consent for a subscription before they’ll receive anything.
We’ll navigate to the Consent tab in Marketing Cloud Next. Before we import, we need to decide which subscription to use.
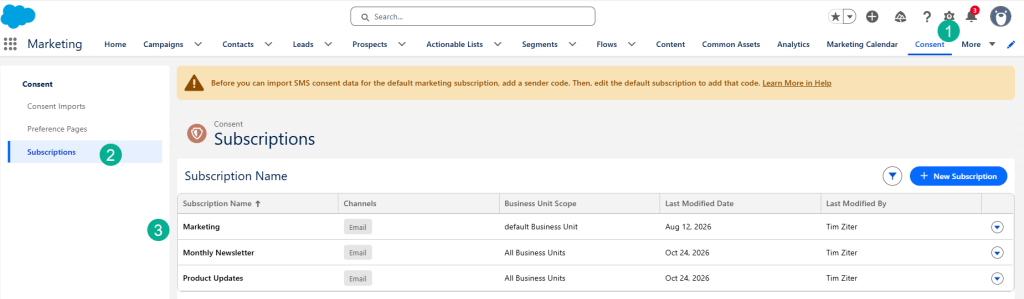
(1) In the top nav, click on the Consent tab.
(2) Select Subscriptions.
(3) Determine the best subscription for your needs, in our case we’ll use the general Marketing Subscription
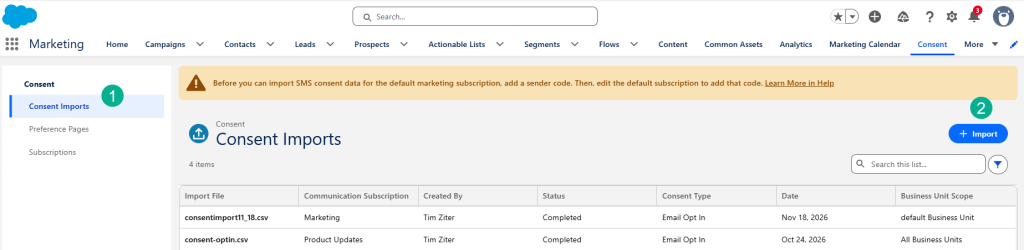
(1) Select Consent Imports in the left panel.
(2) Click the import button in the upper right.
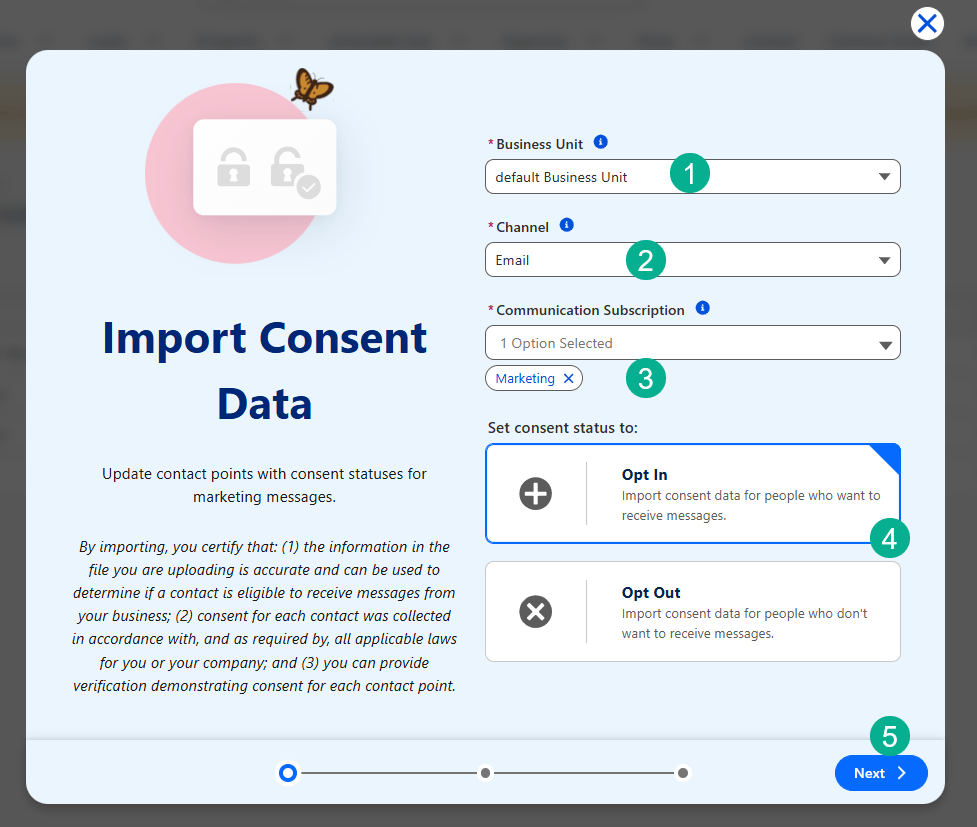
(1) Choose your Business Unit.
(2) Set the Channel to Email.
(3) Choose the subscription from the previous step (General Marketing Subscription). (4) Select Opt In.
(5) Click Next.
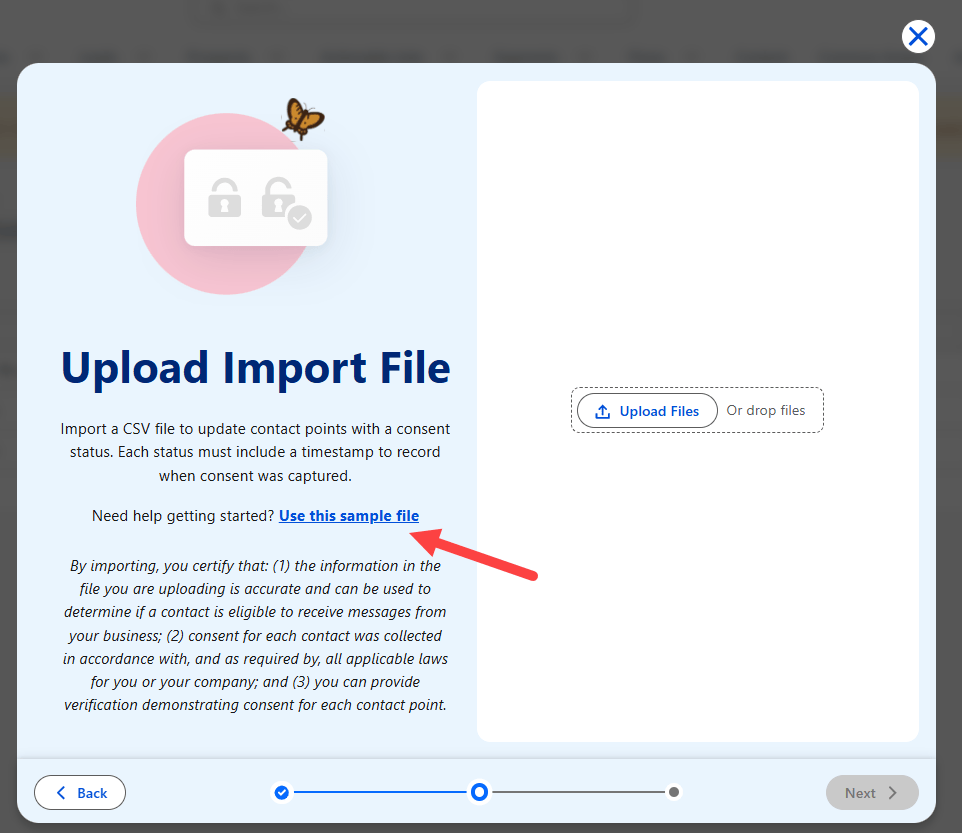
Select sample file to get a good format guide.

Enter in only two fields, email and Consent date (make sure you enter the day before).
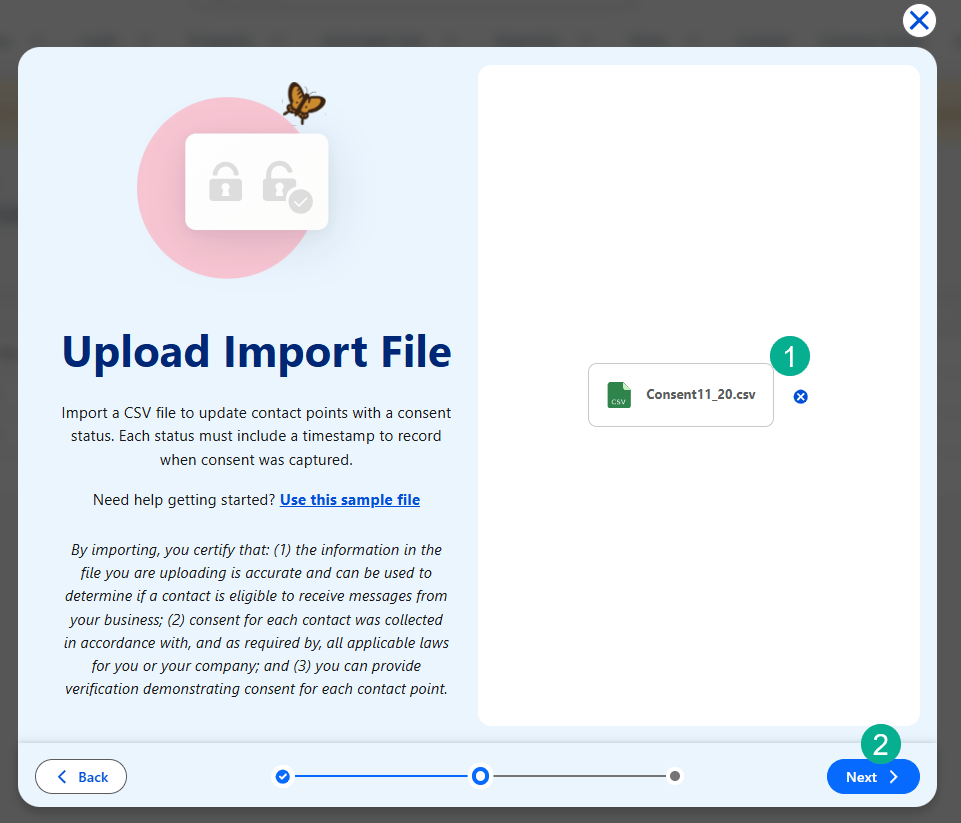
(1) Upload your CSV and confirm the file name appears.
(2) Click Next.
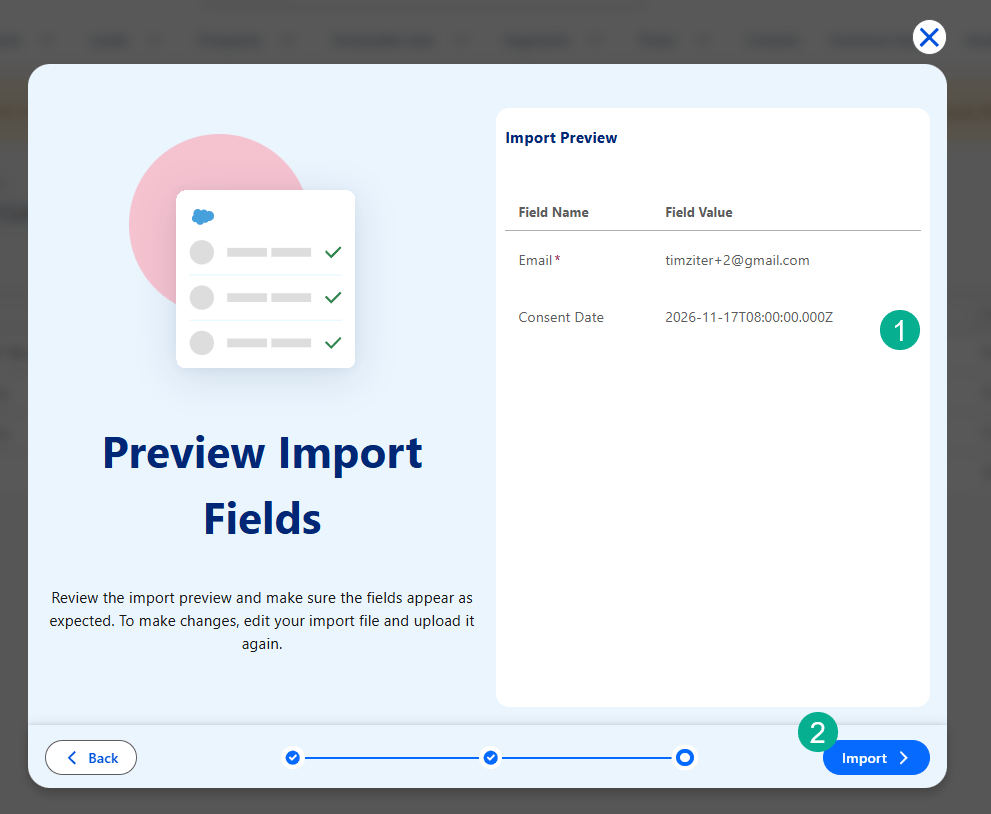
(1) Check that the preview values for Email and Consent Date look right.
(2) Click Import.
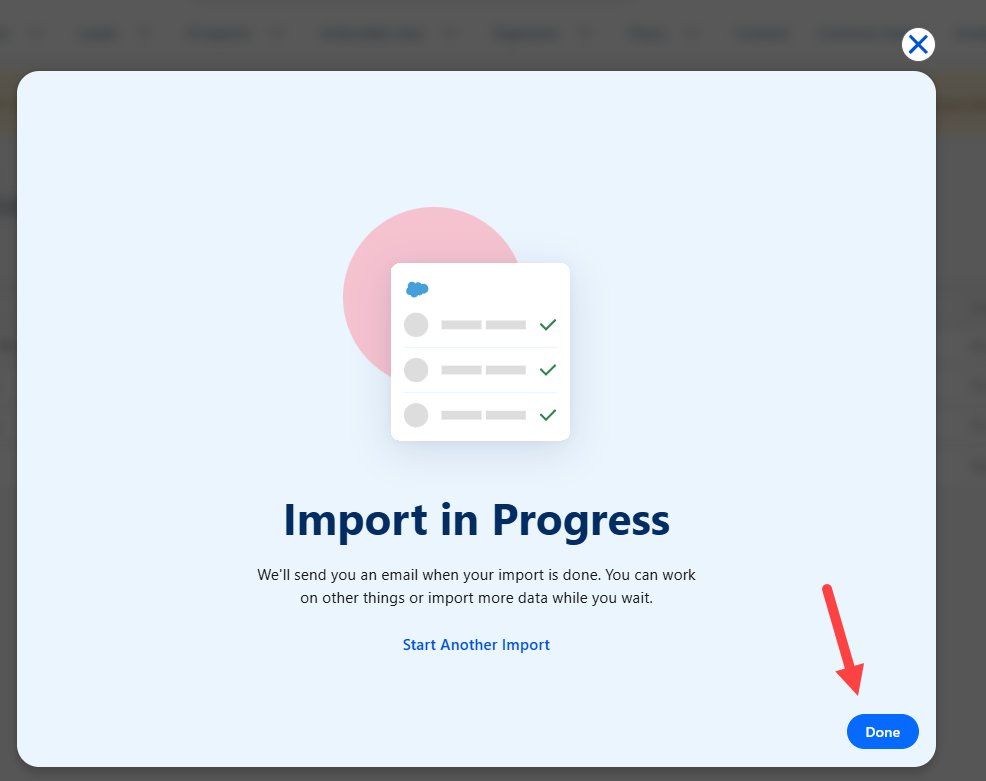
And select Done. You can keep working while the import finishes.
Now let’s check that those consent records have been created.
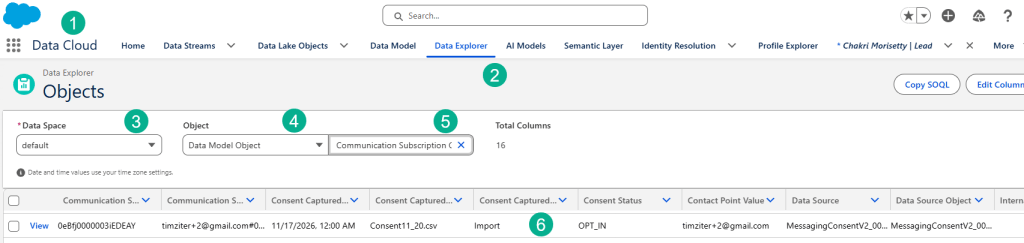
(1) In the Nine Dots search for Data Cloud.
(2) Select the Data Explorer tab.
(3) Select your data space, most likely default.
(4) Select Data Model Object.
(5) Search for Communication Subscription Consent.
(6) You should see your newly added consent records. You may need to use the filters on the right to find the records if you have thousands of records here.
Summary
That’s it! Your trade show leads are now in Marketing Cloud Next, grouped in an Actionable List, and opted in to the right subscription, so they’re ready for your first follow-up email.
The main thing to remember is that this is a two-part job. Get the records in, then give them consent. If you skip Part II, your send will go nowhere.
One time-saver: keep both sample files as templates so the next event upload only takes a few minutes.
If you’d rather watch than read, check out our video walkthrough of this process: https://www.youtube.com/watch?v=OhjWmzflHkQ
Have questions or different use cases for importing records into Marketing Cloud Next please let us know in the comments!


Leave a Reply