In this blog we’ll cover how to set up a Vonage RCS Journey Activity so that you can send RCS messages right out of Marketing Cloud.
Prerequisites to this session is to have a Brand set up on the Vonage backend which is ready to be connected to Marketing Cloud.
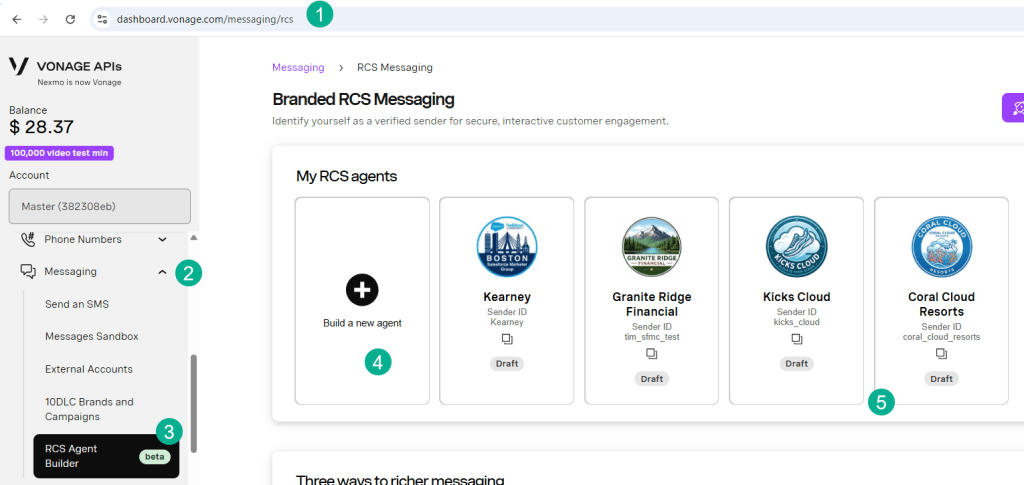
(1) Log into the Vonage backend portal: https://dashboard.vonage.com/
(2) Select the Messaging folder
(3) Select RCS Agent Builder
(4) Select Build a new agent
(5) In todays blog we’ll be covering connecting the Coral Cloud Resorts agent
We’ll update this blog with a walkthrough of how to create an RCS Agent once that blog is published.
Step I: Create an Installed Package
First we’ll need to create an Installed Package in Marketing Cloud for the specific brand that you are looking to send RCS messages.
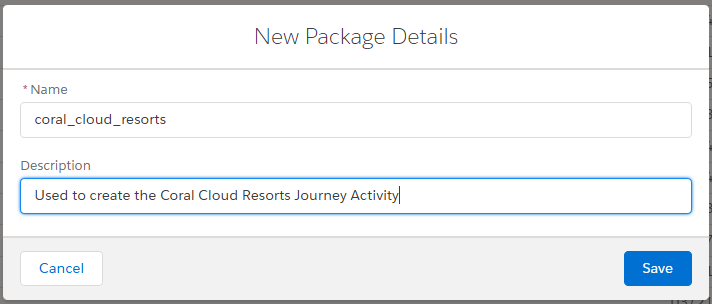
It’s best practice to name the installed package after your RCS Agent and add a description.
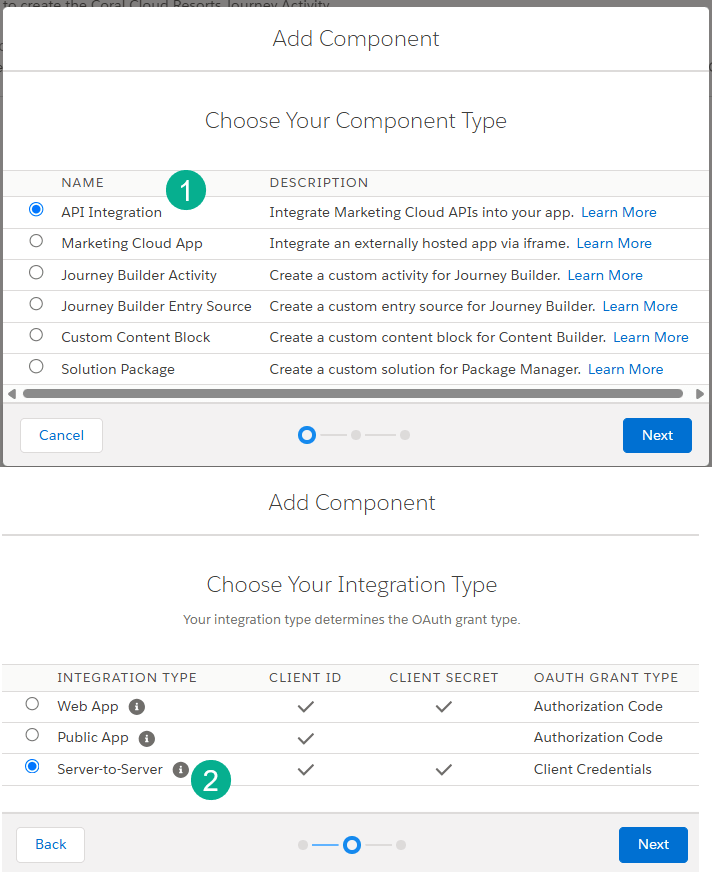
(1) Select an API Integration
(2) Select Server to Server as you’ll need a Client ID and Client Secret
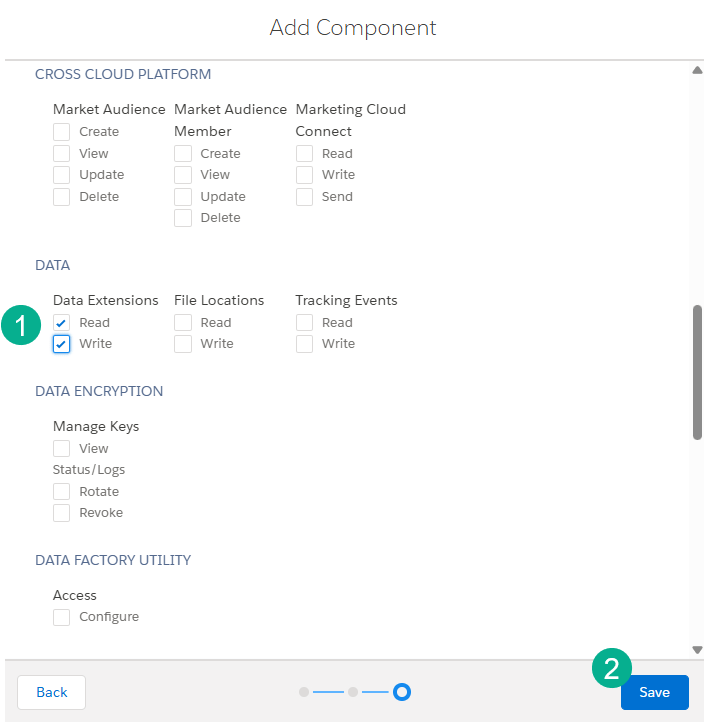
(1) The only level of access you need is the ability to Read and Write to Data Extensions
(2) Click Save
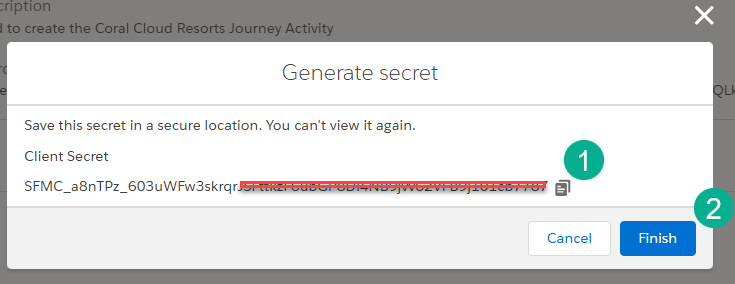
(1) Copy the Client Secret and store in a safe place
(2) Click the Finish button
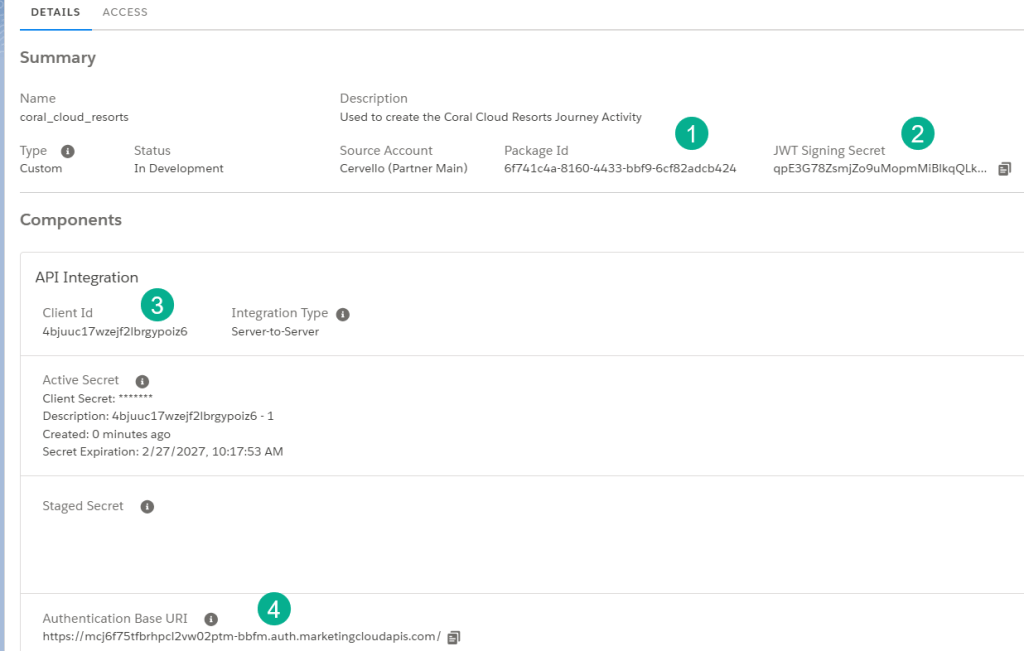
You also need to store four additional values to use in the Vonage integration:
(1) The Package ID
(2) The JWT Signing Secret
(3) The Client ID
(4) The Authentication Base URI – everything before the “.auth”
Step II: Build the New Instance
Navigate to: https://developer.vonage.com/en/cloud-runtime
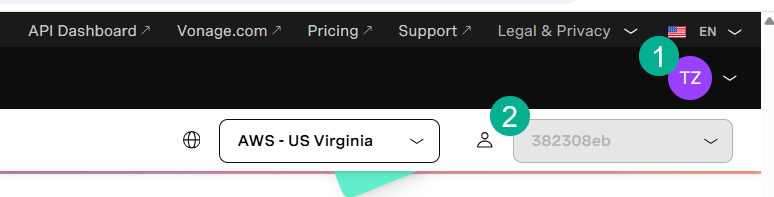
(1) You may need to log in
(2) Verify this is your master key – you’ll want to verify with the Vonage team
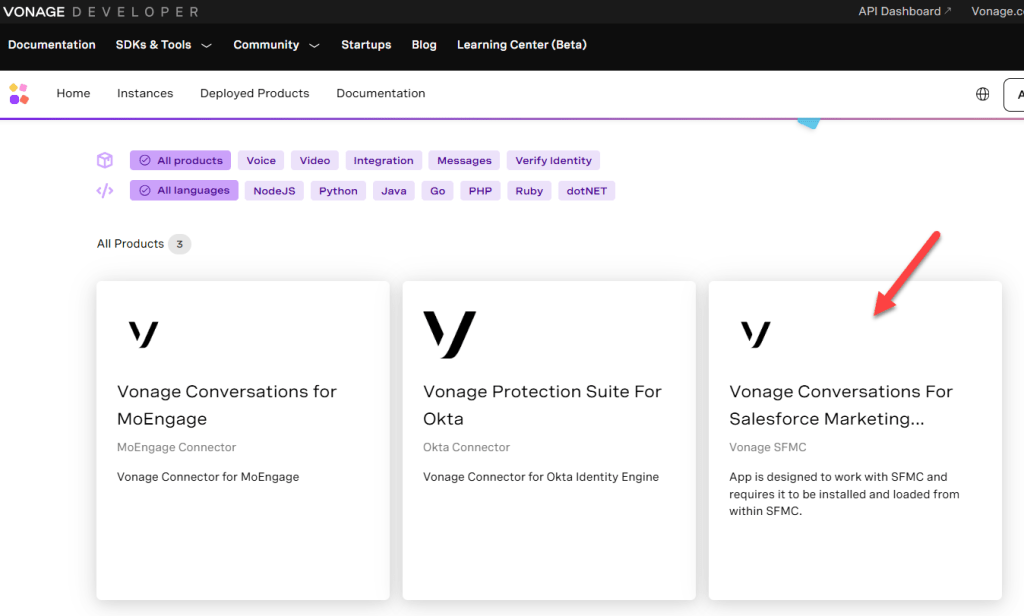
Scroll down and click on the Vonage Conversations For Salesforce Marketing Cloud
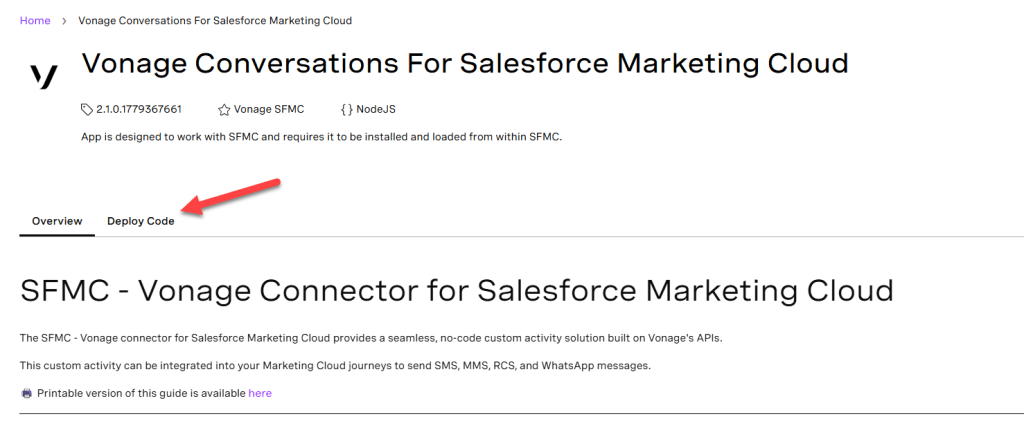
Click on the Deploy Code tab
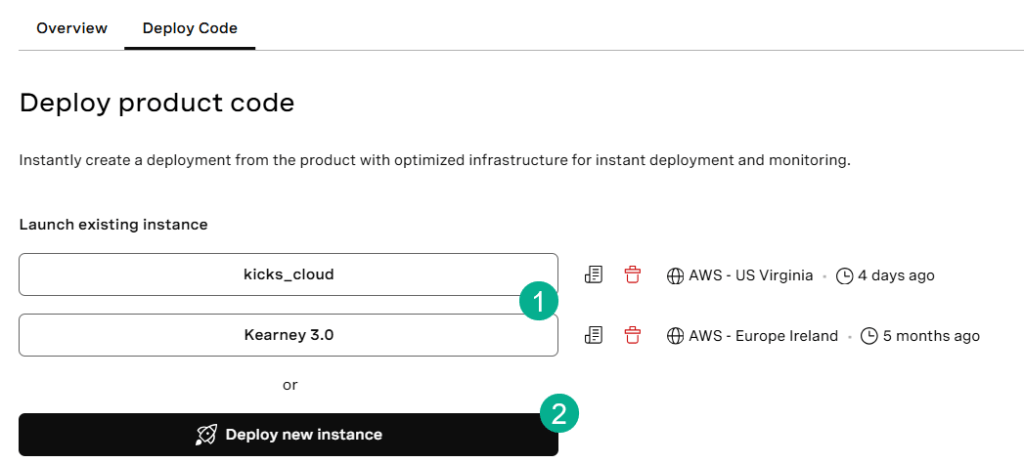
(1) You will see any existing Instances that were added before along with brief details
(2) Select Deploy new instance
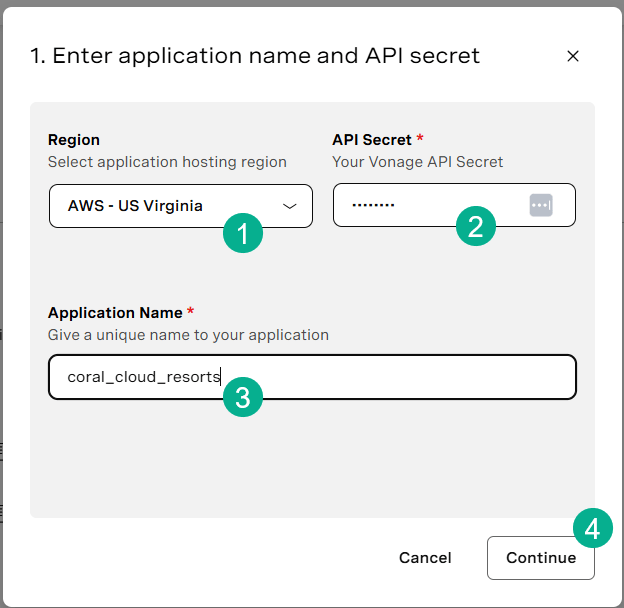
(1) Enter the Region – the Vonage team will help you select the right region, most likely US
(2) Enter the Vonage API Secret – you will set this up with the Vonage team
(3) Enter the application name – use the same name that you set up with the Vonage Brand
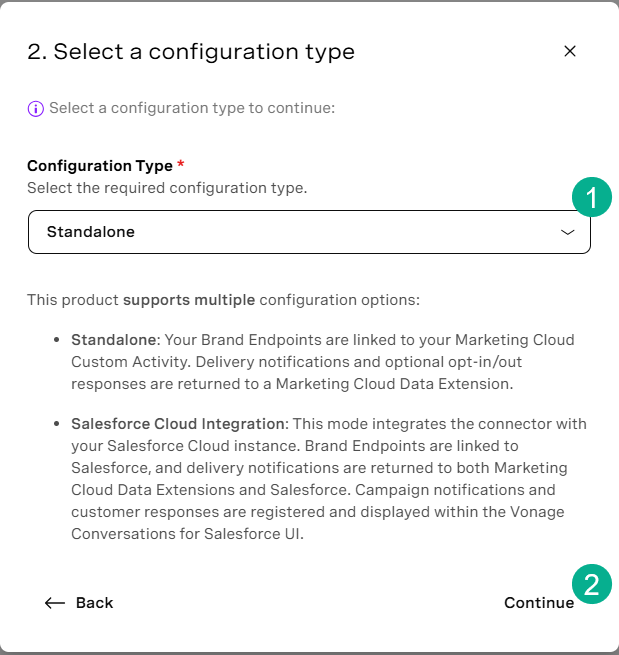
(1) Select Standalone from the drop down – validate with the Vonage team
(2) Select Continue
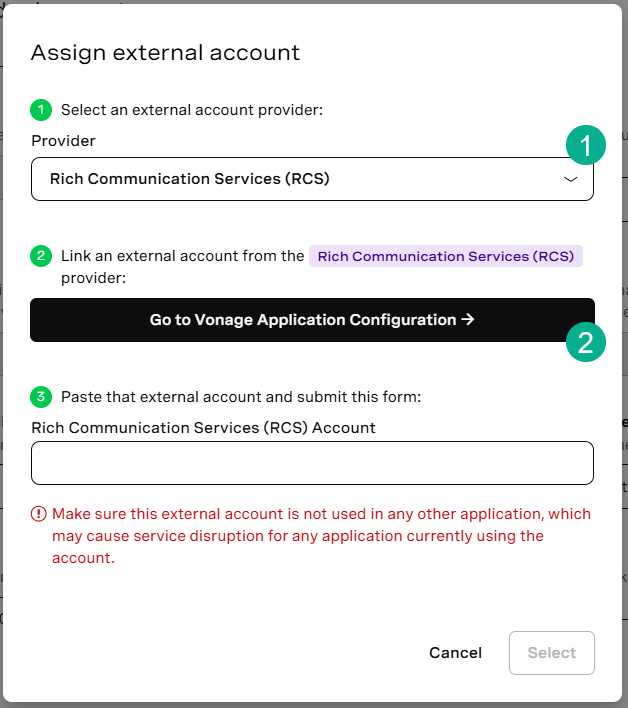
(1) Select Rich Communication Services (RCS) in the drop down
(2) Select Go to Vonage Application Configuration
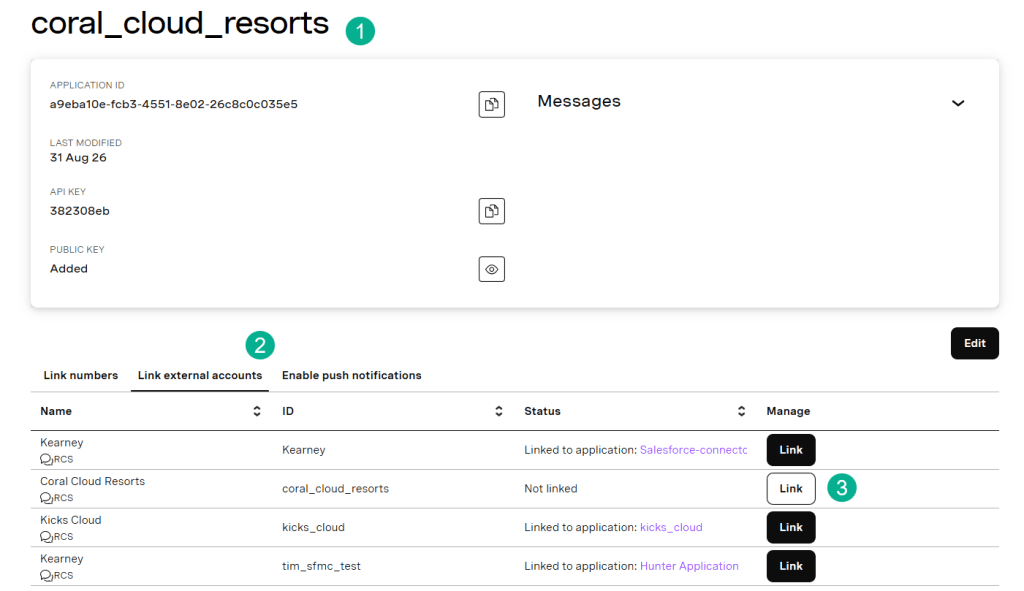
(1) You should see the brand you are looking to add
(2) Select the Link external accounts tab
(3) Click on Link
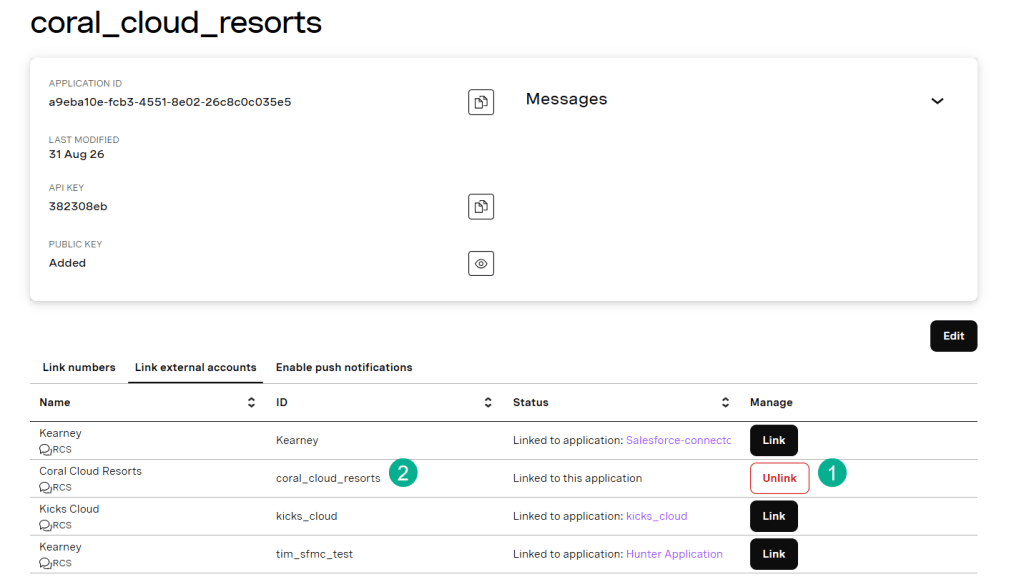
(1) You should see the Link change to Unlink
(2) Copy the ID name for your brand
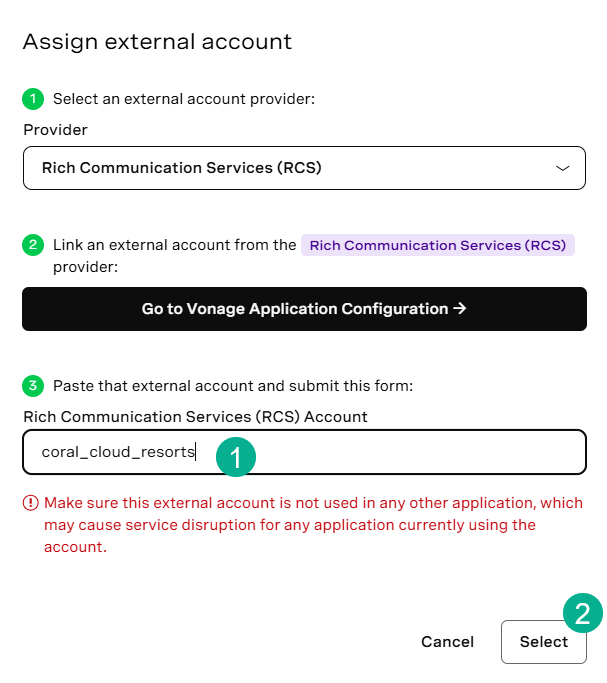
(1) Enter in the ID into the RCS Account space
(2) Click Select
With everything filled out your deployment should look like this:
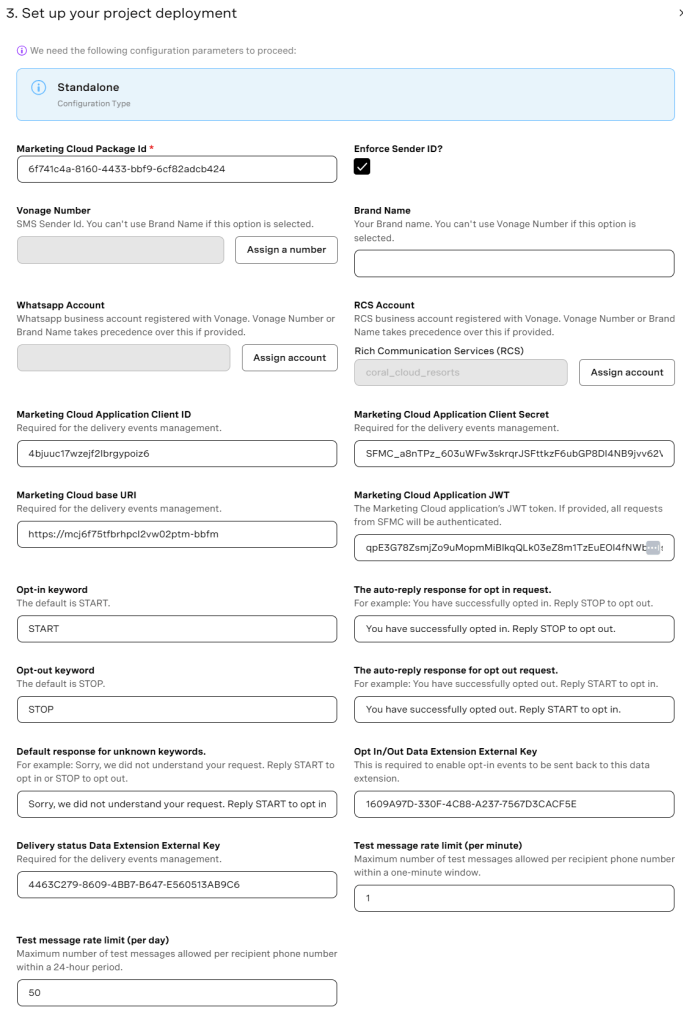
When verified click “Submit”
Addendum: In previous setup, which we’ll cover in another blog, you’ll need to set up two data extensions. You’ll need to add their keys in the Instance form as well.
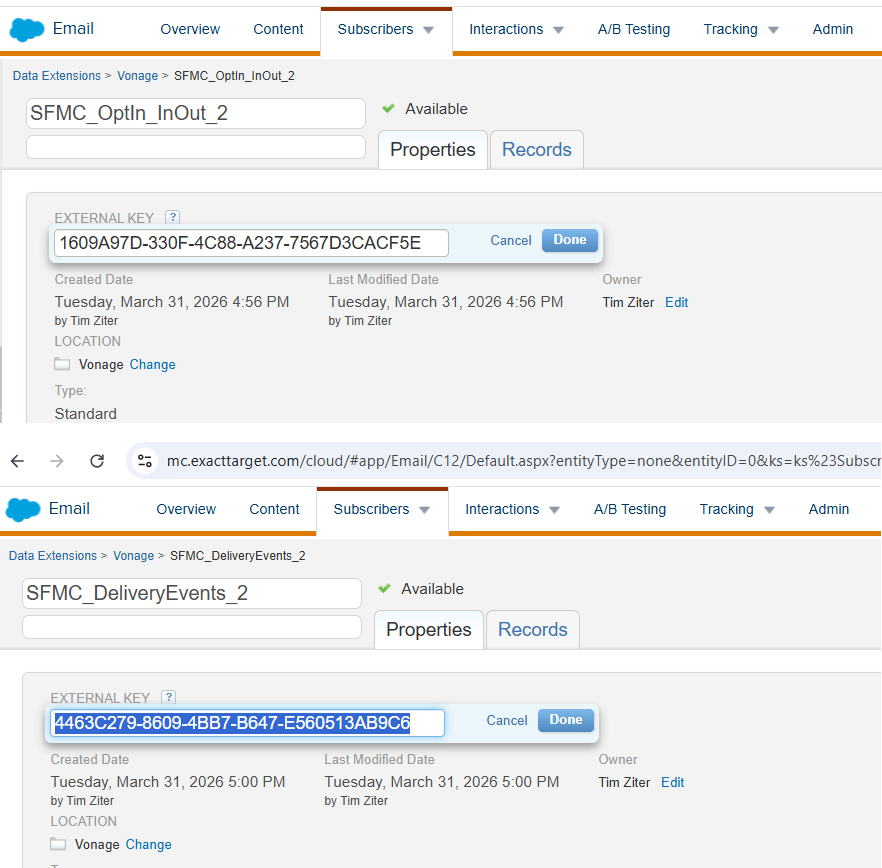
Step III: Create the Journey Builder component
Before you configure the Journey Builder component, first we need to obtain the Vonage Endpoint URL
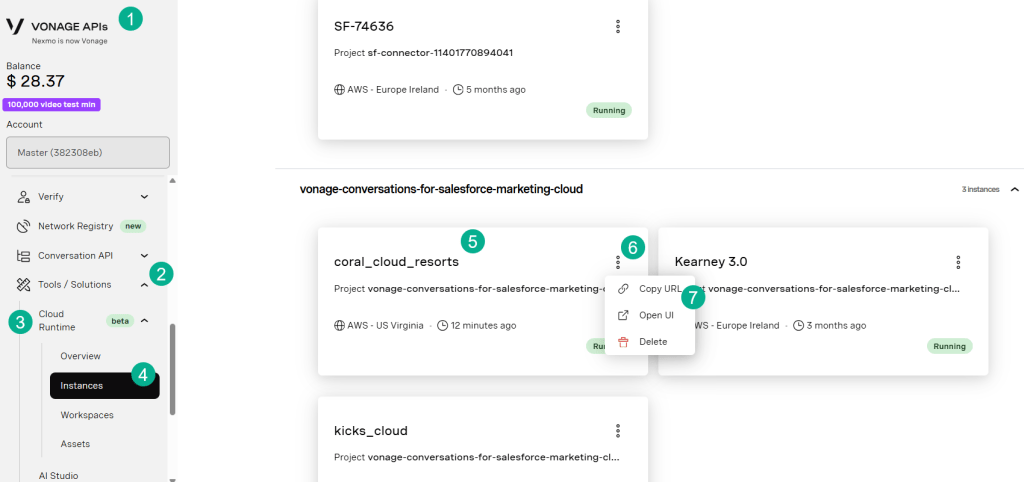
(1) Back in your Vonage dashboard
(2) Select Tools/Solutions
(3) Select Cloud Runtime
(4) Select Instances
(5) Select the new brand you just created
(6) Copy the URL and save the URL
Now let’s create the Journey builder component to allow you to add the Journey Activity to you canvas.
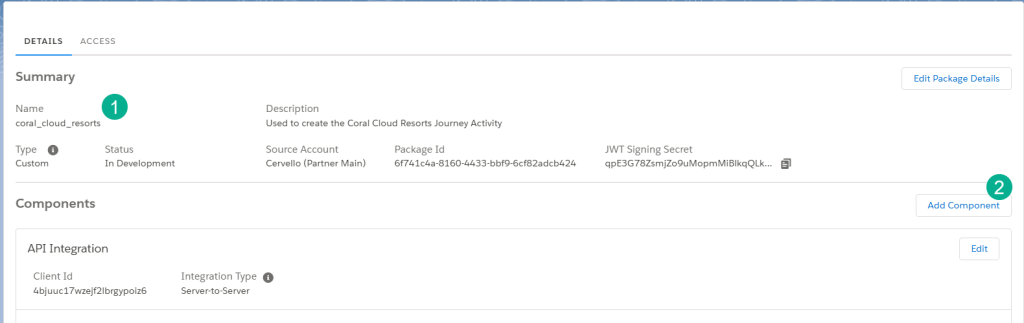
(1) Navigate back to you installed package
(2) Select Add Component
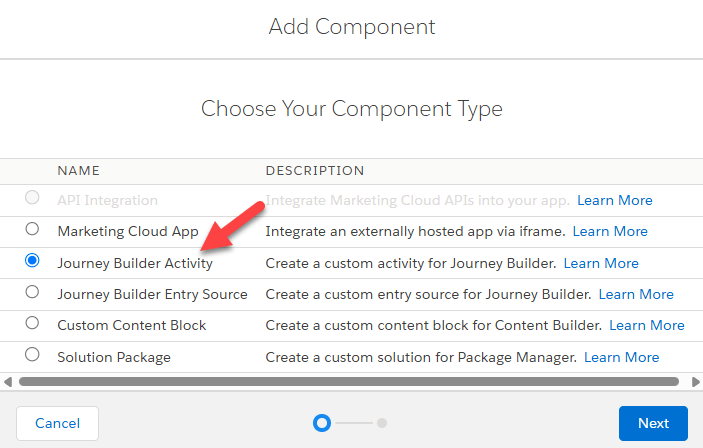
Select Journey Builder Activity
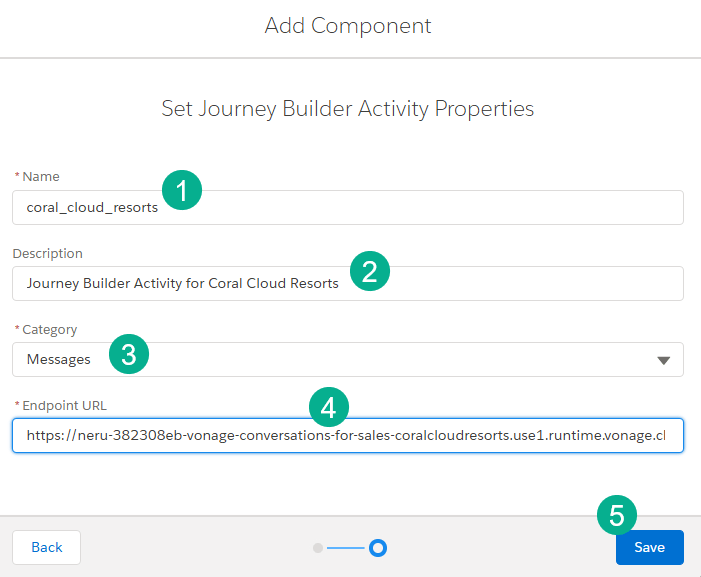
(1) Use the Brand ID name
(2) Add a description
(3) Select Messages category
(4) Copy in the Endpoint URL from above
(5) Select Save

The Journey Builder Activity will appear on the Installed Package.
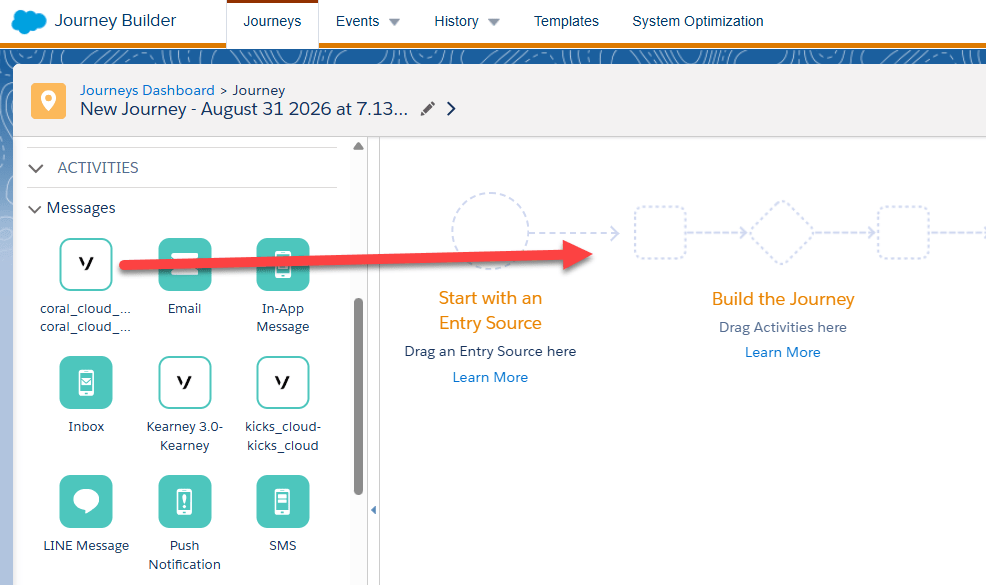
And now you should see the new Journey Builder Activity added to your Journey Builder canvas.
Excellent work! Please check our other blogs on RCS configuration to help you get off and running sending RCS messages in Marketing Cloud.

