Sometimes when you send an email, your actual audience extends beyond just the targeted recipients. You may be sending emails to financial fund participants, but need to loop in the financial advisors you partner with. Or maybe your sales team wants preview emails to understand what their top accounts will be receiving, before they receive it.
In this post we’ll walk through how you can create a single dynamic “preview” email that you can send to both these stakeholders and your target audience. No need for multiple email builds, or firing off static attachments of test sends before you push deploy.
We’ll be using a financial services use case in this post, where we need to send a preview to our partner financial advisors before sending an email to our target fund participant audience.
Prework: Determine how you will identify recipient types and their relationship key in your data
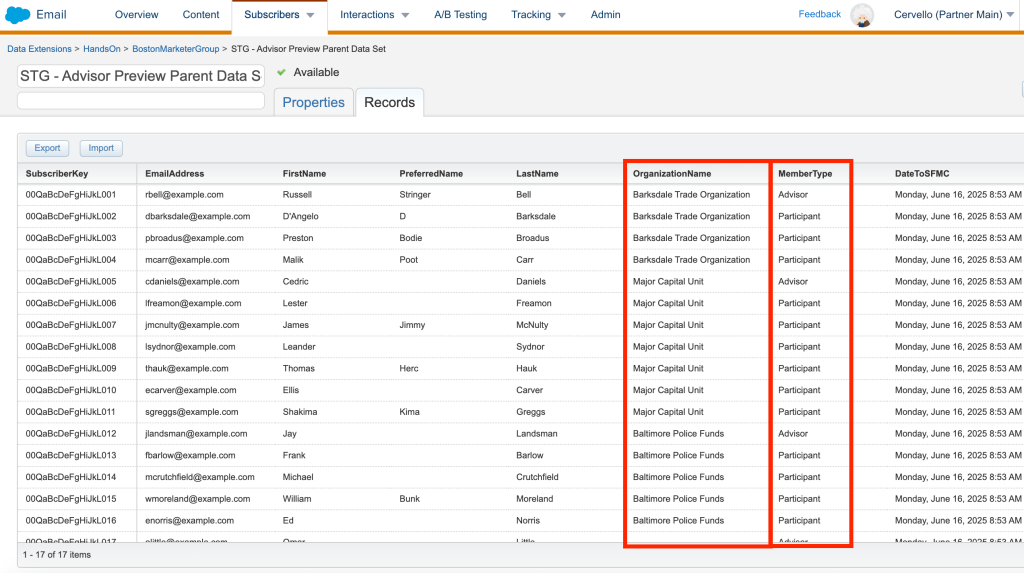
(1) In our use case we have a MemberType field to identify contact types in a mixed data set.
(2) We’re using the shared Organization Name to establish a relationship between our advisors and our participants. Your data may use the assigned advisor’s name, a UserID, email address, or other identifier.
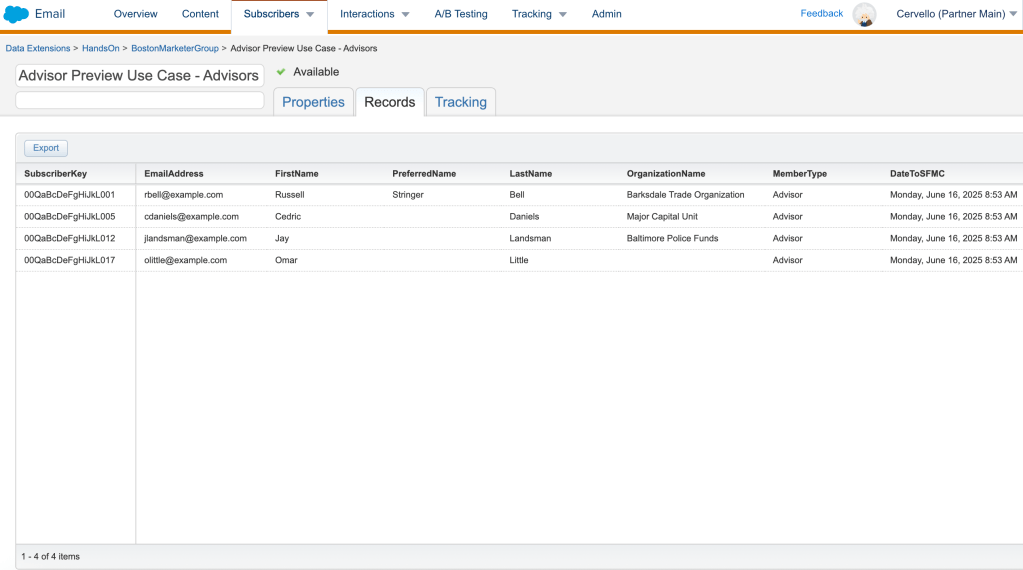
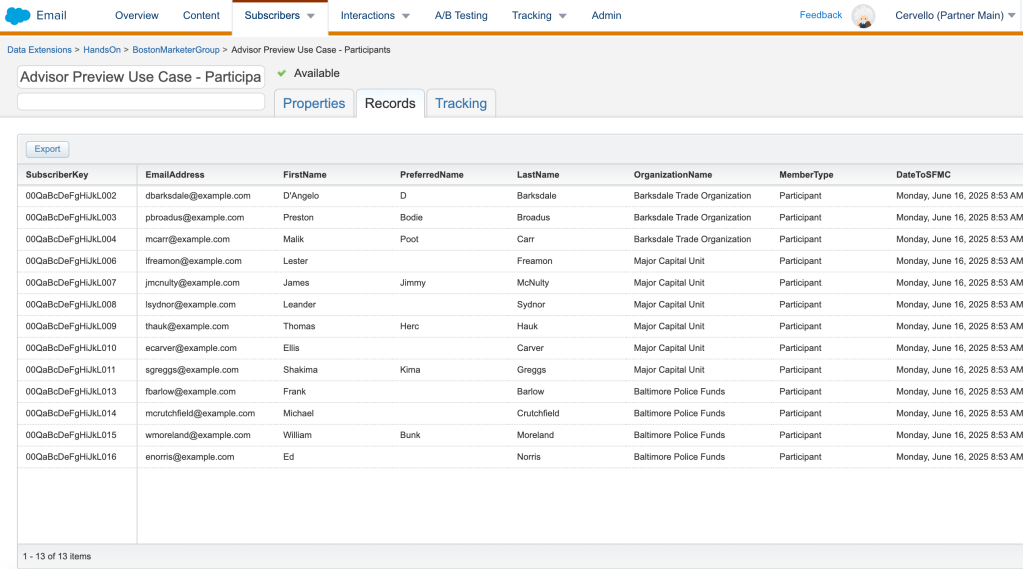
(3) We will filter this data extension into two sendable data extensions, one for our advisor preview send, and one for our regular participant send:
Add an AMPscript block to your email to support personalization needs
%%[
var @advsubject, @memberType, @lookupOrgName, @rows, @rowCount

set @memberType = AttributeValue("MemberType")
set @lookupOrgName = AttributeValue("OrganizationName")

if @MemberType == "Advisor" then
    set @rows = LookupRows("Advisor Preview Use Case - Participants", "OrganizationName", @lookupOrgName)
    set @rowCount = rowcount(@rows)
    set @advsubject = "ADVISOR PREVIEW: "
endif]%%
(1) @advsubject will be used to display a dynamic prefix to our subject line for our advisor preview audience.
(2) @memberType (or your chosen identifier) will be used to display or suppress our dynamic content appropriately based on recipient type.
(3) @lookupOrgName is our lookup variable, allowing us to pull in related participants to display in our advisor send
(4) We’ll use an if statement to determine if our targeted recipient is an Advisor or a Participant. If the recipient is an Advisor type, we’ll identify related Participant rows using the LookupRows function, with OrganizationName serving as our identifying key.
(5) We’ll set a rowCount variable with the number of returned related rows to help us build a dynamic display table later on.
Add your Advisor Preview Subject Line Prefix to the subject line of your email
We’ll add the subject line prefix we set in our AMPscript block to the subject line of our email to ensure our preview recipients can easily identify the send as a preview in their inbox.

Create a dynamic intro block to set the context for your Preview sends
%%[if @MemberType == "Advisor" then]%%
Hello %%FirstName%%, <br>
<br>
Please find below an email notification that will be sent to your accounts in the near future. <br>
<br>
A list of accounts that will be receiving this email can be found at the bottom of this message for reference.<br>
<br>
<hr>
%%[endif]%%(1) Add an HTML block at above your designed email content
(2) Use an if statement to dynamically display the block only if the designated recipient is an advisor
(3) Add line breaks and a horizontal rule to separate this block from your designed email content visually
(4) Close your if statement
Create a dynamic Preview Table block to display related participant information
It’s very likely that your email won’t be deployed to every record that your preview recipient cares about. Wouldn’t it be nice to display a dynamic table that tells them exactly which records you’ll be sending to? Let’s use the below HTML as an example of what your dynamic table could contain.
%%[if @MemberType == "Advisor" then]%%
<hr>
<br>
Your Affected Accounts:<br><br>
%%[if @rowCount > 0 then ]%%
<table style="text-align:center; border: 1px solid black;" width="600">
  <tr>
    <td style="border: 1px solid black;">
      #
    </td>
    <td style="border: 1px solid black;">
      FirstName
    </td>
    <td style="border: 1px solid black;">
      LastName
    </td>
    <td style="border: 1px solid black;">
      Organization
    </td>
  </tr>
  %%[ for @i = 1 to @rowCount do
    set @row = row(@rows, @i) /* get row based on counter */
    set @FirstName = field(@row,"FirstName")
    set @LastName = field(@row,"LastName")
    set @DisplayOrgName = field(@row,"OrganizationName")
]%%
  <tr>
    <td style="border: 1px solid black;">%%=v(@i)=%%</td>
    <td style="border: 1px solid black;">%%=v(@FirstName)=%%</td>
    <td style="border: 1px solid black;">%%=v(@LastName)=%%</td>
    <td style="border: 1px solid black;">%%=v(@DisplayOrgName)=%%</td>
    %%[ next @i ]%%
  </tr>
</table>
%%[ else ]%%
No associated accounts were located. Please contact your assigned marketing manager for details.
%%[ endif ]%%
%%[ endif ]%%
(1) We’ll reuse our @memberType if statement to display the table dynamically only for Advisor recipients.
(2) Add in line breaks and a horizontal rule to separate the table and its title from your designed email content.
(3) Add an if statement to start building the table only if the number of returned related Participant rows is greater than 0.
(4) Add in your table headers. In our case, we’re displaying the row number, FirstName, LastName, and Organization Name. We adjust our OrganizationName variable name slightly here to avoid any potential interference with the preview recipient’s OrganizationName variable set in our initial AMPscript block.
(5) We’ll use an AMPscript for loop to build additional dynamic rows for each returned row as determined by our rowCount function.
(6) In each iteration of the loop, we’ll set our desired display values before advancing to the next row
(7) We’ll use an else statement to display an error message in the event no matching rows were returned for a targeted advisor recipient.
(8) Close your if statements
Test, test, test!
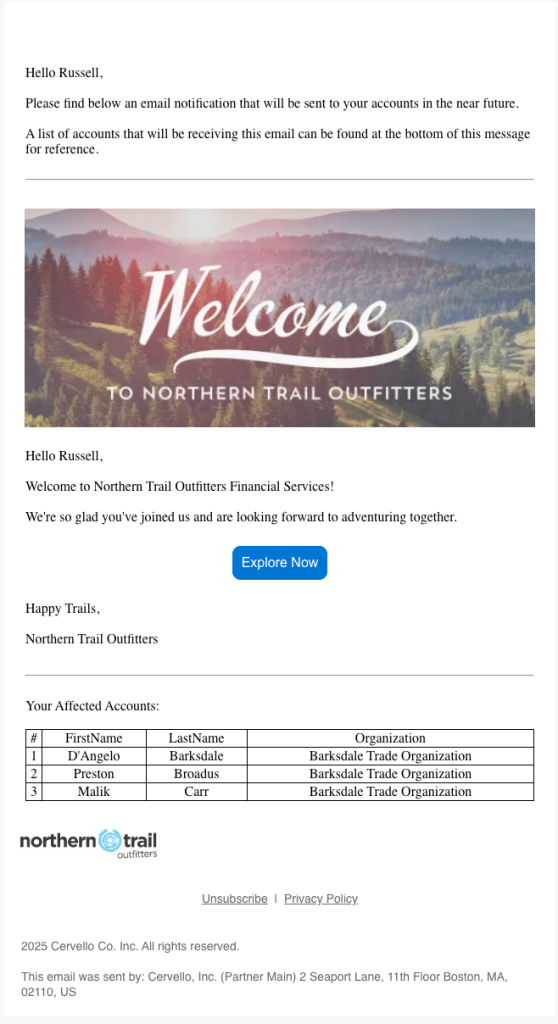
At this point, your email should have an AMPscript block at the very top, a dynamic Advisor Preview Intro, your designed email content, and the dynamic Advisor Preview Table. It should look something like this:
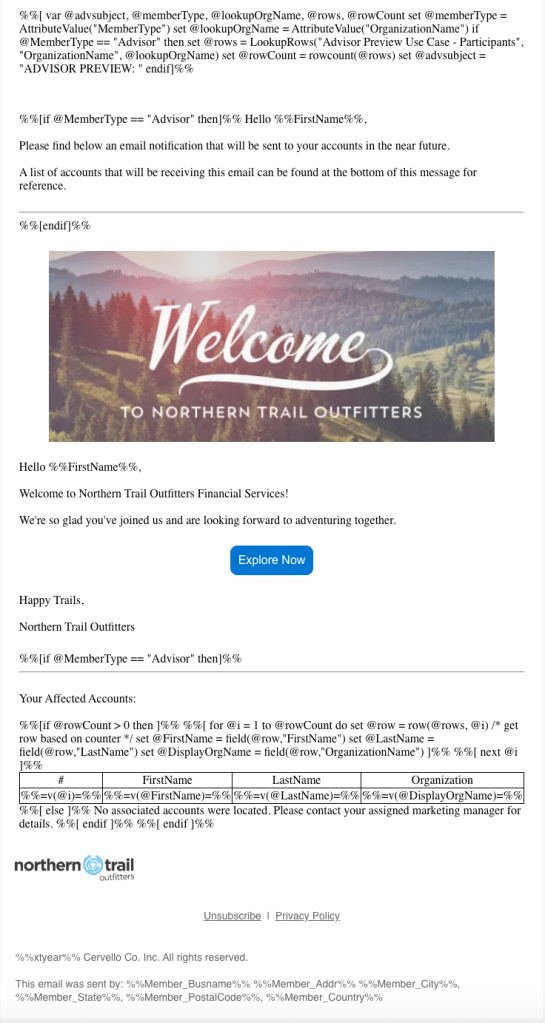
(1) Preview the email against your Advisor sendable data extension, ensuring that the subject line prefix, intro block and preview table are all displaying, and that your preview table has the appropriate related rows displayed.
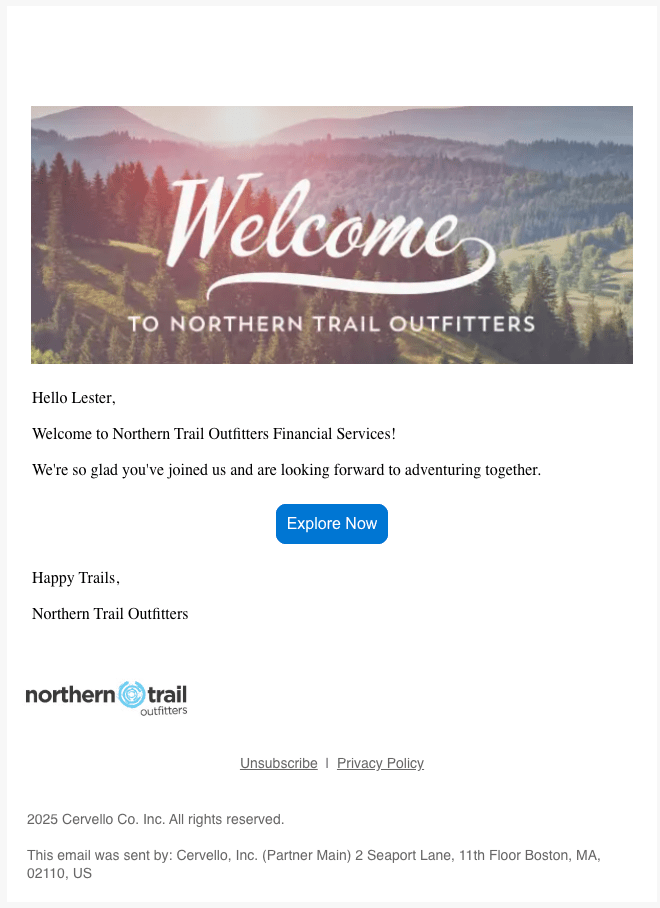
(2) Preview the email against your Participant sendable data extension, validating that the dynamic advisor content is now hidden
(3) Enjoy sending native previews to your invested stakeholders directly from Marketing Cloud Engagement!
Closing Thoughts
I’ve found that 48 hours is a great window to deploy to your preview audience before your production send. It’s just enough to allow for audience changes to occur if needed, but not so far away that your stakeholders forget about it pre-deployment.
One challenge with these previews is identifying dynamic content in your designed production email within the the preview context. You may need to account for how personalization string fields or AMPscript variables for the Participant send are reflected in your Advisor sendable data extension, or inform your stakeholders that merge fields will be populated with a random associated Participant recipient’s data. Ultimately your specific data architecture and design choices will drive outcomes here.
There are lots of ways to adapt or adjust this framework depending on your specific data architecture. Saving your AMPscript, Intro and Preview Table blocks for reuse can be a great way to bring them in to all of your standard email sends quickly. You can experiment with adding an additional variable to store your targeted lookup data extension name to isolate what needs to be changed between deployments depending on how comfortable your email builders are with modifying code.
How are you managing your email previews? Let us know how this works for you or leave suggestions for improvement in the comments below!

Leave a reply to Luiz Victor Cancel reply