In this session the team continues highlighting essential areas of the Ampscript Bootcamp series hosted with the Phoenix Salesforce Marketing Group. In this session Sandesh utilizes the InsertData function adding data to a data extension via a cloud pages form. This is part of his Data Extension Ampscript Bootcamp featured below.
For more information on the Phoenix Salesforce Marketer Group please follow this link to sign up: https://trailblazercommunitygroups.com/salesforce-marketer-group-marketing-cloud-phoenix-united-states/
PART I: Overview of InsertData code
The InsertData function is very straightforward there are only two three data points needed to execute.

(1) The name of the data extension you want to update
(2) The field in the data extension to update
(3) The value that will be placed in the field
Let’s take a closer look at how Sandesh codes to handle these three data points
PART II: Set Data Extension as a variable

Instead of entering in the name of the data extension in the function, set a variable in the Configurations section. This has two main benefits:
(1) If you set all of your configurations in one place, most likely the top, if you need to validate the source data points they will all be in the same place. No need to scan through the code to find each data points
(2) Set the data extension once as a variable and then you can use the variable multiple times throughout the code.
PART III: The RequestParameter Function
Requestparameter can be used to convert a form field value to a variable. Taking a closer look at the details for the function in the Ampscript Guide: https://ampscript.guide/requestparameter/
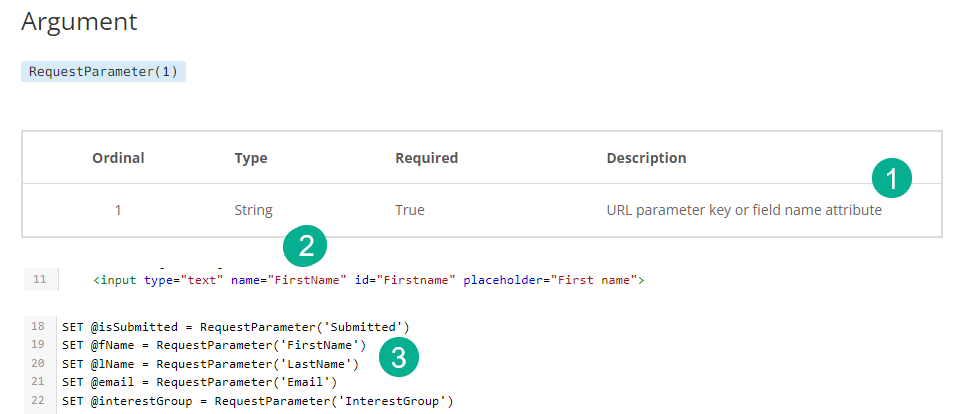
(1) The description on Ampscript Guide, look for field name
(2) The HTML code on the cloud page “name=’firstName’ in an input tag, for more information on input tags: https://www.w3schools.com/tags/tag_input.asp
(3) In your ampscript block how to set a variable using the Requestparameter function.
PART IV: InsertData setup
Following the documentation let’s fill in the InsertData function

1.) Fill in the required fields looking to populate five different variables that are present in our data extension
2.) To populate the current date we’re leveraging the Now function where an empty value “Now()” returns the time that the data was processed: https://ampscript.guide/now/
3.) Last, to help we’re going to set our Debug variable to the @isInserted variable which if the InsertData is successful should return a value of “1”. For more on the Debug syntax please click here: https://handsonsfmc.com/ampscript-bootcamp-part-ii-debug/
PART V: Testing
Save and publish the changes/additions made above and let’s test by filling out the form to see if the data extension populates as expected.
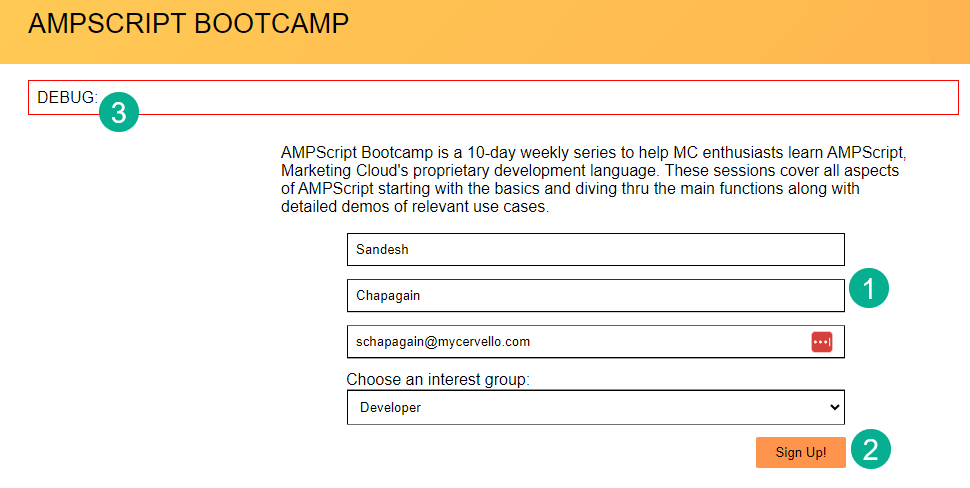
(1) Enter in values for the four fields
(2) Click “Sign Up!”
(3) And notice that the Debug variable is empty currently.
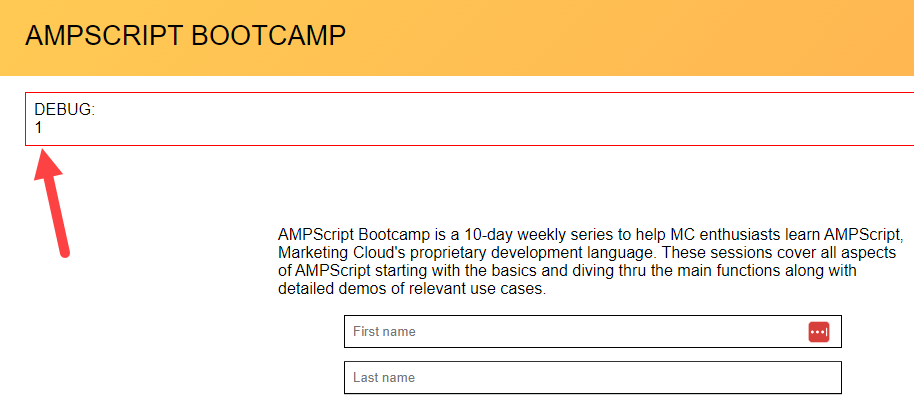
When entering the Debug variable should show a “1” if the InsertData populated correctly.
Let’s take a look at the data extension to see what populated.
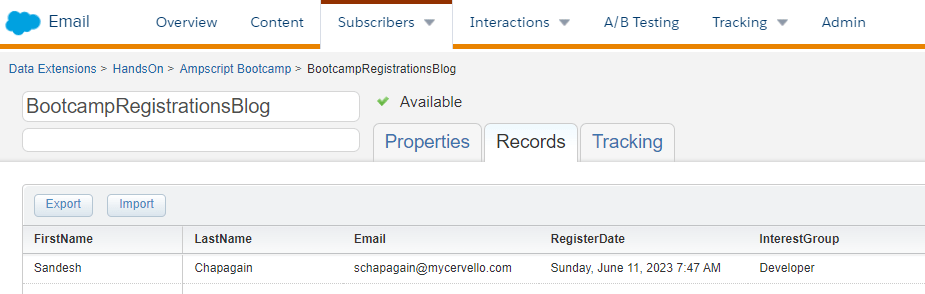
Success, we’ve populated the data extension with the data filled out in the form fields.
PART VI: Enhancements
To enhance the end user experience Sandesh adds a cool little IF statement to render a message upon a successful submission.

(1) Add an IF statement using the EMPTY function (for more information on the EMPTY function check out our Lookup Ampscript bootcamp content: https://handsonsfmc.com/part-3-lookup-function/)
(2) Set a variable to output a success message.
In your HTML code for the page display the @success) variable using another inline IF statement.
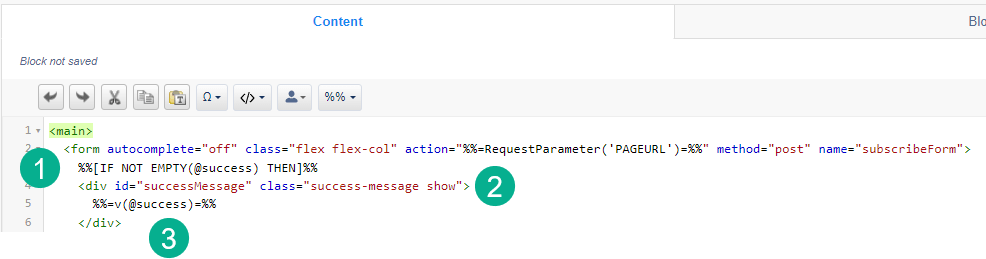
(1) Inline IF statement
(2) Formatting of the type in HTML
(3) Using the “V” function to output the @success variable
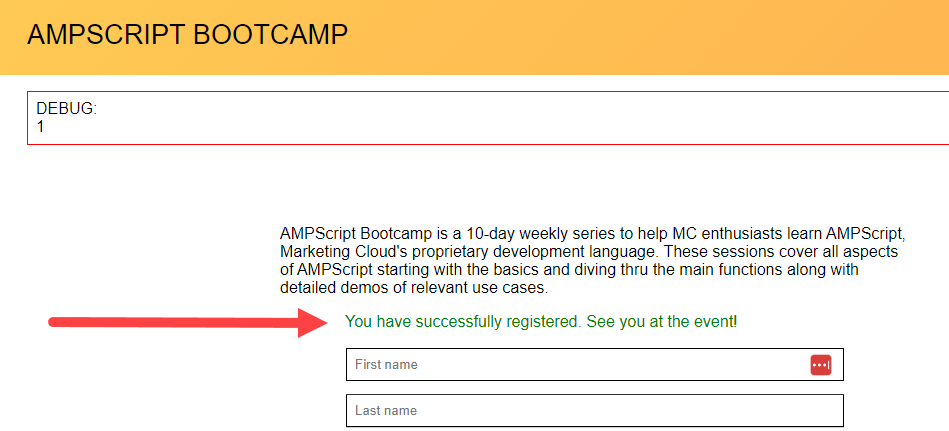
Now when you fill out and enter the form and it successfully adds to the data extension a message appears on the form:
For more information and a visual walkthrough please reference the YouTube video of Sandesh’s section above.
