
Tuesday, September 19th at 12-1pm EST we’ll be hosting a Hands On Build session building a Marketing Cloud Personalization sitemap from scratch. We are looking for a “new to Marketing Cloud” volunteer to do the building right in a Marketing Cloud sandbox environment.
To sign up to attend the event: https://trailblazercommunitygroups.com/events/details/salesforce-salesforce-marketer-group-marketing-cloud-phoenix-united-states-presents-mcp-series-15-mcp-usecases-demo/
If you are interested in being the volunteer builder in our sandbox environment please sign up here: https://handsonsfmc.com/contact/
Here’s a walkthrough of the build we’ll be conducting on Tuesday.
Pre-Build – Create a new Dataset
Sandesh walked through the Sitemap in his deep-dive session documented here: https://handsonsfmc.com/marketing-cloud-personalization-bootcamp-build-sitemap/
We’ll leverage this use case as a reference when we build out the Sitemap. The first step will be to create or clone the dataset to give us a blank sitemap to start our build. First up creating/clone in a data set so we can have a clean slate to build out the sitemap.
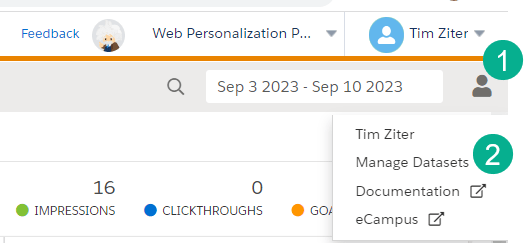
(1) In Marketing Cloud Personalization hover over the person icon in the upper right corner
(2) Select Manage Datasets

(1) Navigate to the dataset that you are looking to clone
(2) Select the clone icon
(3) and clone the dataset
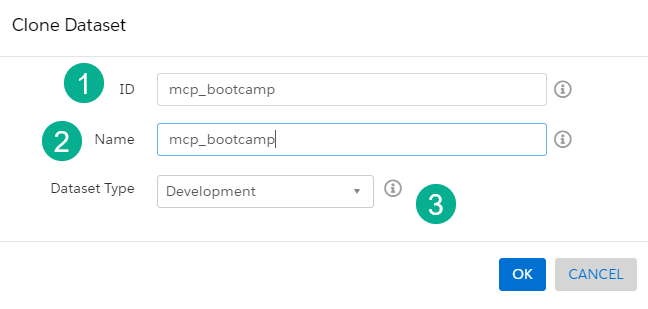
(1) Enter the id of the dataset and (2) the name that will appear in Marketing Cloud Personalization
(3) Select the type – for our purposes “Development” works
Pre-Build – SDK setup
With the dataset created we’ll need to copy the javascript integration into all pages on our POC website.
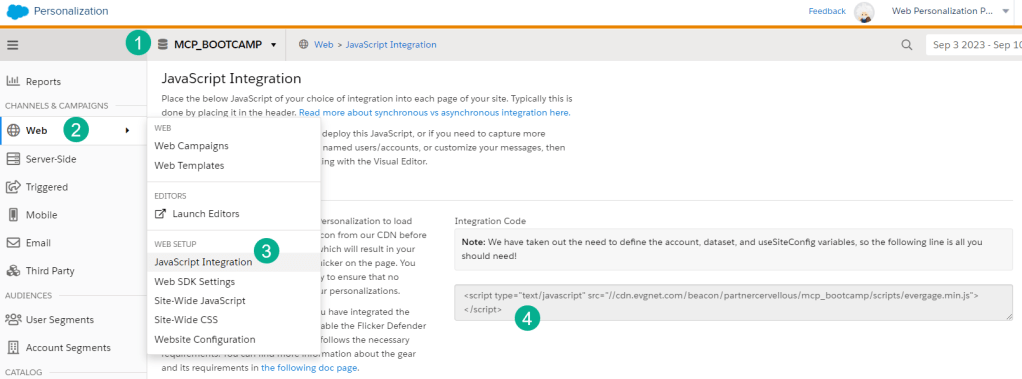
(1) Select the dataset just created
(2) Select the Web section of the left hand navigation
(3) Select the Javascript Integration
(4) and copy the javascript code
In our use case we are using cloud pages to mimic a website so we’ve made a duplicate copy of the home page.
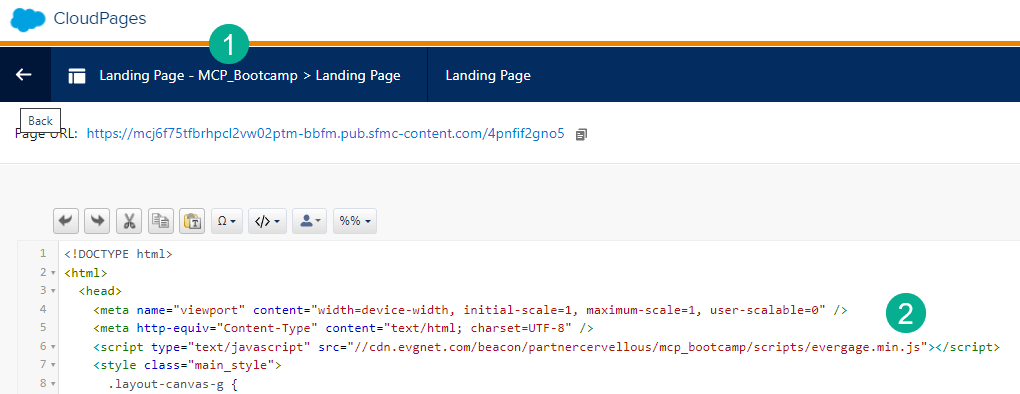
(1) The duplicated Cloud Page for our proof of concept
(2) The copied code pulled from the section above
Navigating to the cloud page site next we’ll log into Marketing Cloud Personalization using the SDK launcher extension for Chrome.
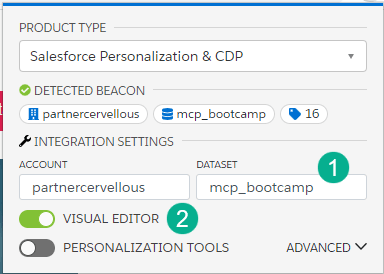
(1) Select the new dataset mcp_bootcamp
(2) Turn on the visual editor
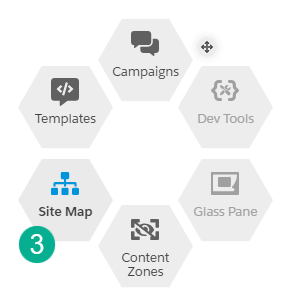
(3) Navigate to the Site Map in the MCP flywheel
Building the Sitemap –
Before we build the sitemap let’s orientate ourselves inside the Sitemap tool in the MCP flywheel:
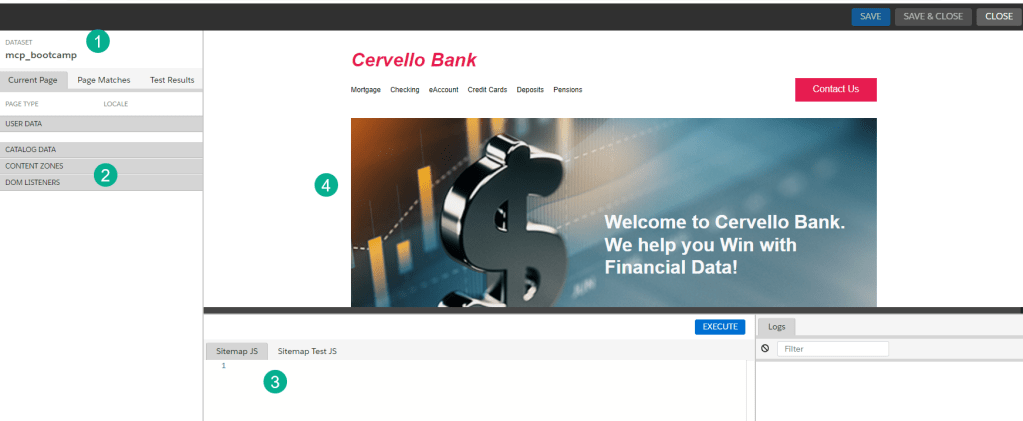
(1) Confirm the dataset
(2) We’ll be building listeners and content zones which will appear here
(3) Here’s our open palette where we’ll be building the sitemap
(4) Visual of the site/cloud page where the content zones will be set up
To create the sitemap we’ll be leveraging the excellent salesforce documentation, Getting started with site mapping: https://developer.salesforce.com/docs/marketing/personalization/guide/sitemapping-getting-started.html
Part I: Sitemap Javascript Code Structure
Copy the code from the documentation to set up the basic sitemap structure:
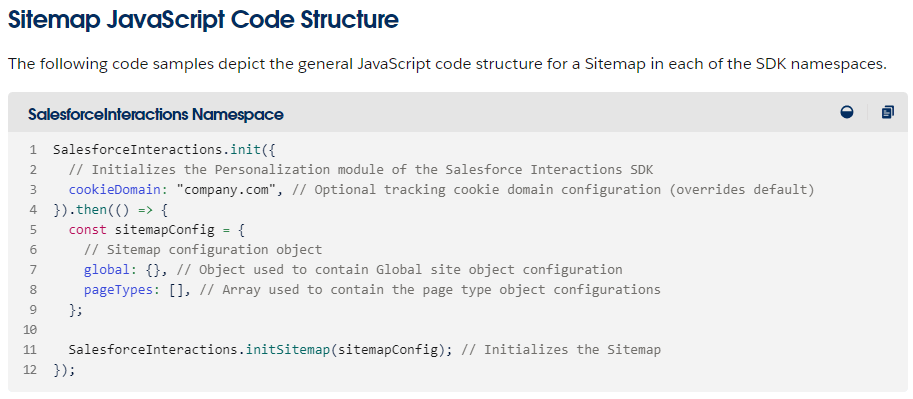
And drop it into your sitemap editing area, removing the commented code:
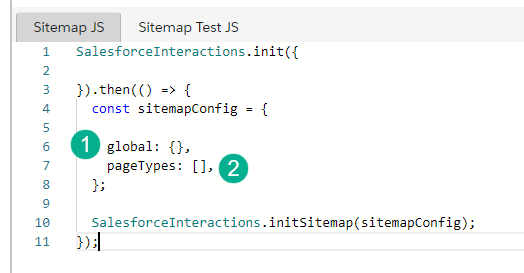
With the core of the site map in place we’ll be adding listeners and content zones in two areas:
(1) Global areas that impact all pages
(2) and pageTypes or individual pages
Developer Tip: Don’t forget to save your work and hit “Execute” to validate each step to help troubleshoot errors.
Part II: Global Listener and Content Zone
a.) Adding a listener: Further down in the documentation:
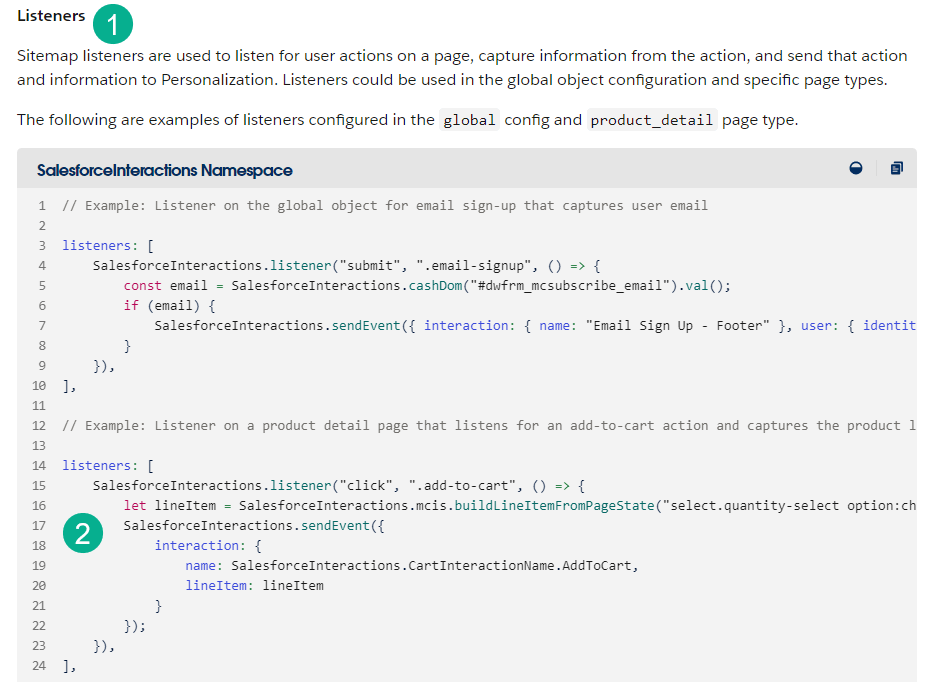
(1) Navigate to the Listeners section in the documentation
(2) For our use case copy the second example
And carefully paste the Listener code inside the handlebars in the Global section:
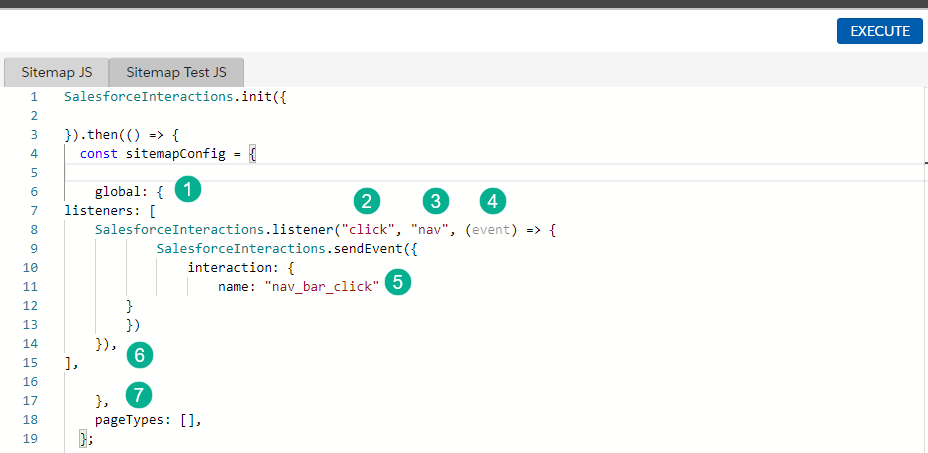
(1) and (7): open up space between the handlebars in the global center
(2) For our use case we’ll be tracking clicks on the nav of the site/cloud page looking for a “click”
(3) On the “nav”
(4) Which will be an event tracked by MCP
(5) Simplifying the interaction code we’re looking to name the interaction “nav_bar_click”
(6) be careful of ending the coding correctly to avoid Execute errors
b.) Adding a content zone: Scroll back one section in the documentation:
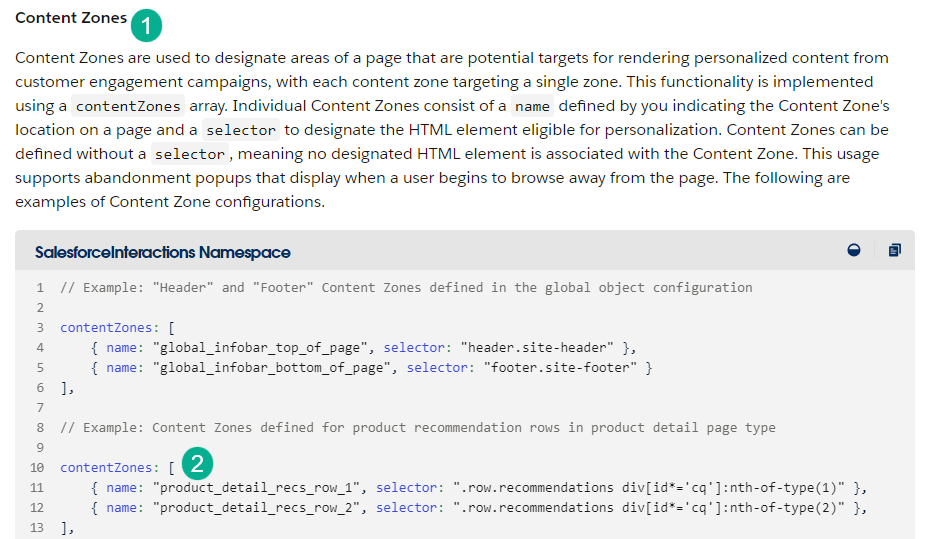
(1) Navigate to the Content Zones section in the documentation
(2) For our use case copy the second example as well
And carefully paste the Content Zone code following the Listeners section of the Global section right before the pageTypes:
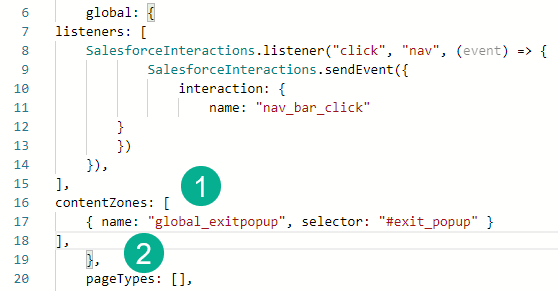
(1) The name: will identify the content zone
(2) Make sure you are mindful of the code where it is placed before the pageTypes section.
Part III: pageTypes isMatch and Content Zone
Before we add in the content zones for the home page we’ll need to add in the isMatch coding which is required to support the Personalization data collection.

(1) isMatch which needs to be added to the pageType
(2) as it is Required
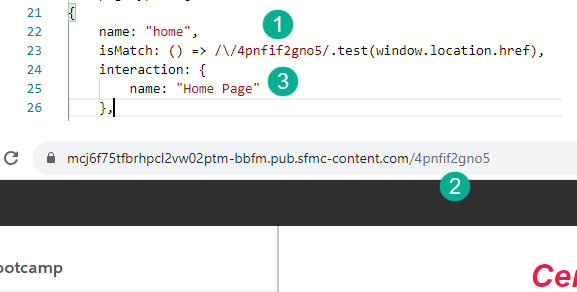
(1) Replace the url(2) from the website/cloud page in the isMatch code
(2) Add interaction code to identify the page in this case “Home Page”
Follow the same Content Zone steps used for the Global section of the sitemap:
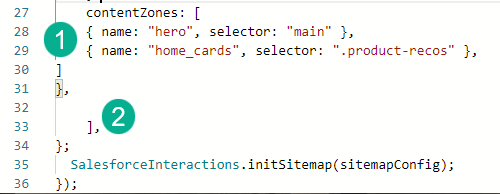
(1) Here we’re adding two different content zones, one for the Homepage hero and the second the product recommender called “home_cards”
(2) Be mindful on the coding opening and closing the content zone area
Once the pageTypes has been added click on the Execute button to validate the code. If everything checks out the Listener and content zones should appear in the left hand column.
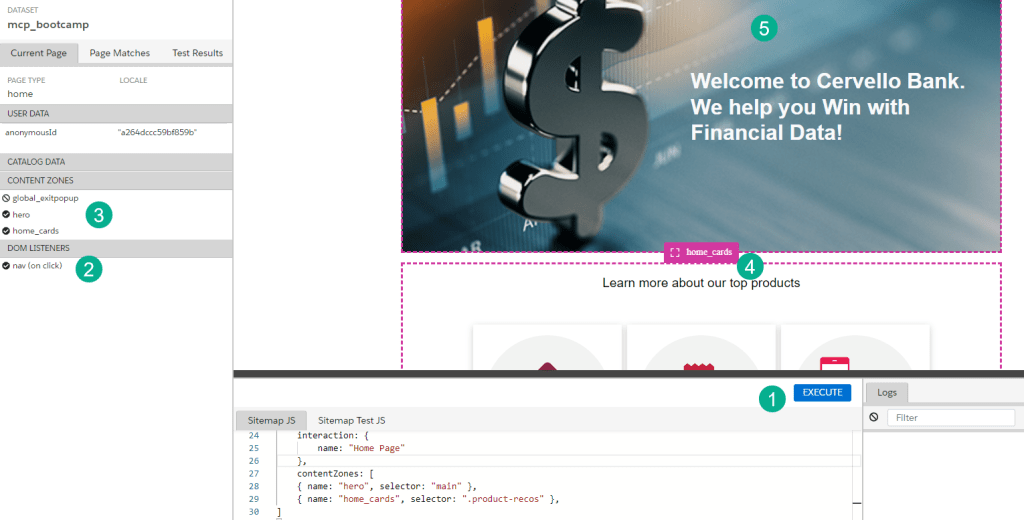
(1) Click on the Execute button
(2) on the left hand column the listener should appear
(3) as well as the Content Zones
(4) When set up correctly the content zones should be identified by colored dash marks and when hovering over each zone the name should appear
(5) The home page “hero” content zone
In our next session we’ll cover how the content zone integrates with Templates and Segments.
