Marketing Cloud sends can be helpful to view in Sales Cloud or Salesforce Core. Visualizing the send and engagement data of Marketing Cloud sends can be as easy as setting up a report based on the Individual Email Results object. Let’s go over the steps to view/create a report of Marketing Cloud sends in Salesforce Core:
1.) Get to know the Individual Email Results(IER) object and fields
2.) Check your Marketing Cloud sends can populate IER records
3.) Create a Individual Email Results with Contacts or Leads report
4.) Configure the report to populate the appropriate fields
5.) Test send emails in Marketing Cloud to verify the are populated in the report
Step I: Get to know the Individual Email Results(IER) object and fields
The Individual Email Results object will created when you set up the Marketing Cloud Connector between Sales Cloud and Marketing Cloud. For a walkthrough on how to set up the Marketing Cloud connecter please review our previous blog on the topic: https://handsonsfmc.com/how-to-setup-marketing-cloud-connect/
Once set up it will typically be added to the page layout under Details or a separate tab.
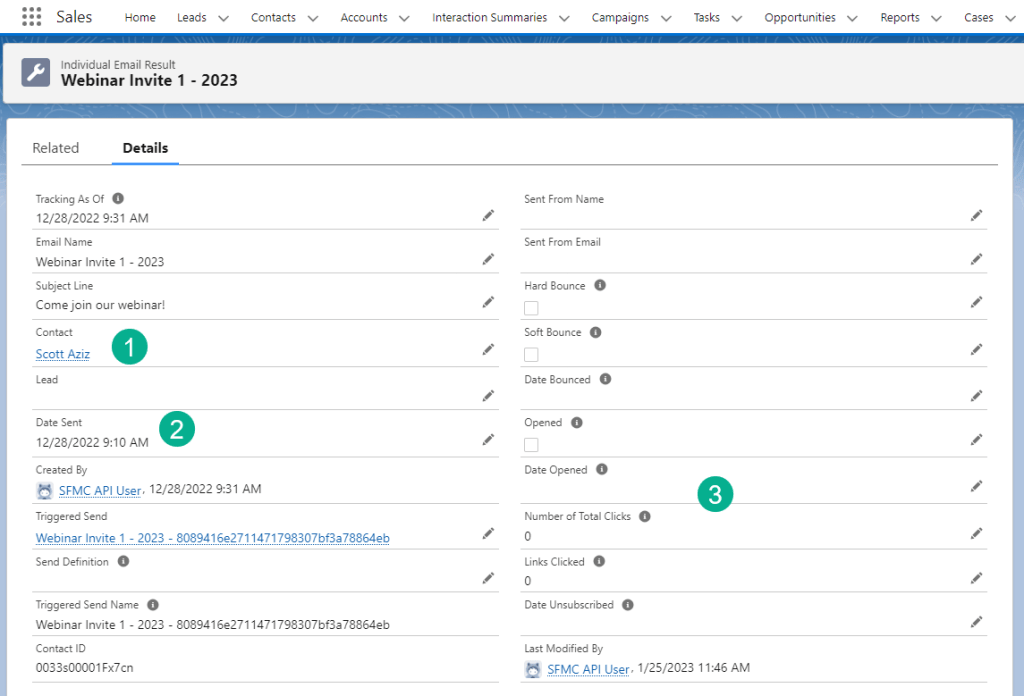
(1) Each record will be assigned to a contact or a lead.
(2) The record will include send time information and
(3) Engagement like opens and clicks as well as details about the send like Subject Line and Email Name.
Step II: Check your Marketing Cloud sends can populate IER records
Not all Marketing Cloud sends will populate an IER record in Sales Cloud. Here’s a list of sends that qualify and don’t qualify:
Qualify:
Journey send
Salesforce Send (Note must use a Salesforce Data Extension)
Don’t qualify:
Triggered send
Non Salesforce Send like a User Initiated Send
Double check you instance to confirm Journey and Salesforce Sends do create an IER record. Remember IER records can take over an hour to be created in the Salesforce core environment.
Step III: Create a Individual Email Results with Contacts or Leads report
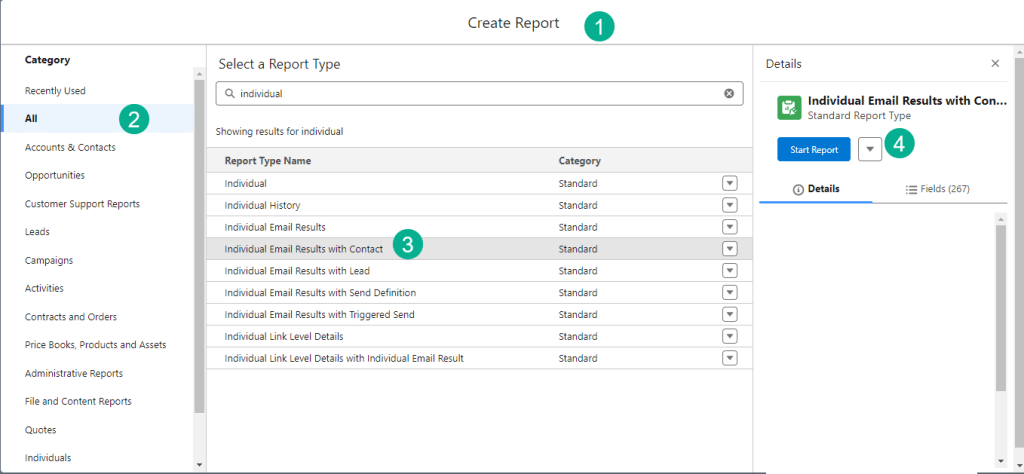
(1) Under Report builder in Sales Cloud.
(2) Select “All” under category.
(3) Search for Individual in the Report Type search bar and select either IER with Contact or Lead.
(4) Start the report.
A basic report will be created where you can modify to fit your needs by adding/modifying columns:
Step IV: Configure the report to populate the appropriate fields
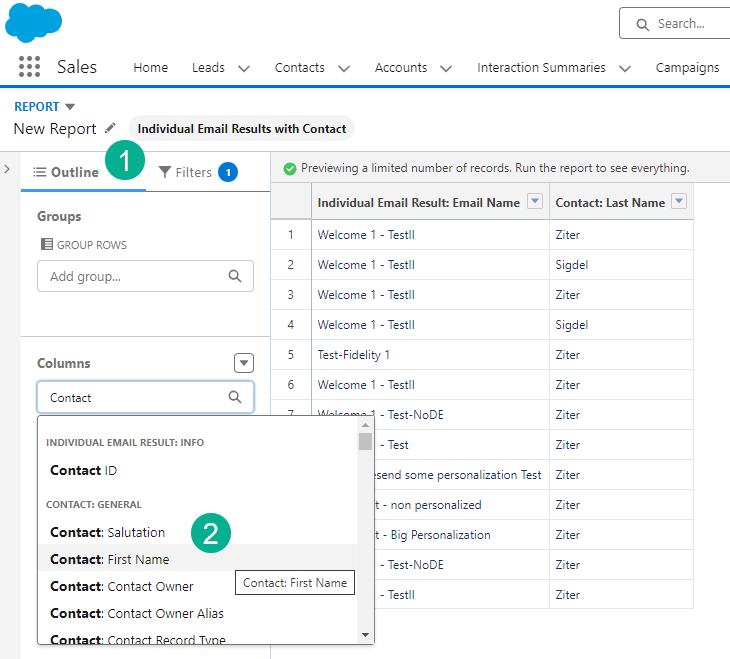
(1) In the Outline tab.
(2) Add new Columns. Note both the IER and Contact/Lead objects fields will be available to select.
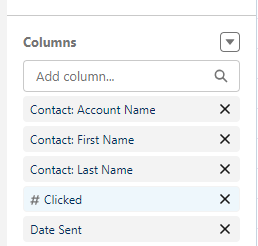
A basic report could include the above fields.

(1) On the Filters tab.
(2) Select the Show Me filter.
(3) And change it to All IER records.
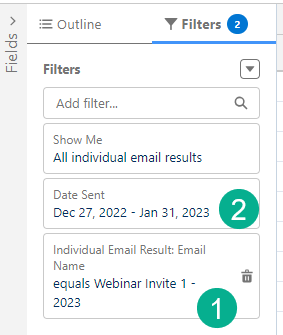
(1) Add additional filters like Individual Email Results: Email Name and select a particular email name.
(2) Add the Date Sent field and specify a specific date range.
Click Run and you’ll see your report data populate:
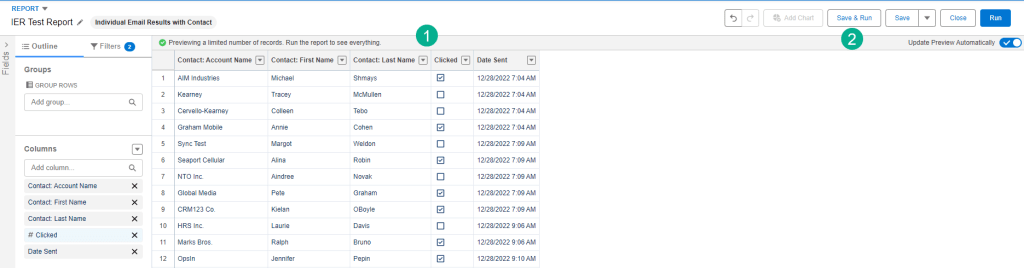
(1) Even before you click run you’ll be able to see your data populated.
(2) Click Save & Run to run the report.
Step V: Test send emails in Marketing Cloud to verify the are populated in the report
To validate your report either verify the report results vs sends in Marketing Cloud or send new emails and validate that they appear on the report after the IER records are created in about an hour.
You can also add additional custom fields to the IER object and add the fields as columns on the report outline.
Share with us how you use the report builder in Sales Cloud to visualize Marketing Cloud sends.
To see this report being used in action for a use case to display custom fields in the IER records in Sales Cloud check out the following video:
– Overview of basic report setup: 12:00 mark
– Population of custom data from Marketing Cloud in custom IER record fields: 46:13
