In this post we will cover what the Send Log is, how to create your Send Log and how to customize it maximize your marketing automations in Marketing Cloud.
What is the Send Log
The Send Log is a special data extension in Marketing Cloud that captures details of every send in Marketing Cloud. There can be only one Send Log per Business Unit so be mindful when you create and maintain the send log.
How to create the Send Log
Let’s walk through the four basic steps to create a Send Log:
(1) Create a Data Extension folder specifically for the Send Log so that you know where to access the log.
(2) Create a new data extension in the Send Log folder and fill in the Properties tab
(3) Add Data Retention Policy settings
(4) View standard fields and add custom fields to the data extension and click Create
Here’s a walkthrough of these steps in the platform:
Step I Create a Send Log Data Extension folder
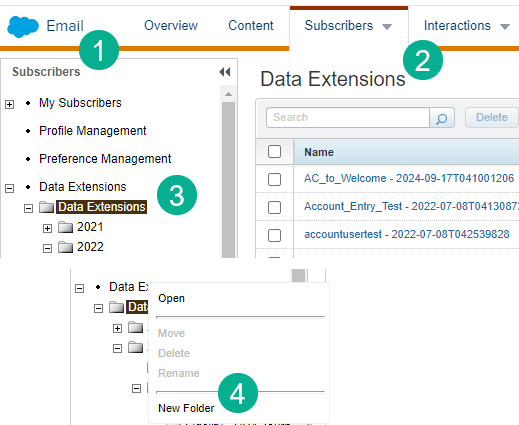
(1) In Email Studio.
(2) Under the Subscribers tab at the top.
(3) Navigate to the root Data Extensions folder
(4) Right click on the Data Extension folder and select New Folder.
(5) Name that folder Send Log
Step II: Create a new data extension in the Send Log folder and fill in the Properties tab
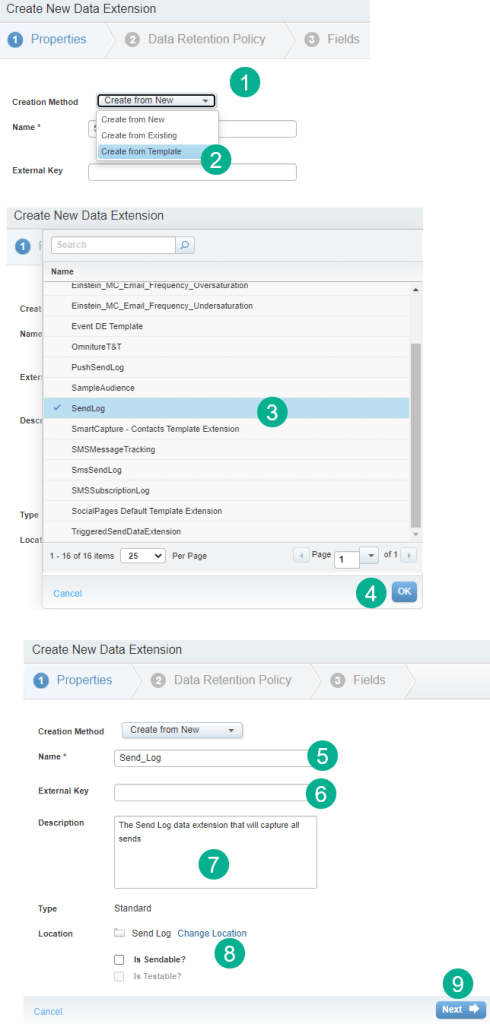
(1) Select the Creation Method tab.
(2) Select Create from Template.
(3) Select the SendLog template.
(4) Select OK.
(5) Name the Send Log. We recommend avoiding spaces as it will be easier to query so Send_Log would be recommended.
(6) You can add a External Key or Marketing Cloud will create one automatically for you.
(7) Add a description will be helpful for those who are new to the Send Log.
(8) Don’t click on is Sendable. You won’t be using the Send Log to send emails, only record the sent records.
(9) Click Next.
Step III: Add Data Retention Policy settings
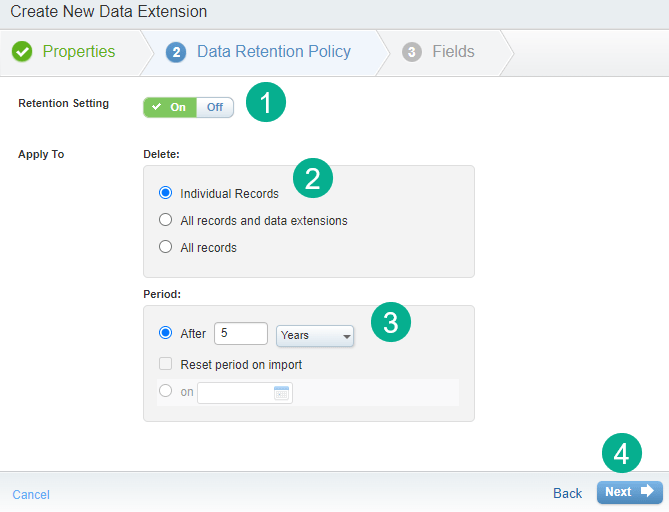
(1) If you want to delete records after a certain time period which is recommended, turn on the Retention Settings.
(2) Select Individual Records. Make sure you don’t choose All records and data extensions as that will delete the Send Log data extension.
(3) Select your time period, in this use case we are selecting 5 years.
(4) Select Next
Step IV: View standard fields and add custom fields to the data extension
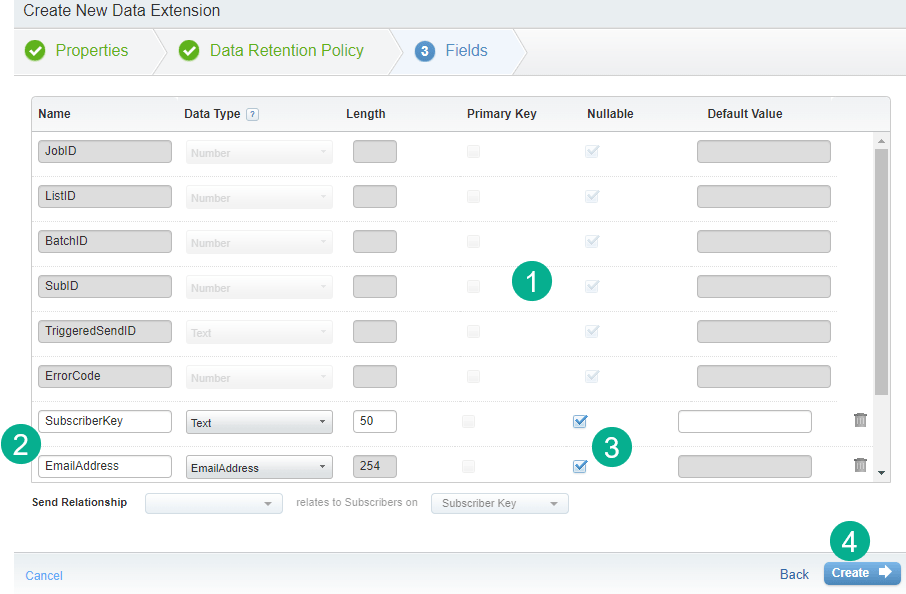
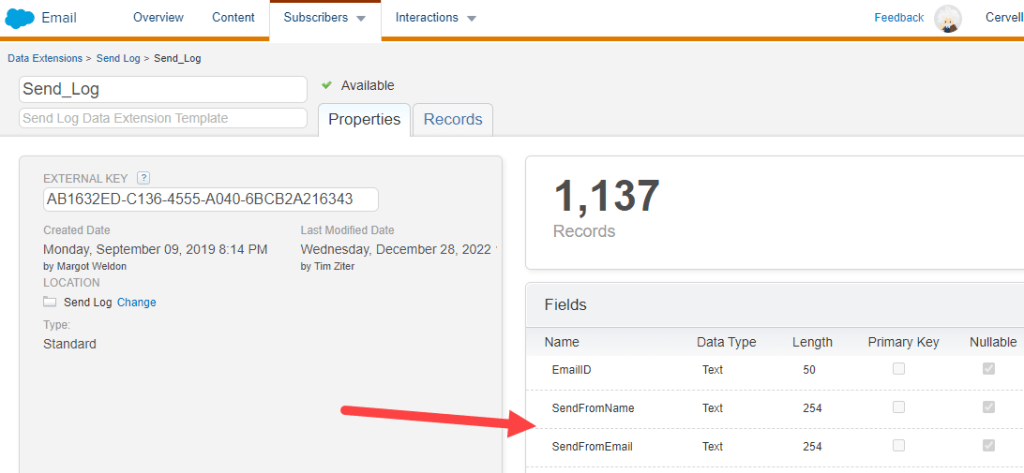
(1) Note the standard fields that are provided with the Send Log template. You’ll use these fields to query the Send Log and align it with Data Views and other data sources.
(2) Customize your Send Log by adding fields. Two that we recommend are SubscriberKey and EmailAddress. Follow their recommended data types and lengths.
(3) NOTE: all fields in the Send Log must be nullable and there can’t be a primary key.
(4) Click the Create button.
Now that you’ve created the send log you’ll want to create Ampscript code to populate those custom values.
How to populate data in the custom values in the Send Log for all of your email sends
In this section we’ll walk through how to create ampscript to set those values and create a scalable way to make sure all of your emails are populating those custom Send Log values.
Use case:
In a recent presentation we outlined a use case where a company needed to populate who the name and email of who sent the email in the Send Log. Like in the steps above the company added custom fields to the Send Log:
And next step was to populate those values with Ampscript.

(1) To make the solution scalable they created a Code Snippet content block. Code Snippets are recommended for capturing ampscript coding.
(2) They named it after the Send Log as this content block could added to all emails say in the footer of an email template. That way whenever the team needed to add additional fields to the Send Log they could just update this content block.
(3) To populate the SendFromName and SendFromEmail for this particular send the email send data extension provided a User ID which this script used the LookupRows function to pull up the Salesforce user who sent the email. For more on the LookupRows function please check out this walkthrough page: https://handsonsfmc.com/part-3-lookuprows-function/
(4) To populate a Send Log variable in Ampscript simply set a variable that’s the name of the Send Log field and populate that variable in the code. It’s that simple! NOTE: Be mindful of all the fields in your Send Log and avoid creating variables in your ampscript code that are not meant to be set in the Send Log.
(5) Another example of setting a Send Log field, in this case SendFromEmail.
(6) Another valuable field to add to the Send Log is the EmailID which is a unique field that is created for each email content piece. In this use case the EmailID is being set by the _emailid personalization string which is automatically populated at time of send. For more on Marketing Cloud personalization strings please view here: https://help.salesforce.com/s/articleView?id=sf.mc_es_available_personalization_strings.htm&type=5
Once you’ve created the Send Log code snippet block you simple need to use the ContentBlockByKey function to leverage the block in any email.

(1) In this email we’ve created a Header Script block at the top of the email.
(2) This block is a code snippet block as we are including ampscript coding.
(3) Using the ContentBlockByKey we are calling the content block that will populate those fields in the Send Log.
To validate that the values are being populated let’s cover our last section…
How to query the Send Log
Send Logs can be quite large so opening up the Data Extension and and spot checking/validating isn’t possible. You’ll need to check by writing a SQL query. Query Studio can be helpful visualizing data in the Send Log without creating an actual query and data extension. Query Studio is a free application which can be downloaded here: https://appexchange.salesforce.com/appxListingDetail?listingId=a0N3A00000FP3yFUAT
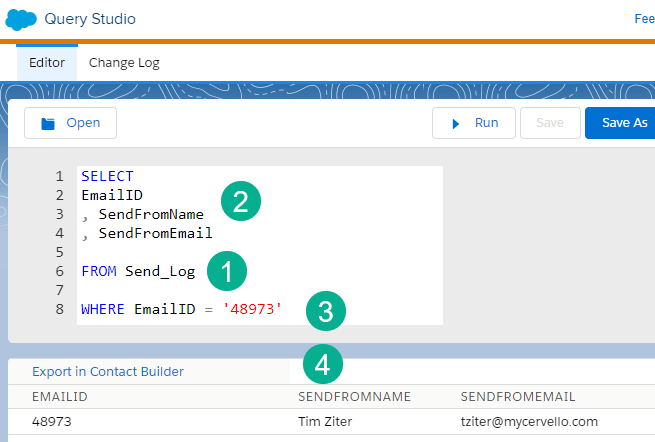
(1) In the FROM statement of your query use the Send_Log as the source.
(2) Depending on what you are looking to validate add as many fields to the SELECT statement. To prevent errors always start the 2nd line and every line there after with a comma.
(3) In the WHERE clause you can use the DATEADD function to specify a certain date range. In this example we are using the Email ID. To find the Email ID for any email:
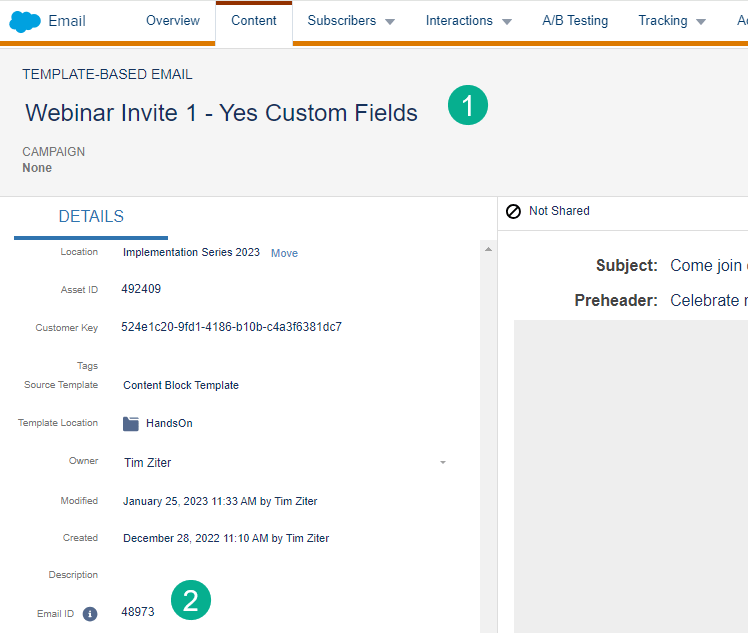
(1) Navigate to your email and before you click the edit button.
(2) In the properties view the Email ID is listed.
(4) In the Query Studio query validate the values are being populated in the Send Log.
Summary
The Send Log is a powerful tool in Marketing Cloud to populate unique characteristics of all or your email sends. Be mindful when setting up the Send Log as well as when you add any custom fields.
Video Use Case:
To see in a live video how to customize, populate values and use the Send Log in a automation & Journey check out this video below:
