This blog series walks you through how to set up the Marketing Cloud Connector in several steps. In this step we’ll be configuring Marketing Cloud in order to make the connection with Salesforce CRM.
Step I: Create Marketing Cloud API User
To make the connection to the Salesforce CRM environment first we’ll need to create a API user in Marketing Cloud.
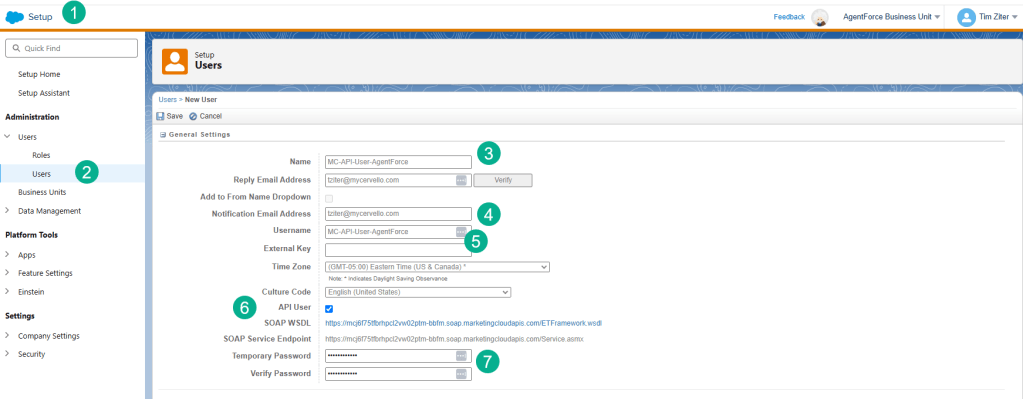
(1) In Setup.
(2) Under Users.
(3) Create a Marketing Cloud API user name.
(4) Have the email be set to the admin on the Marketing Cloud account.
(5) And create a unique user name.
(6) Make sure you click the API User
(7) And password and click Save.

(1) Search for the user and click on the checkbox to the left of the user.
(2) Click on the Manage Roles tab.
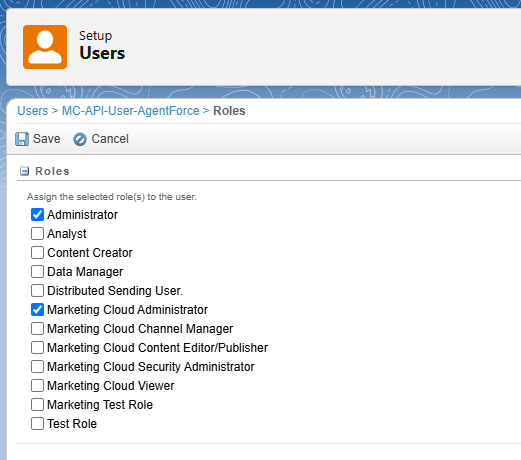
And select Administrator and Marketing Cloud Administrator
(3) Then click on the Manage Business Units.
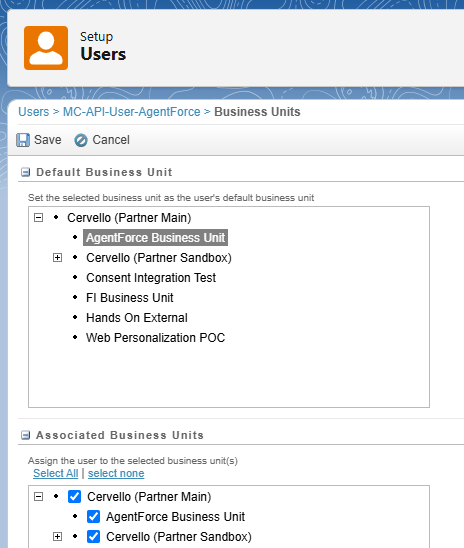
And select the default business unit as well as checking off boxes for the business units to allow access.
Step II: Configure the Marketing Cloud Connection
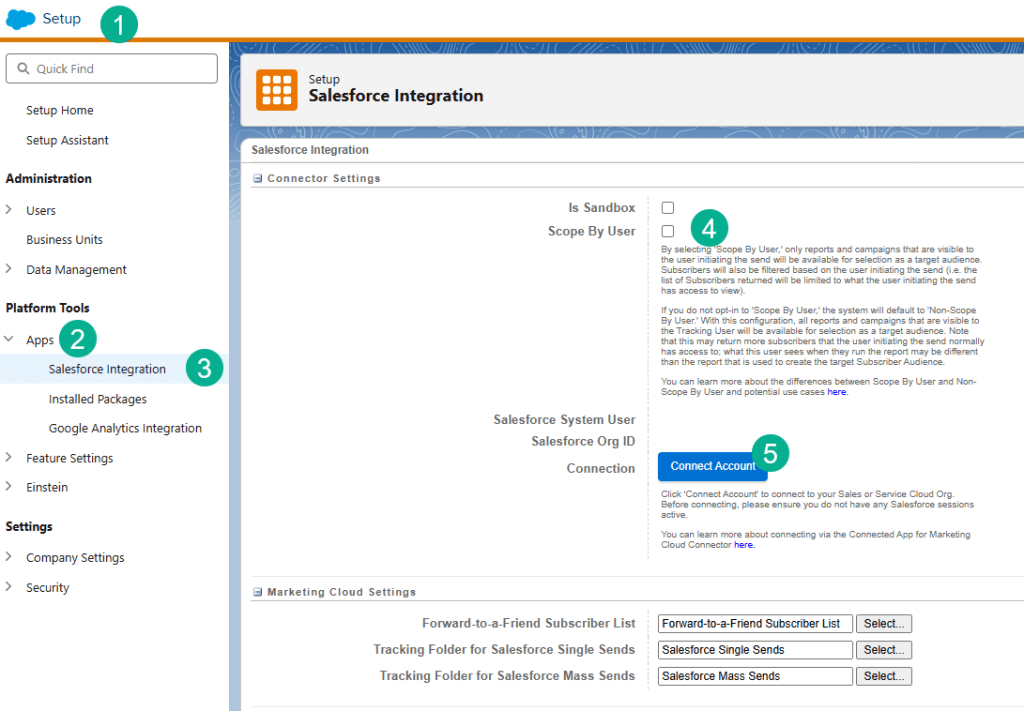
(1) Under Setup.
(2) Under Apps.
(3) Select Salesforce Integration.
(4) Most likely you’ll not want to select Scope By User, make sure this is unchecked.
(5) Click Connect Account.
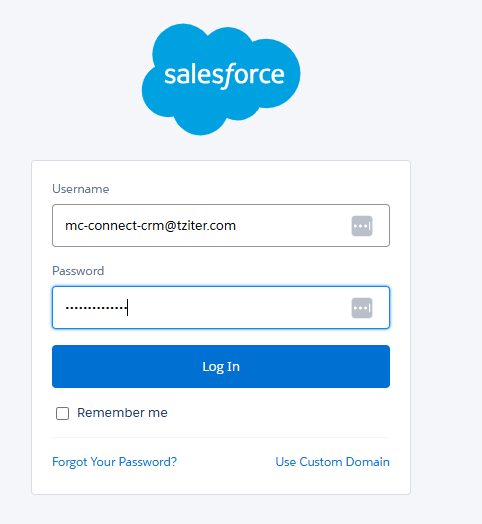
You’ll need to log into Salesforce with the new Salesforce CRM API user.
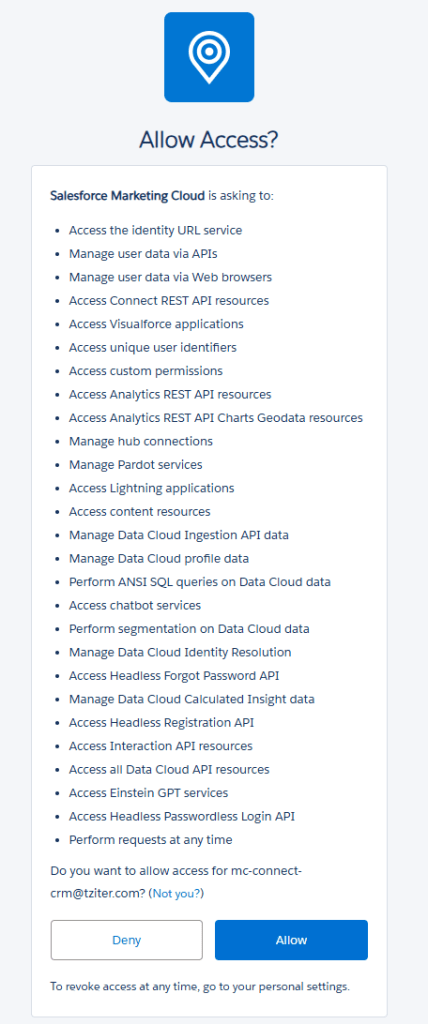
Allow Access for Marketing Cloud.
Step III: Finalize the Marketing Cloud App configuration
Back in Salesforce CRM navigate to Setup.
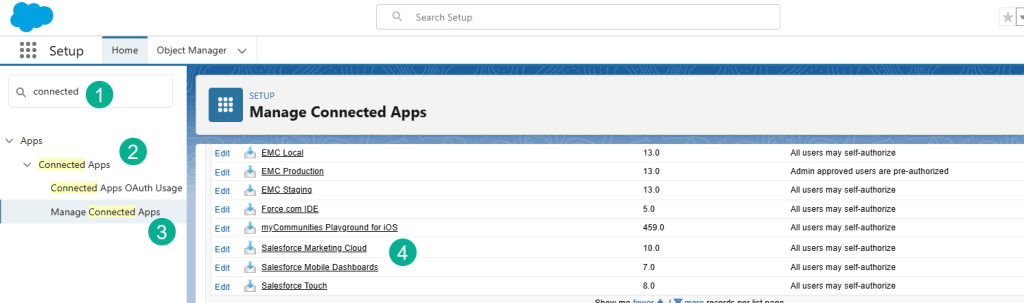
(1) Enter in “Connected”.
(2) Under Connected Apps.
(3) Select Manage Connected Apps.
(4) Navigate to Salesforce Marketing Cloud and select it.
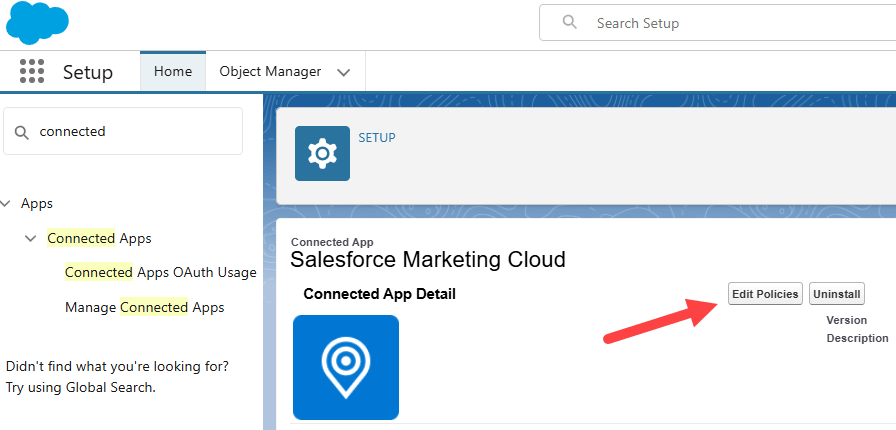
Select “Edit Policies”.
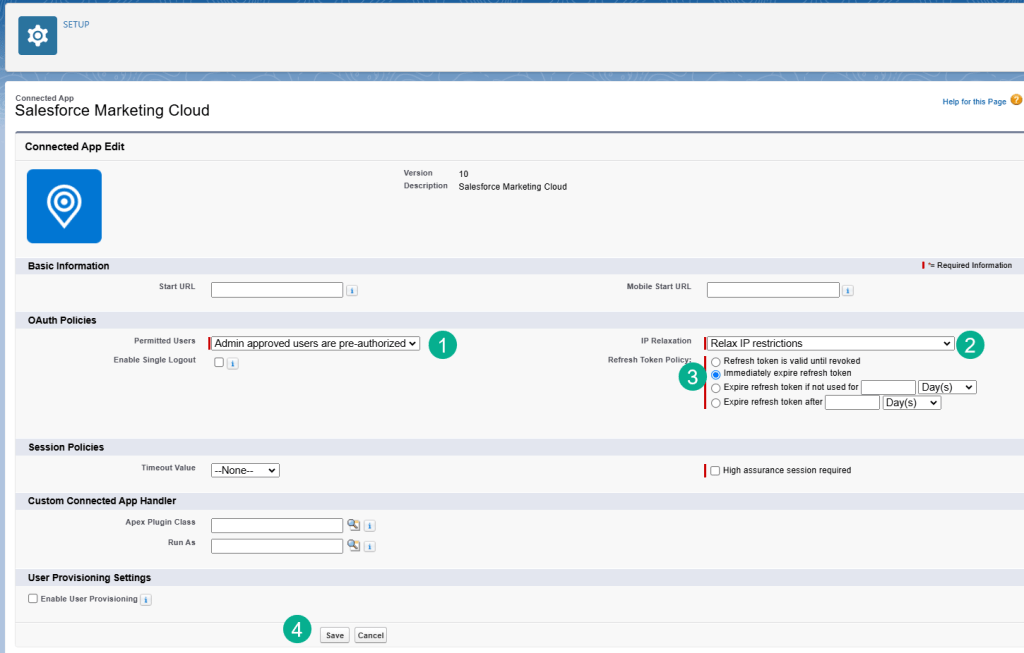
(1) Under Permitted Users select “Admin approved users are pre-authorized.”
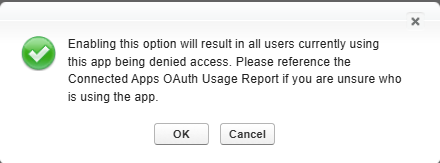
A warning message will pop up which you can say “OK”.
(2) Under IP Relaxation select “Relax IP restrictions.”
(3) Under Refresh Token Policy select “Immediately expire refresh token.”
(4) and click Save.
Step IV: Complete the Managed Package Configuration
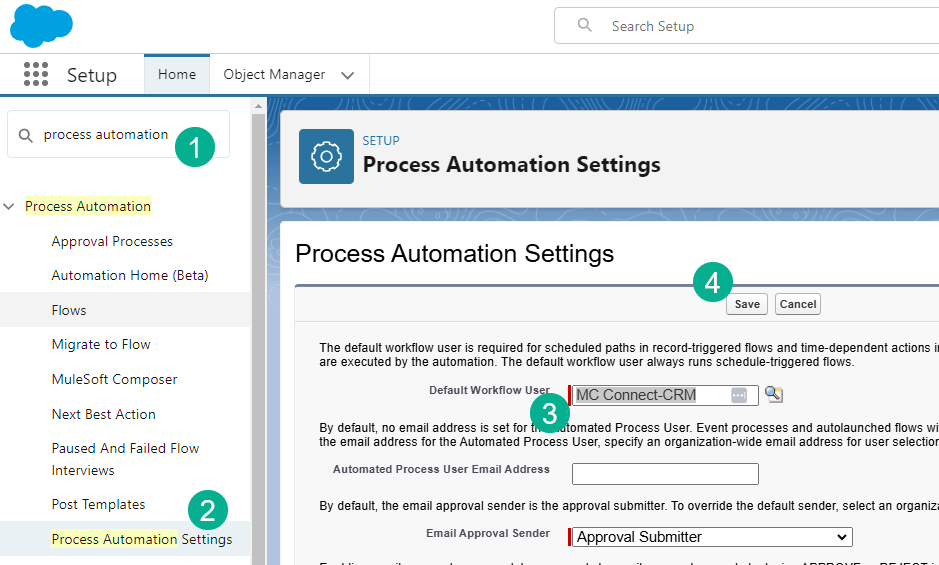
(1) Staying in Setup, type “process automation”.
(2) Select “Process Automation Settings.”
(3) Enter in the Default Workflow User the CRM Marketing Cloud API user.
(4) Click Save.
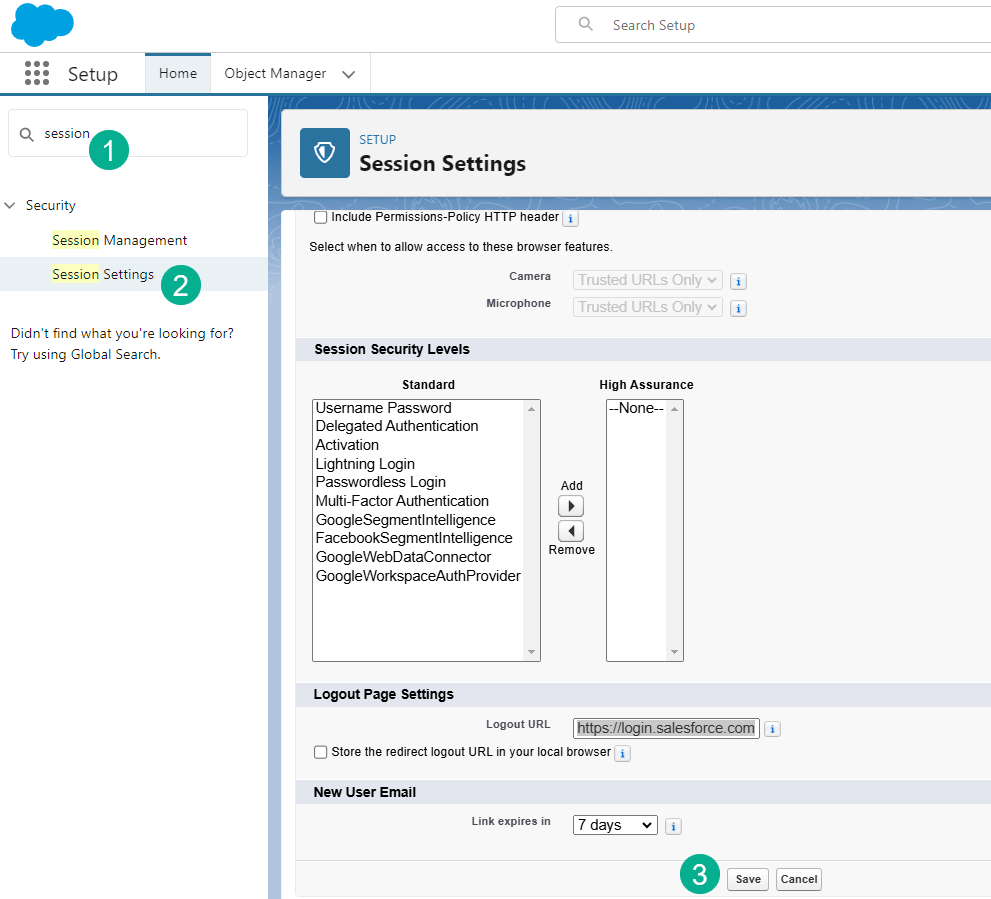
(1) Still in Setup type in session in the quick find box.
(2) Click on Session Settings.
(3) Click on the Save button.
Part V: The Marketing Cloud Connector Setup Wizard
In nine buttons menu in the upper right enter Marketing Cloud.

Click on “Verify Remote Site.”
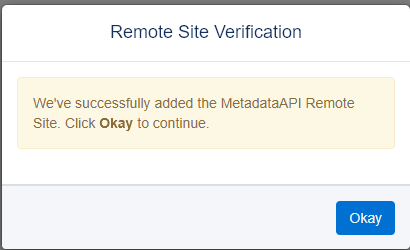
And click on the “Okay” button.
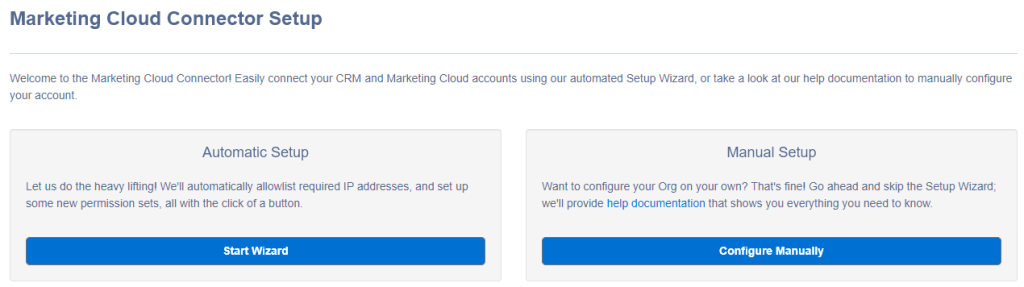
Select the “Start Wizard” button.
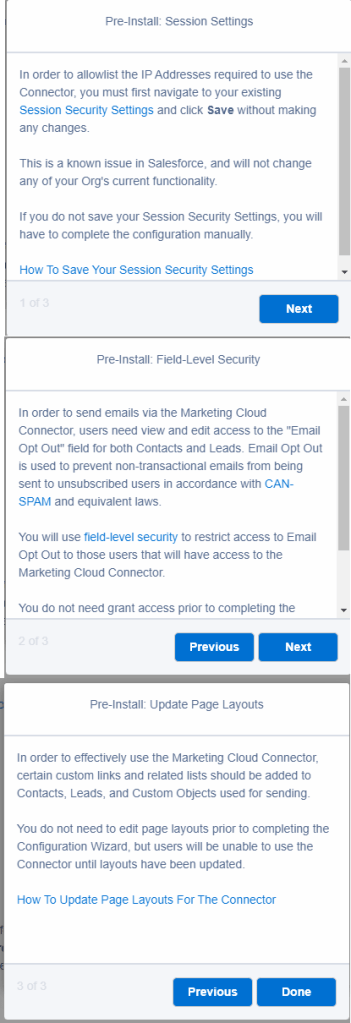
Click Next, Next and Done as you acknowledge security information.
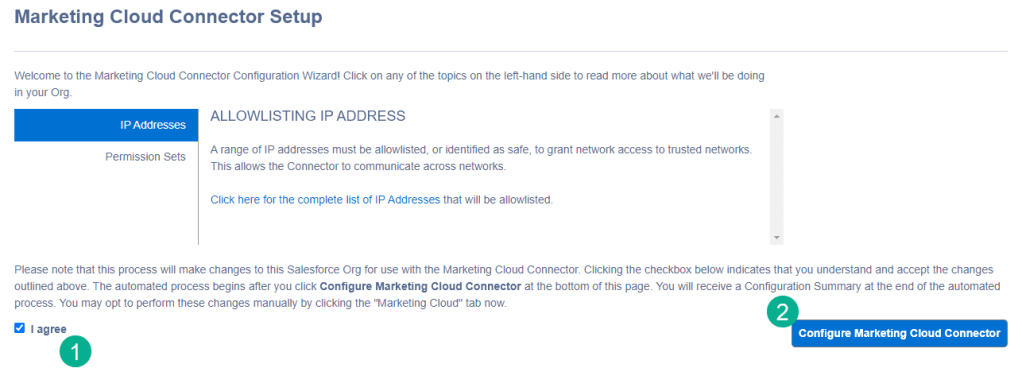
(1) Select the “I Agree” checkbox.
(2) Select “Configure Marketing Cloud Connector.”
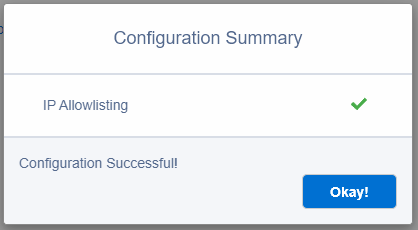
If all goes well you will be provided a configuration summary.
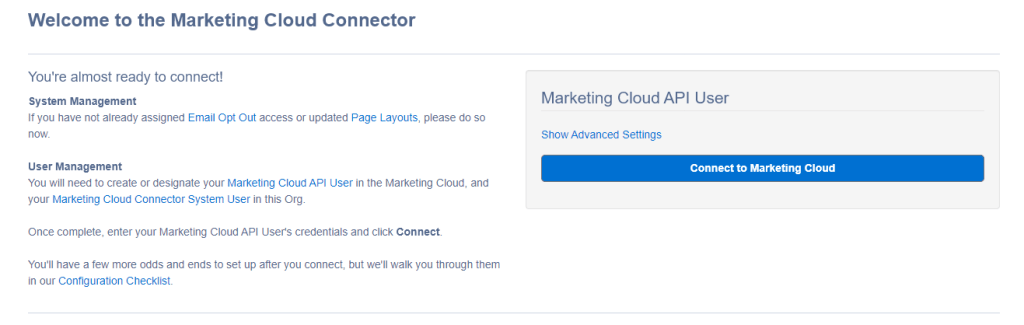
Step VI: Connect to Marketing Cloud with Salesforce CRM
Staying in the connector screen, click Connect to Marketing Cloud.
Fill out the Connector Settings.
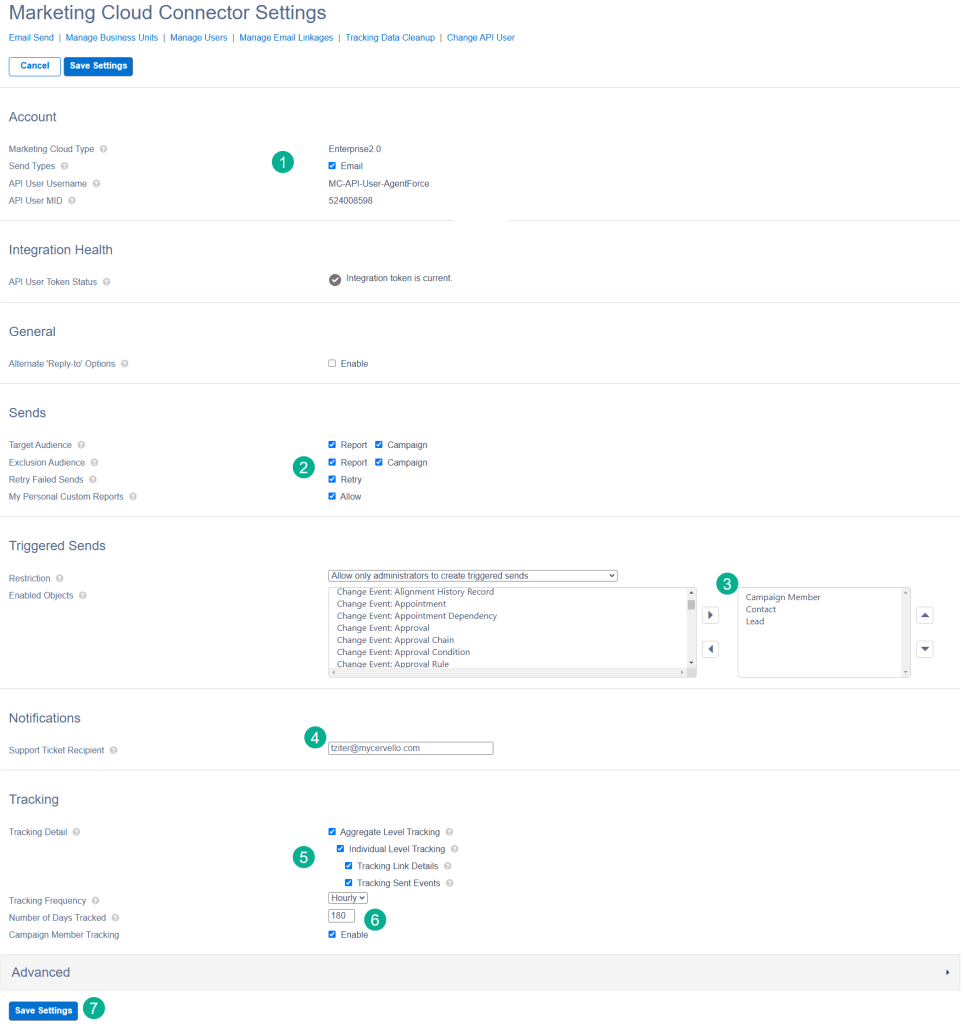
(1) Check the Email box.
(2) Select all options in this section.
(3) Select any objects that might be used for triggered sends. We typically use those object that will trigger sends like Campaign Members, leads and contacts.
(4) Enter in the email address to receive important error notifications.
(5) In Tracking make selections that make sense to your company as they can impact overall storage and costs in the CRM org.
(6) Days tracked could be increased to 180 days.
(7) Click on Save Settings.
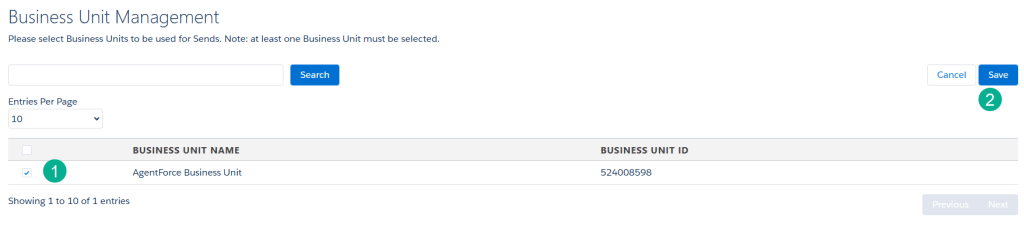
(1) Check the box next to the new BU setup.
(2) And select Save.
Step VII: Marketing Cloud User Integration
Log back into Marketing Cloud as a regular user, not the API user. Make sure you select the appropriate business unit you are connecting.
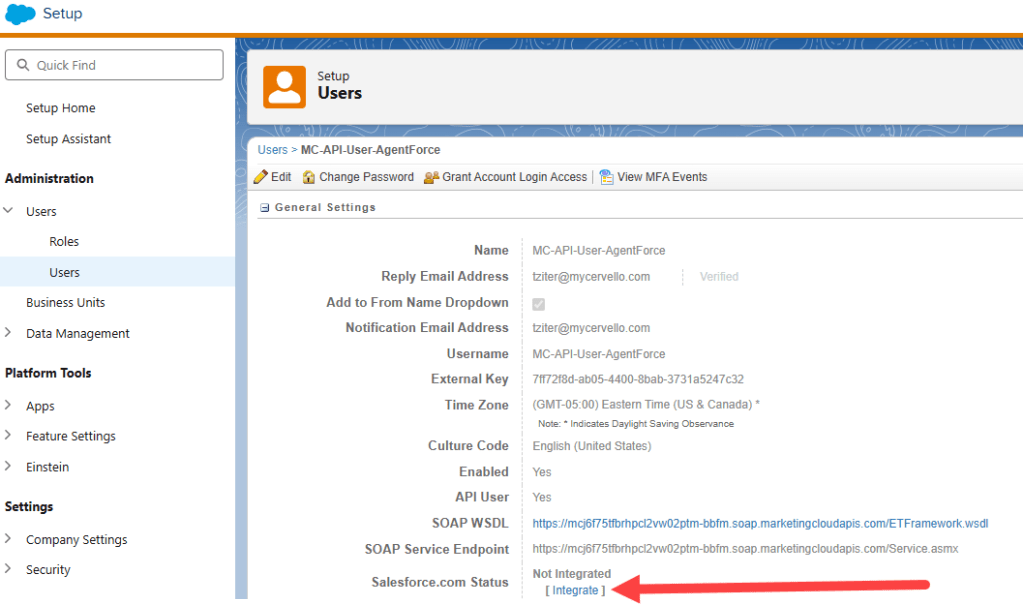
Navigate to the API User and click on the Integrate button.
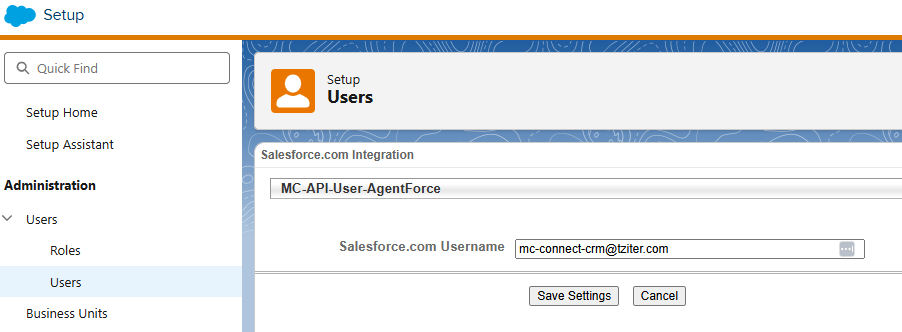
A screen will appear for you to enter in the Salesforce API user name.
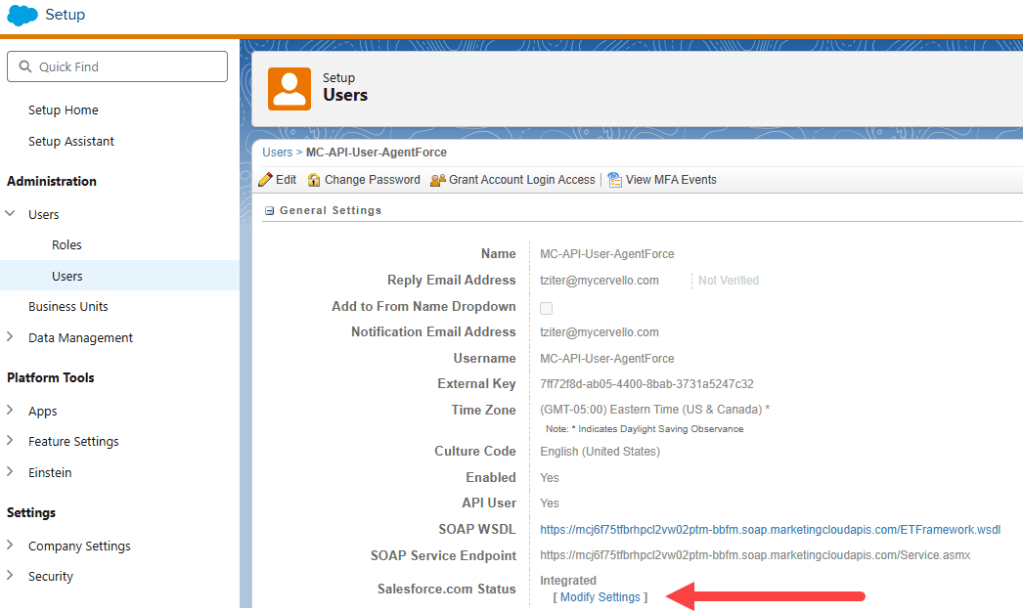
And you are integrated!
Congratulations you’ve just integrated Marketing Cloud with Salesforce!
Next step will be to synch over synchronized data extensions and validate that objects are synching over.
