Congratulations you’ve now set up the Marketing Cloud Connector between Marketing Cloud and Salesforce. One final step is to verify the connection to Salesforce CRM. We’ll cover three ways to validate the connection both checking that Marketing Cloud can receive data from Salesforce and that Marketing Cloud can push data to Salesforce.
Test #1: Synching over objects from Salesforce to Marketing Cloud.

(1) In the Marketing Cloud main menu.
(2) Click on the Audience Builder icon.
(3) And Select Contact Builder.
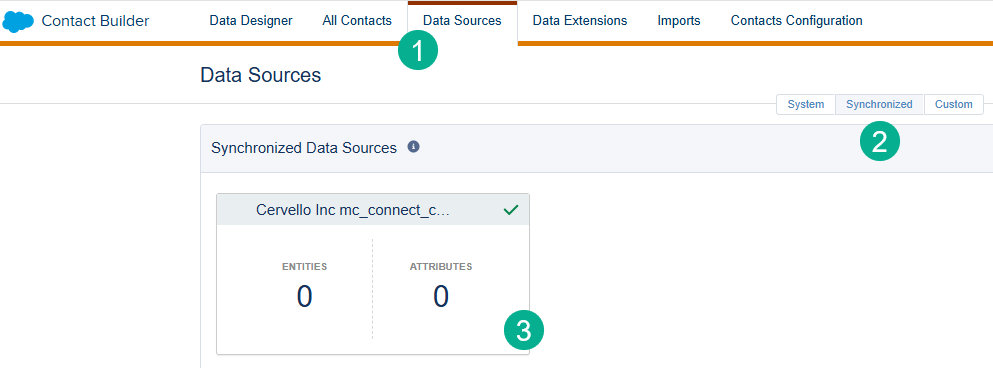
(1) Under Data Sources.
(2) Select Synchronized.
(3) And click on the box in the left to set up the Synchronized Data Extensions.
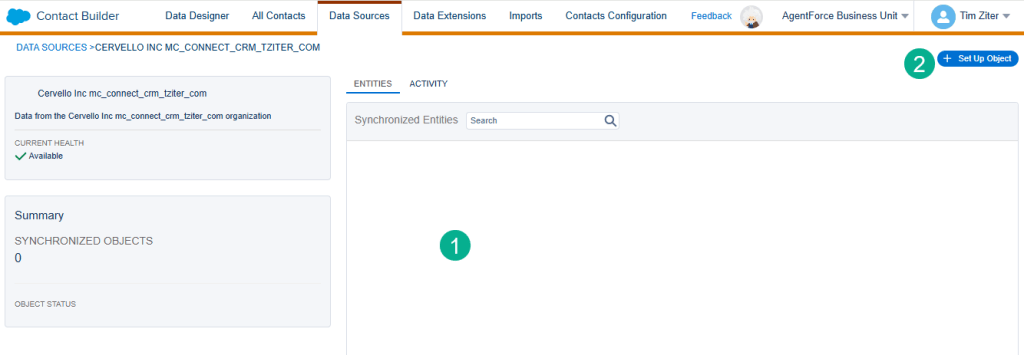
(1) In this area you will start to see your individual objects.
(2) To set them up click on the Set Up Object button.
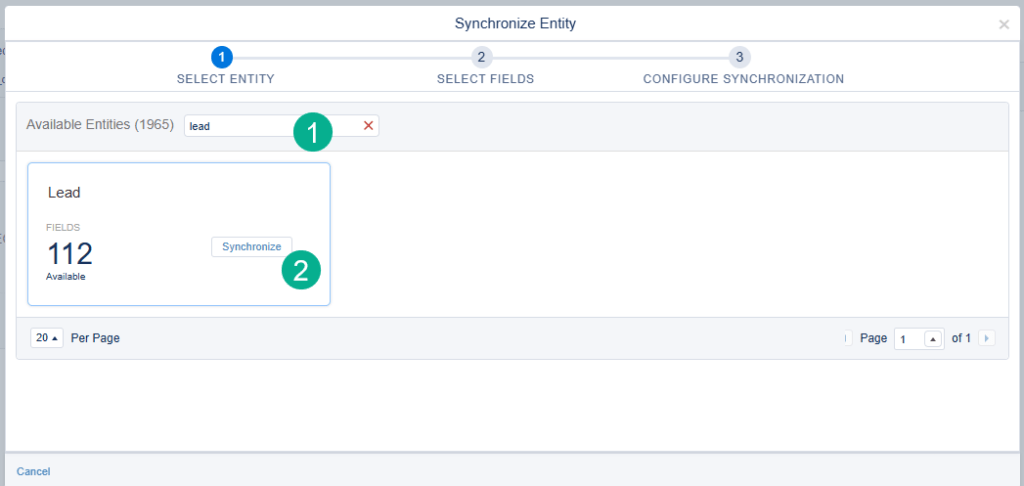
(1) Search for the Lead object.
(2) And synchronize.
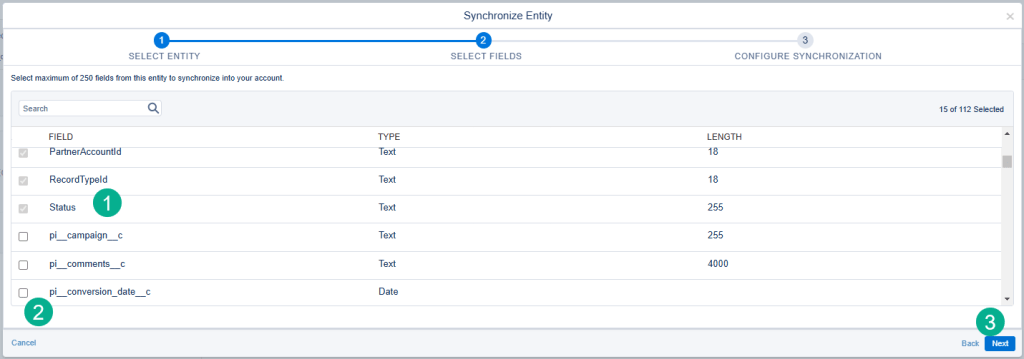
(1) For each object you’ll see default fields.
(2) You can select additional fields by clicking on the checkboxes.
(3) When you are ready click on the blue Next button.
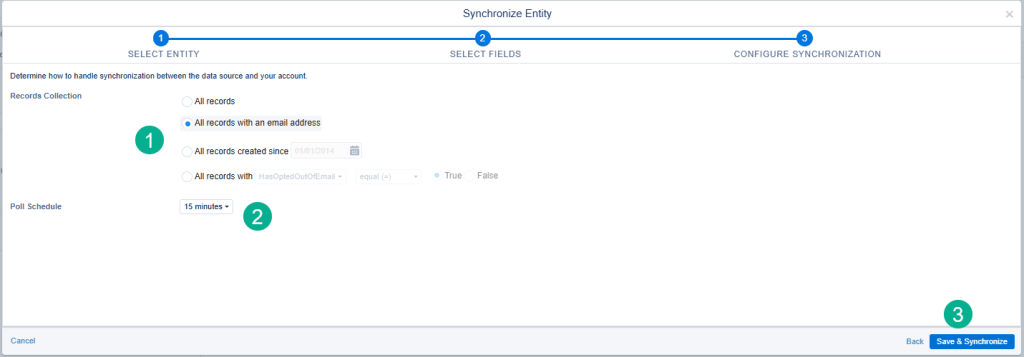
(1) You have a few options to limit the records you will synch. For testing purposes we’re going to synch all leads that have an email address.
(2) 15 minute refresh makes the most sense here.
(3) When you are ready, click Save & Synchronize.
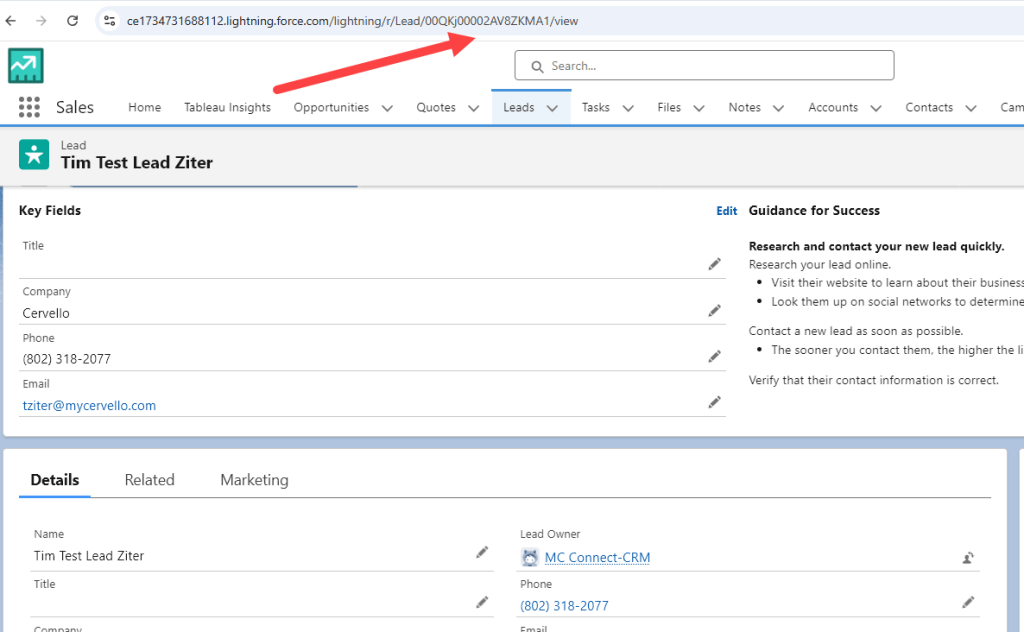
To validate that records can be synched let’s create a new lead in Salesforce and wait 15 minutes.
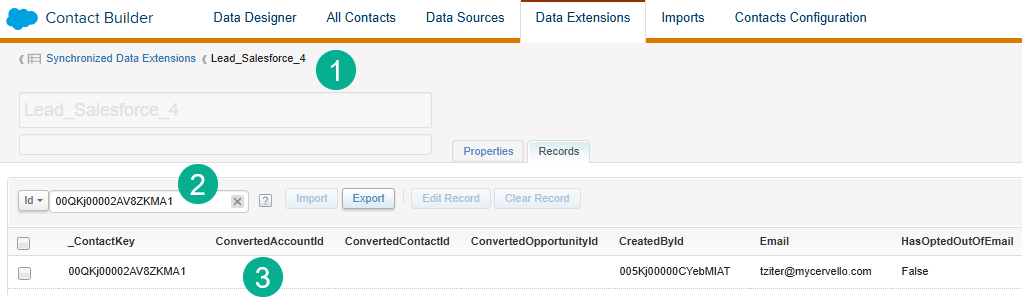
(1) Under Data Extensions in Contact Builder we’ll find the Lead Synchronized Data Extension.
(2) We can search for the lead we just created by dropping in the Lead ID from Salesforce.
(3) And yes validation that the newly created lead was synched to Marketing Cloud.
Test #2: Firing a Journey from a record being created or updated in Salesforce.
We’re going to use the Campaign, Campaign Member and Contact object to validate the next two tests. First we’ll create a campaign so that we can create a journey to pull in campaign members added to the campaign.
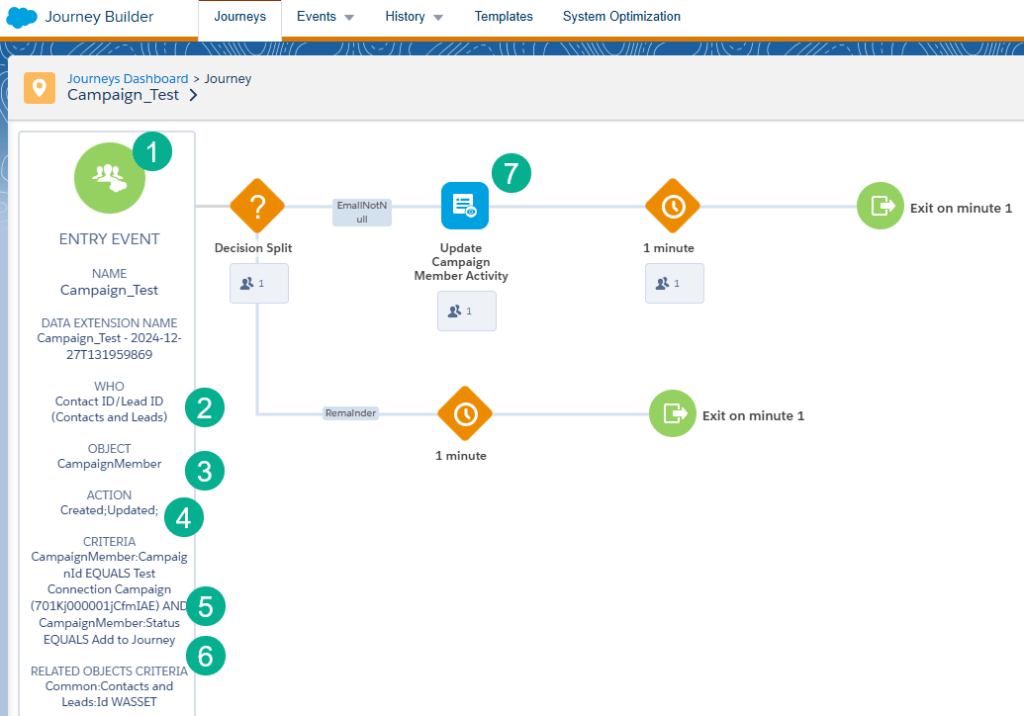
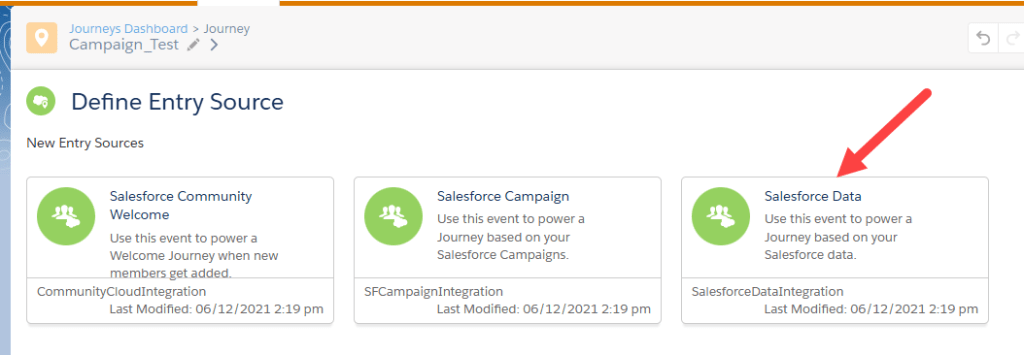
Here’s the Journey we set up to validate the connection.
(1) We are using a Salesforce Data Entry Event.
(2) Pulling in either Contacts or Leads.
(3) As Campaign Members.
(4) When a Campaign Member is either created or updated.
(5) For the Campaign we just created.
(6) And a Campaign Member status of “Add to Journey”
Here’s a few tips when setting up the Journey Entry Event:
Use the Salesforce Data option in the Salesforce Entry Event.
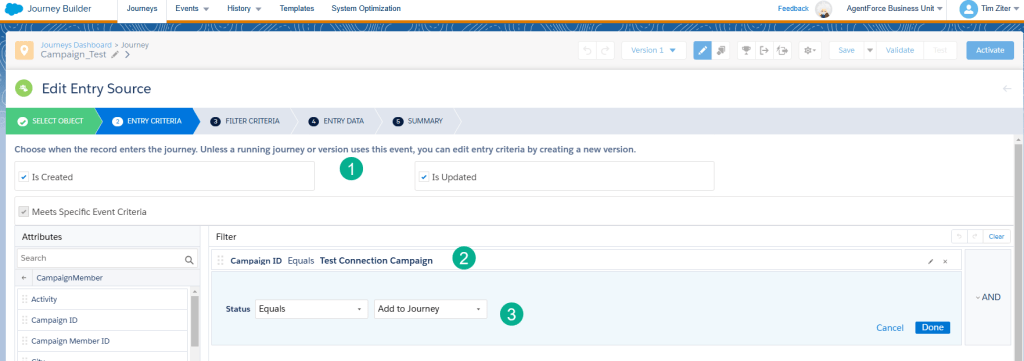
(1) Select both Is Created and Is Updated.
(2) Add the campaign that was created in Salesforce by entering the ID, but wait a few seconds for the platform to load the name of the campaign before selecting.
(3) Add the Status of “Add to Journey”.
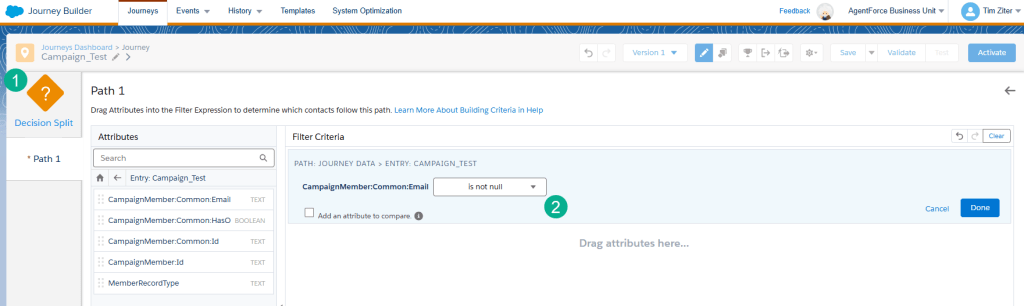
(1) For testing purposes the journey has basic functionality including a decision split that is just testing that the email address is not null.
(2) Using the drop down menu option.
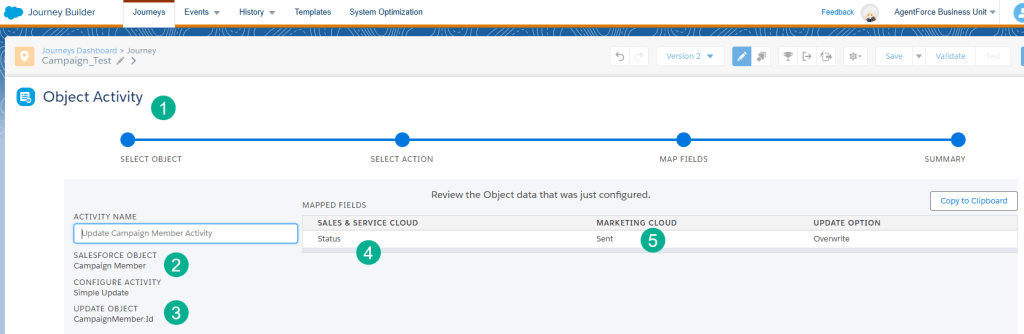
To validate that Marketing Cloud can update Salesforce CRM as well we added an Object Activity to the Journey.
(1) Configuring the Object Activity.
(2) Selecting the Campaign Member object.
(3) Using the Campaign Member ID as the value to identify the record.
(4) Updating the Status field.
(5) To “Sent”.

Testing we create a new contact and add it to the campaign.
(1) Where the contact creates a Campaign Member record.
(2) With the status of Add to Journey.
And after the record goes through the journey:

We validate that Salesforce was able to send data or a subscriber to Marketing Cloud and fire a Journey as well as Marketing Cloud was able to update Salesforce CRM.
All looks good on your Marketing Cloud Connector setup. Have fun synching records from Sales Cloud to Marketing Cloud and sending out amazing communications.
