Here’s a walkthrough on how to automatically unsubscribe a contact or lead in Marketing Cloud using the Exact Transfer Load (ETL) automation process in Marketing Cloud.
Use Case: This use case applied directly to our company Cervello. In our Cervello Sales Cloud instance we wanted the capability to unsubscribe a contact or lead in Marketing Cloud if the Email Opt Out box was checked.
In our sales process our business development team works leads and contacts for potential client engagements. The team works with our marketing automation COE (Center of Excellence) to send out automated emails promoting our various services. Every now and then they will hear from a lead/contact who wants to be unsubscribed. We offer an unsubscribe link in all of our emails, but that can be a little cumbersome to ask a contact/lead to find an email and click it.
The Ask: Our team wants the ability to check the Email Opt Out box in any record and have it automatically unsubscribe them from future marketing emails in Marketing cloud.
Here are a few steps to at first create the automated ETL Unsubscribe process to be run manually at first.
Step I: Verify that clicking on the Email Opt Out box doesn’t already unsubscribe the record in Marketing Cloud.
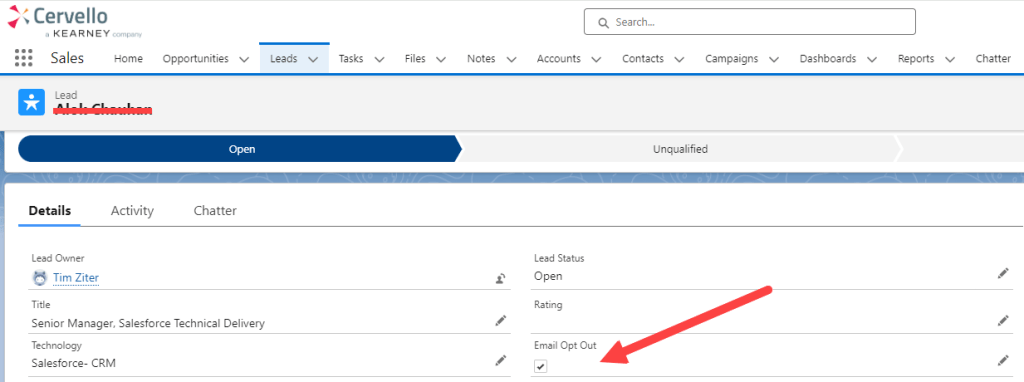
Let’s find a lead in Sales Cloud to test step I.
This lead doesn’t have the Email Opt Out box checked in Sales Cloud, but wants to be unsubscribed.
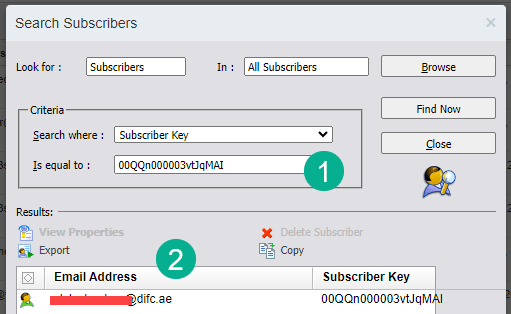
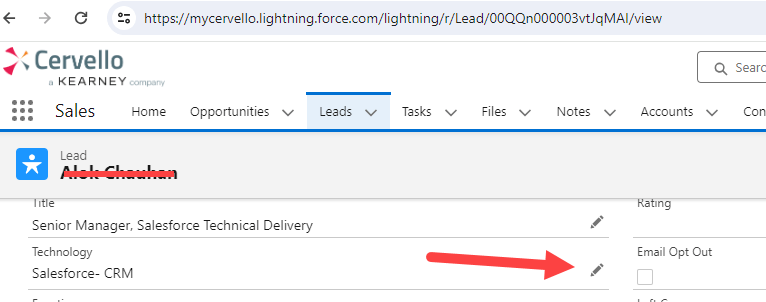
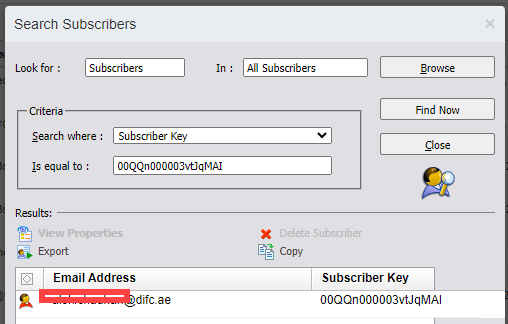
(1) Searching in All Subscribers based on the SubscriberKey (Lead ID taken from the URL of the Sales Cloud lead.
(2) We see that this subscriber has a “Green Shirt” or is in an “Active” status.
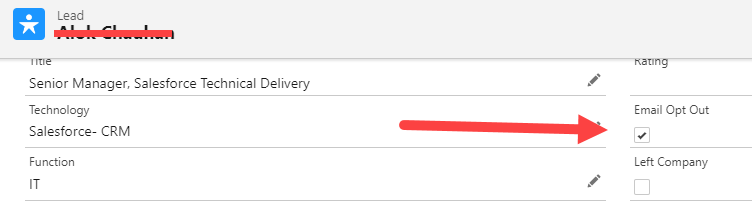
Step II: Check Email Opt Out Box, confirm it doesn’t automatically unsubscribe the record
In this record we’ll check the Email Opt Out box:
Now let’s check the lead record in the synchronized data extension.
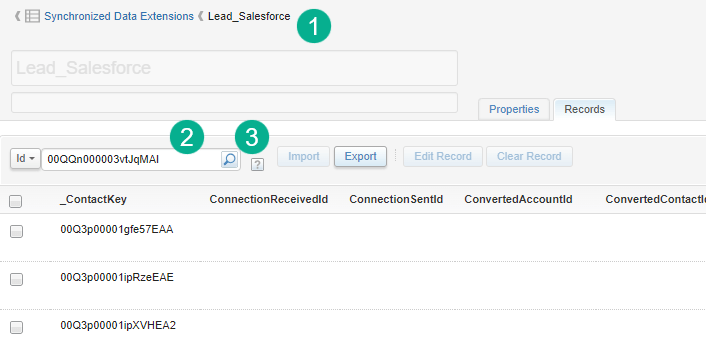
(1) Navigating to the Lead Synchronized Data Extension.
(2) We’ll paste in the lead ID in the search box to find the specific lead in the DE.
(3) And select the magnifying glass icon to run the search.
We confirm that the lead has been updated with the HasOptedOutOfEmail field populated as true. To verify this is the correct field follow these steps:
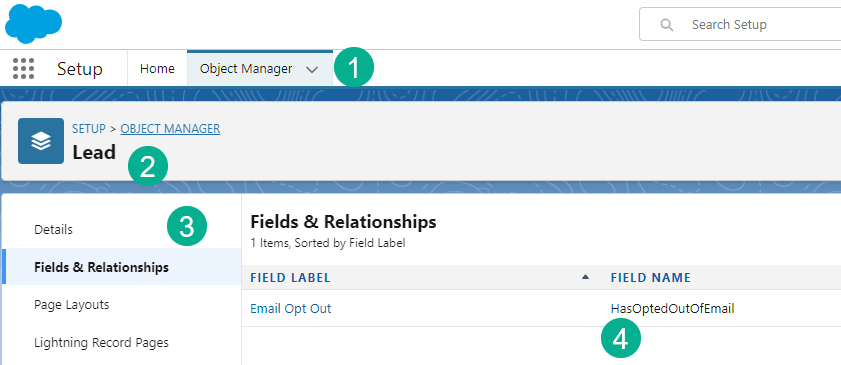
(1) In Setup in Sales Cloud select the Object Manager.
(2) Search for the Lead object.
(3) Under Fields & Relationships search for “Email Opt Out” or simply “Email” will do.
(4) Verify the Field Name as this is what is passed to Marketing Cloud via the Connector.
The search results show that for this lead the HasOpted field is now “True”. And just to make sure we double check All Subscribers and see that their subscriber status is still “Active” or green shirt.
Step III: Load test subscriber into a Data Extension
The start of the ETL process is a data extension that will contain the subscribers that need to be updated.
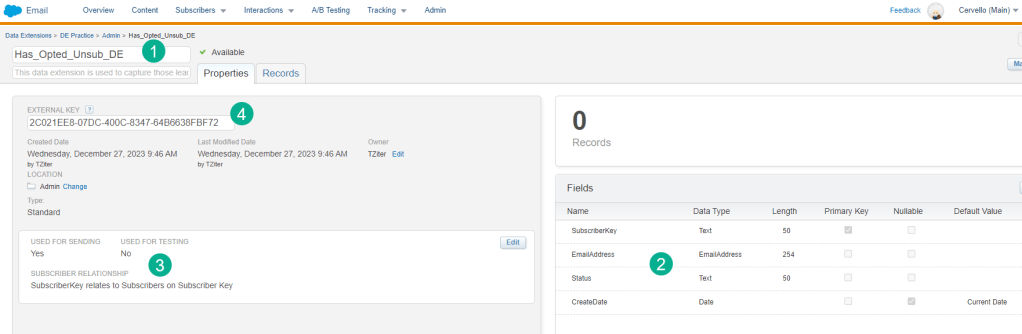
(1) The name of the data extension.
(2) Fields needed. This DE is pretty simple, only needing three key fields (the subscriber key to identify the subscriber in All Subscribers, the corresponding email address and the status which will be set to Unsubscribed. CreateDate will be used to log the date and time of the unsub event).
(3) We’re designating this DE to be used for sending but it can work as non-sendable.
(4) This External key will be used in the File Transfer step.
Next up uploading the test subscriber into this data extension by creating a .csv file with the column headings matching the data extension.

Following the Data Extension Import wizard our record is now inserted.

(1) Import button to the import wizard.
(2) The record now inserted into the data extension.
Step IV: Create Automation to run three Step ETL
First step is to create a shell Automation.
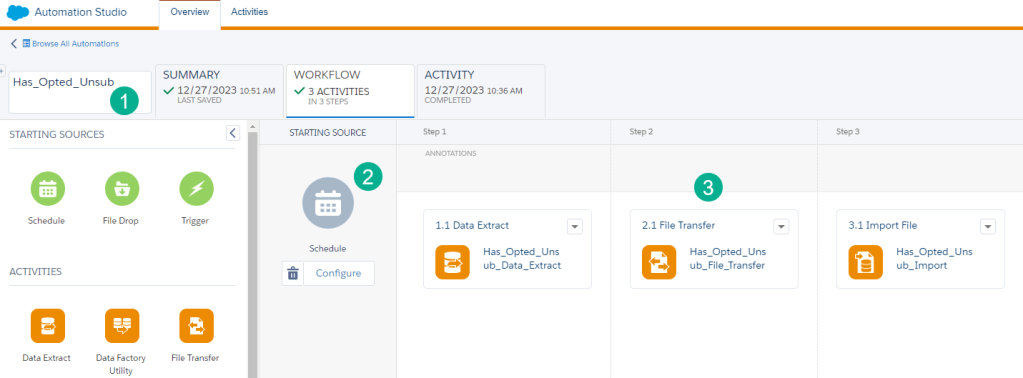
(1) Name and save your automation, make sure to place it in the best folder.
(2) Most likely this automation will be a Schedule Starting Source.
(3) You can create each activity right in the automation if you prefer, or create each activity separately in the Activities tab.
4a.) How to create a Data Extract activity
The first step of the ETL process is the Data Extract which will import the Data Extension and drop it into a data “Safehouse”. Here are a couple of tips on how to set up a Data Extract activity.
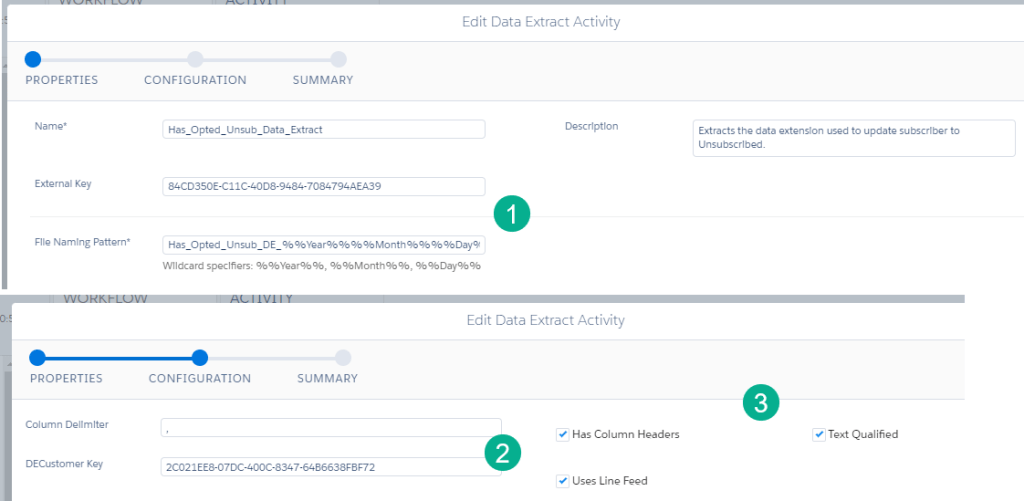
(1) The File Naming pattern is pretty specific. Use the following as an example: Has_Opted_Unsub_DE_%%Year%%%%Month%%%%Day%%.csv – Copy the _%%Year%%%%Month%%%%Day%%.csv and add it to your data extension name.
(2) Here’s where that external key from the data extension is utilized.
(3) Select each checkbox in this section.
4b.) How to create a File Transfer Activity
Step two is to create a File Transfer Activity which moves the file from the “Safehouse” to a folder in the FTP to be imported by the Import Activity. https://help.salesforce.com/s/articleView?id=sf.mc_as_using_the_file_transfer_activity.htm&type=5

(1) Select move file from Safehouse.
(2) Select the same name pattern as was set up in the Data Extract activity.
(3) Select ExactTarget Enhanced FTP.
Tip: Before you create the Import activity run these two activities once. This will do two things:(1) it will validate the settings were correct and (2) it will create a file in the Import folder of the FTP which will help validate the Import activity settings.
4c.) How to create a Import Activity
The Import activity is the last step which imports/updates a data source in Marketing Cloud. https://help.salesforce.com/s/articleView?id=sf.mc_es_import_activity.htm&type=5

(1) Drop in the same naming pattern used in the other two activities.
(2) If you’ve run the previous two activities this screen should pop up alerting you that a similar file has been found.
(3) Search for the data extension/list you want to update. In our case we are looking for All Subscribers.
(4) All Subscribers can be found under mysubscribers or could vary instance to instance.
5.) In the final screen select “Map Manually”.
6.) Select the .csv file that you used to import in order for MCP to adopt your settings.
(7-9) Map each field on the data extension to the All Subscriber fields.
And that’s it. To test out the functionality select “Run Once” in the automation and select all activities. If it runs you should see the subscriber status turn to Red Shirt or unsubscribed.
In Part II we’ll cover how to set up a query to check records that have the Email Opt Out checkbox checked in Sales Cloud but aren’t unsubscribed in Marketing Cloud and feed them into our new automation.
