Abandon cart emails usually are the most successful highest converting emails in your email portfolio. In this two part blog series we’ll outline the steps to create these productive emails in Marketing Cloud in two ways, via a Journey and a triggered send.
What is an abandon cart email?
An abandon cart email is typically sent to a subscriber who created a shopping cart on a website but never made a purchase. The email usually lists the items in the subscribers cart and can offer a discount or incentive to return to their cart to ultimately make a purchase.
Approximately 70% of shoppers abandon carts which means for every brand there is a large audience to target with a high rate of conversion. Abandon Cart emails can convert close to 20% of email sent and thereby making Abandon Cart emails the most productive emails.
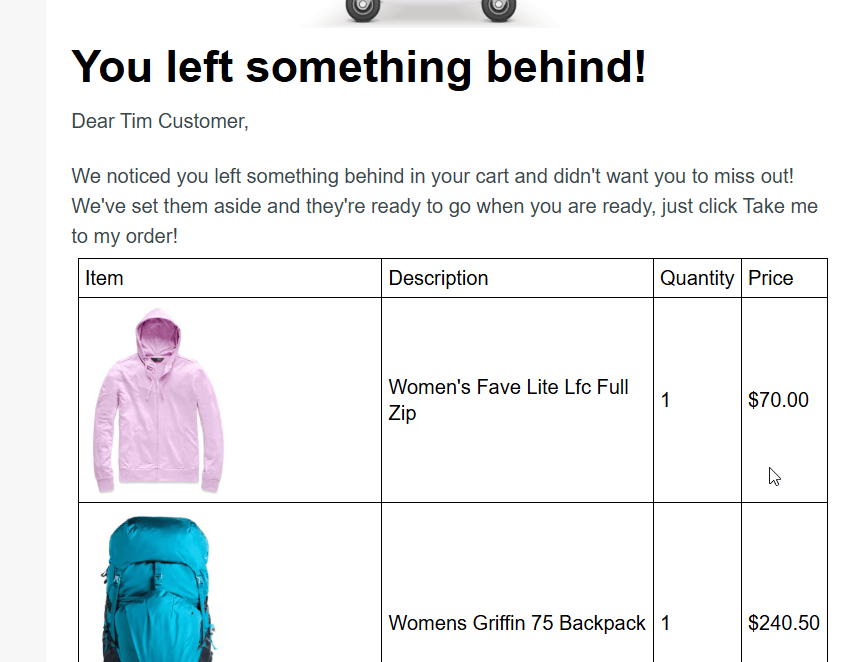
Let’s take a look at a typical abandon cart email that we will breakdown how to create in this blog:
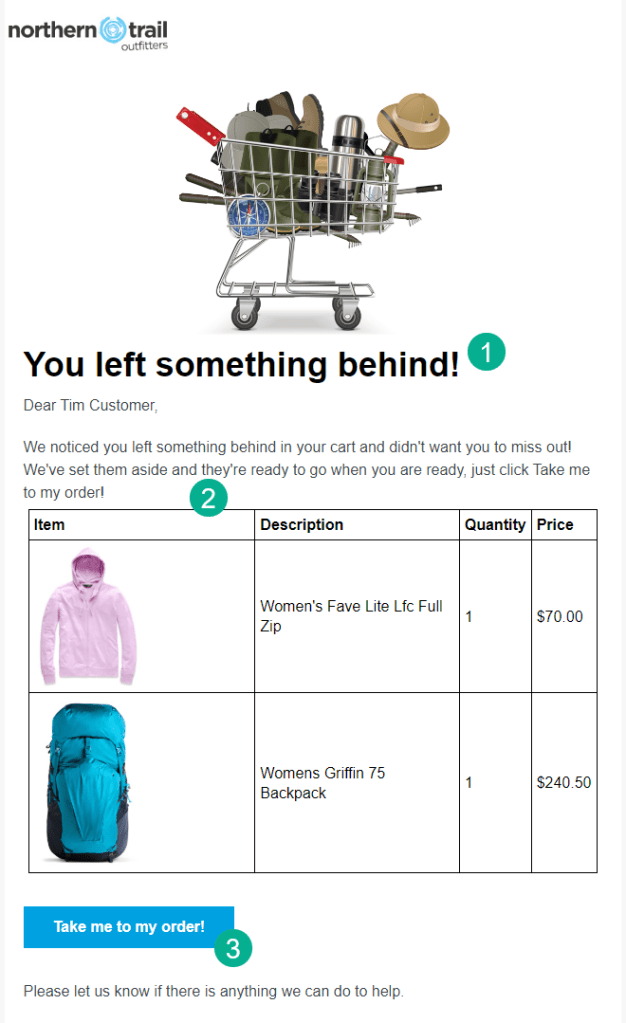
(1) The subject line and headline of the email is typically centered around alerting the subscriber that they have left items in their cart.
(2) The items in their cart are displayed.
(3) A call to action is included to bring the subscriber back to their cart.
Now let’s walk through the steps to build your abandon cart program in Journey Builder.
1.) Understand where your Abandon Cart data will be coming from
2.) Set up automations/queries to pull in Abandon Cart Data
3.) Create a data extension that will capture the Abandon Cart subscriber
4.) Create the Abandon Cart email that leverages the data extension data
5.) Leverage the Abandon Cart free templates in Journey Builder
6.) Build the Journey entry source and all of the activities
7.) Test the Abandon Cart Journey E2E
8.) Go live with your Abandon Cart Journey
9.) Test and adjust your Abandon Cart journey over time
Step I: Understand the data sources for your Abandon Cart email
To send this highly effective email you’ll need a lot of data mainly from your website. Think about grouping your data in three main categories:
a.) Subscriber data:
– Email address: so you can execute the email send.
– Subscriberkey: ideally you’ll want a subscriberkey that’s not the email address itself
b.) Cart data:
– Items, quantity and price of items in cart
– Date of when the cart was created and abandoned
– The email/subscriberkey of the owner of that cart
– Shipped to name/address
c.) Product data:
– Description of each item on the website
– Product image
– Special handling/shipping charges
d.) Additional personalization data points
– First name, address, etc.
– Order history
Step II: Integrate the Abandon Cart Data into Marketing Cloud
Let’s take a look at examples of how the four data areas could be brought into Marketing Cloud and leveraged in an Abandon Cart solution.
A.) Subscriber data – This one should be easy as the subscriber database of record will most likely be Marketing Cloud. What might be helpful is to create a universal data extension so that you could customize the typical subscriber fields that exist in All Subscribers.
Here’s an example of a simplified Universal Data Extension:
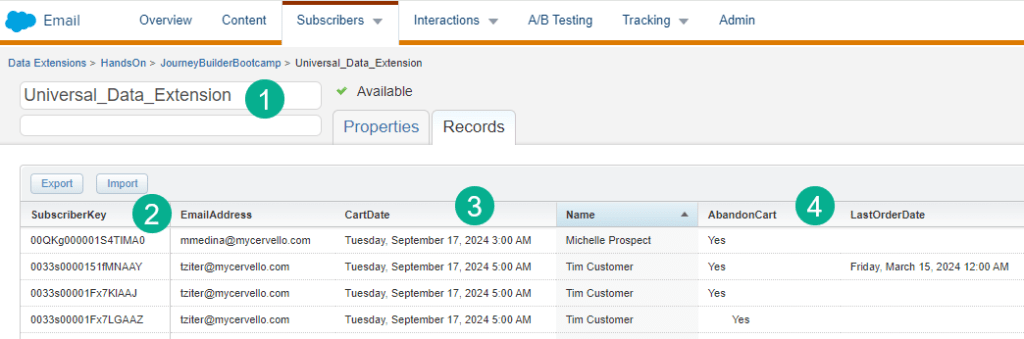
(1) A Universal Data Extension can be helpful to detail out specific engagement stats for each subscriber.
(2) The key fields are the subscriberkey and email address and mobile number if you are using SMS.
(3) Fields specifically for the Abandon Cart use case can be added like in this example the last cart date. This date could trigger an abandon cart email send.
(4) Additional fields can be added to provide detail on engagement activities like an Abandon Cart.
This data is typically brought in via an FTP file drop and a query based automation updates a universal data extension.
B.) Cart data – There are many different ways for the cart data to be passed to Marketing Cloud. It could come in a direct feed from the website to the triggered send or API event journey as a string of data. Here’s an example of a use case where like with the Subscriber data the cart information is ingested in a hourly file via FTP and an automation updates a data extension.
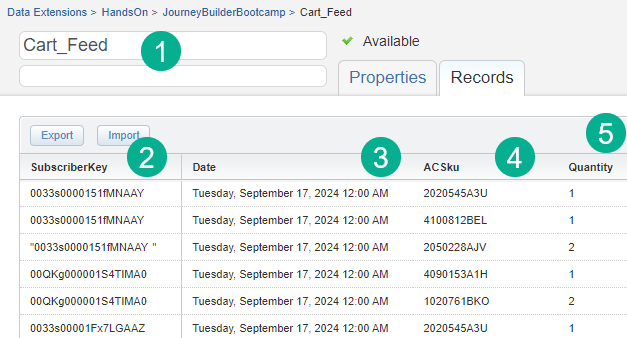
(1) Designate a data extension that contains the cart data.
(2) The SubscriberKey will be needed to identify the subscriber that has the cart item.
(3) A date field can be helpful to determine when the item was entered into the cart.
(4) AC Sku would be where you capture the item that was carted.
(5) And the quantity.
C.) Converting Cart Data to Products – With the product sku information you can set up a data extension for each sku that contains in our use case the image and description of each cart sku item.
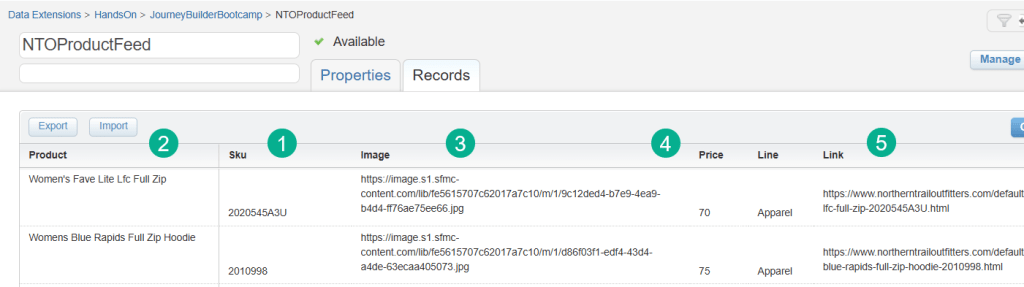
(`1) Creating a product feed data extension include the sku number.
(2) A description of the product.
(3) Create an image for each product by dropping an image file into a Marketing Cloud folder to create an image file and store it in the data extension.
(4) Add Price as well for each product.
(5) And even the link to the product on the website.
Let’s take a look at how all these data points come together in the actual email.
First looking up the cart feed we are able to pull in the product or sku item and quantity ordered for the subscriber. For each sku item we look up the NTO Product Feed data extension to populate the image, description and price for each item so that it can be displayed in a table.
In the email we use multiple ampscript lookups in a code snippet block at the top of our email. First you’ll want to set the @SubscriberKey variable based on the subscriberkey in the DE or the personalization string.

Then come the lookups:
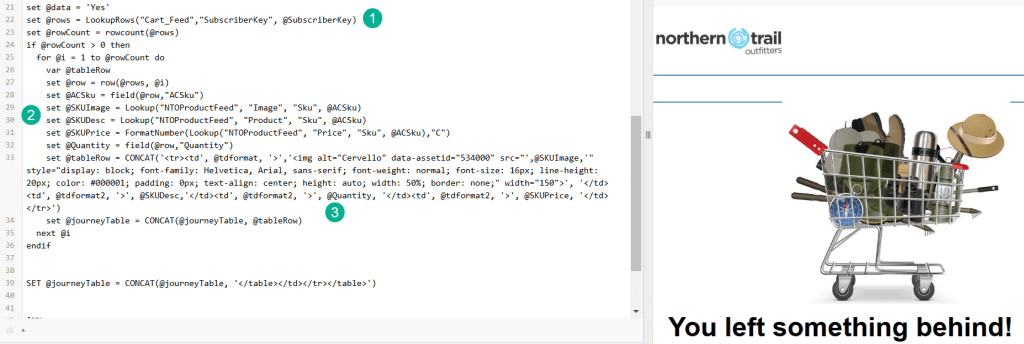
(1) First a lookuprows as there can be multiple rows of abandoned products. For more on the LookupRows functionality check out our blog page: https://handsonsfmc.com/part-3-lookuprows-function/ This is why you need to set the @SubscriberKey variable as this is the key identifier in the Cart_Feed data extension.
(2) Nested in the LookUpRows are three Lookup functions to populate the Image, Description and Price. For more on the Lookup function:https://handsonsfmc.com/part-3-lookup-function/
(3) Last nest those variables in a custom ampscript table to output as a table.
We hope you enjoyed this walkthrough of how to create an Abandon Cart email. For more on the Abandon Cart build check out our YouTube video as part of the Journey Builder Bootcamp Hands On sessions.
