Ever need to make an API call into Marketing Cloud? Maybe it’s better to ask have you needed to test a triggered send or an API Event Journey but can’t find a way in Marketing Cloud?
In this post, we offer a simple solution for using a free API provider called Postman, which gives you the ability to send triggered emails in just a few minutes.
Step I: Set up an Installed Package
First step we need to enable the connection into Marketing Cloud by setting up an Installed Package.
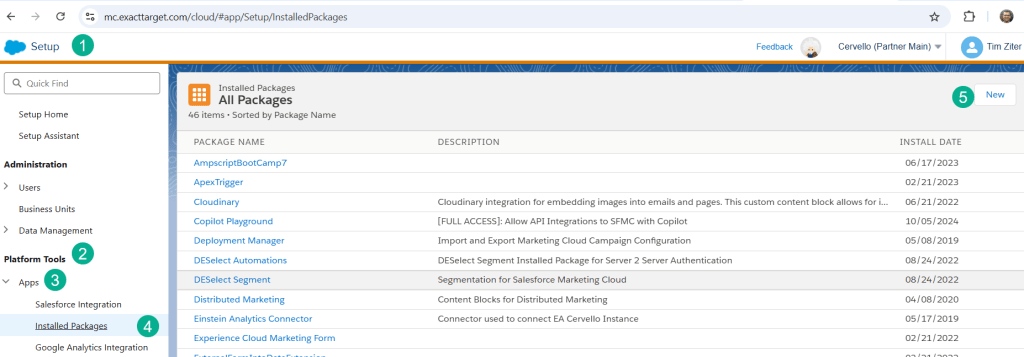
(1) In Setup.
(2) Under Platform Tools.
(3) Under Apps.
(4) Select Installed Packages.
(5) Click the “New” button.
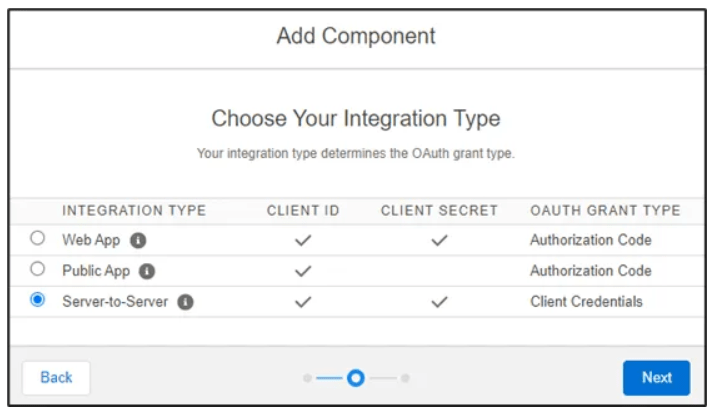
Select Server-to-Server as you’ll need both a Client ID and Secret for the API call plus client credentials.
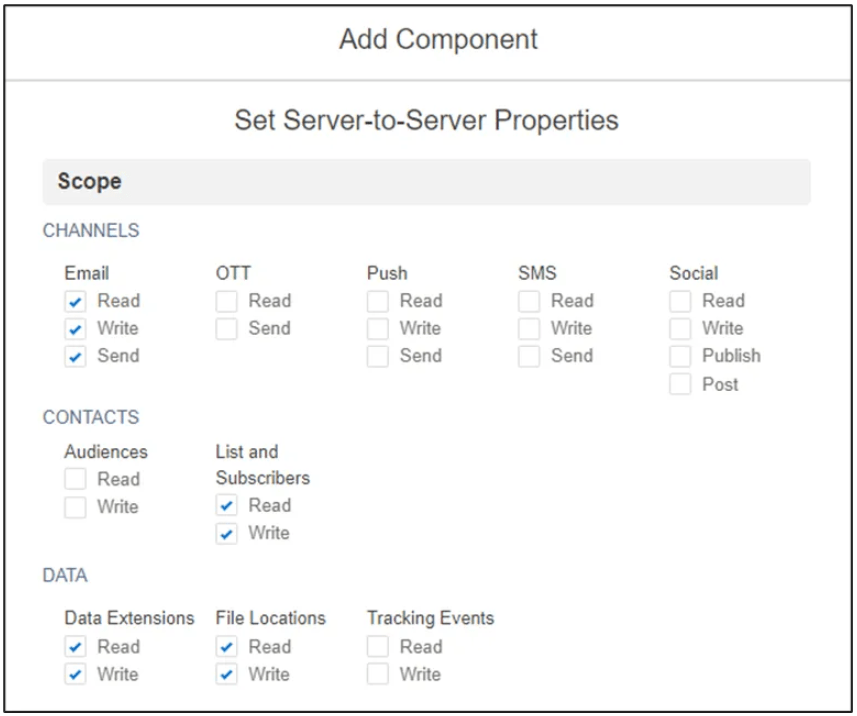
Next in the properties section select only the components that are needed for your API calls.
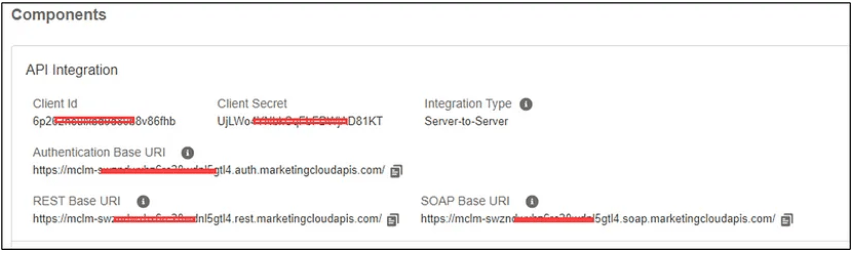
Once all the properties are selected, the Installed Package will be created with the Client ID and Secret plus the Auth and REST Base URIs. This information will be used in the next session: the Postman API setup.
Step II: Configure Postman – or an API tool
Postman is a free third-party tool that allows users to send test API calls. Download the app at postman.com, and set up a workspace to create your collections. You might have a different collection for each triggered test or installed package.
Once your collection is set up, create two requests: Auth Call and Post Call.
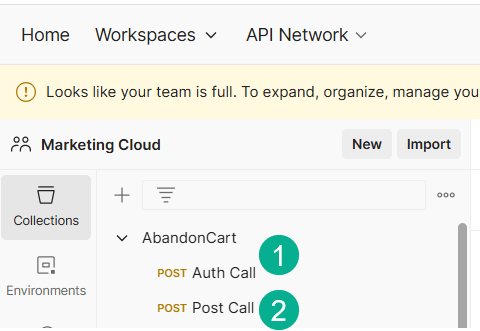
(1) Auth call is going to make the handshake between Postman and Marketing Cloud, opening up the connection.
(2) The Post Call is where you’ll be sending the data that will trigger the event and populate the data extension.
a.) Auth Call: This action will send a call to the Auth Base URI with the Client ID and Secret to obtain a token to open the API connection.
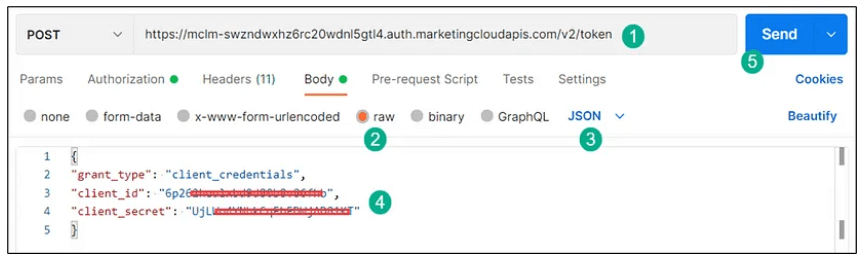
(1) Grab the Authorization Base URI from the installed package, and select POST as the default will be GET. After the Base URI, add /v2/token.
(2) Select Raw to enter in the code listed below.
(3) Select JSON in the drop-down menu.
(4) Enter the Client ID and Secret from the installed package.
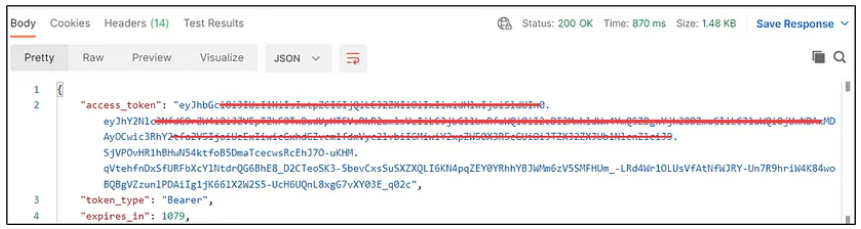
(5) Click send, and if all goes well, you’ll receive an access_token.
b.) Post Call: The request that will trigger the event and populate data in the data extension.
There are a variety of different syntax options to send API calls in Marketing Cloud. The example we are using today is for a triggered send detailed here: https://developer.salesforce.com/docs/marketing/marketing-cloud/references/mc_rest_messaging/messageDefinitionSends.html
Please refer to the document above to see a wide variety of options to use API calls to fire an Entry Event Journey and much more.

(1) Select POST as the default will be GET.
(2) Copy the REST Base URI from the installed package.
(3) Copy the above URL syntax for a triggered send (available from Marketing Cloud documentation).
(4) Enter in the external key for the triggered send definition. (Note: Marketing Cloud documentation does not specify adding the key: before the external key, but it is needed at least for Postman.
(5) Select Raw to enter in the code listed below.
(6) Select JSON in the drop-down menu.
(7) Enter the email address in the Address and SubscriberKey.
(8) Enter the data or payload that needs to be passed to the data extension in Marketing Cloud.
(9) Click send.
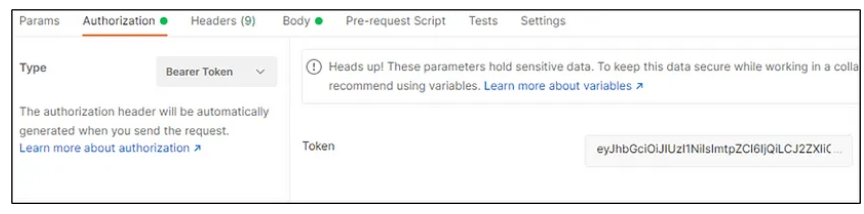
One last thing: before clicking send, copy the access token from the Get Token Request, and paste it into the Authorization tab for the Trigger Request. Select Bearer Token type.
You should receive a confirmation response that the API was made.
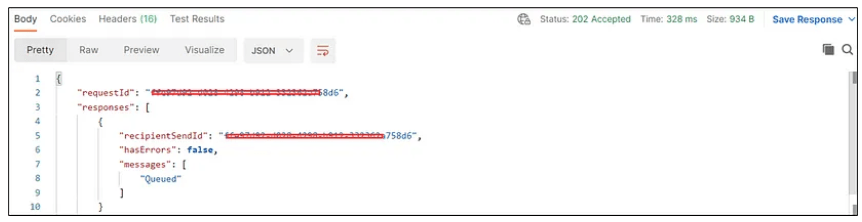
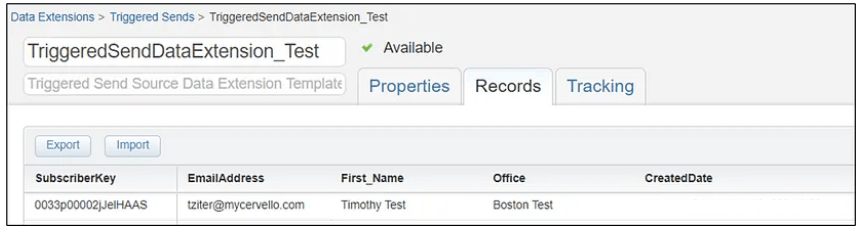
In Marketing Cloud you should see the subscriber above be sent a Triggered Send and their data populated in the Triggered Send data extension.
In future blogs we’ll cover how to set up Postman to use environments, to send different types of API calls to Marketing Cloud and much more.
Have fun sending those API calls!
