lcome to this seven part blog series on how to set up a separate Marketing Cloud business unit and connect it to Salesforce and AgentForce.Welcome our five part blog series on how to set up the Marketing Cloud Connector. In these blogs we will walk you through each step using the use case of creating a separate Marketing Cloud business unit.
Here’s the link to our first blog post which covered how to set up a new business unit.https://handsonsfmc.com/how-to-set-up-a-new-business-unit-in-marketing-cloud/
And here are the three future sessions that we will sending blogs in the coming days:
| Topic | Link |
| Salesforce CRM Settings | https://handsonsfmc.com/how-to-set-up-the-marketing-cloud-connector-salesforce-crm-settings/ |
| Marketing Cloud Configuration settings and Connection! | https://handsonsfmc.com/how-to-set-up-the-marketing-cloud-connector-marketing-cloud-configuration/ |
| Connection testing & Validation | https://handsonsfmc.com/how-to-set-up-the-marketing-cloud-connector-connection-testing-validation/ |
Before we start we highly recommend checking out the fantastic Trailhead Module that Salesforce created on this topic: https://trailhead.salesforce.com/content/learn/modules/marketing-cloud-connect
Part I: Install the Marketing Cloud Connector managed/Installed Package
First, click on one of the following URLs:
– Production Org: https://sfdc.co/MCC
– Sandbox Org: https://sfdc.co/MCCSandbox
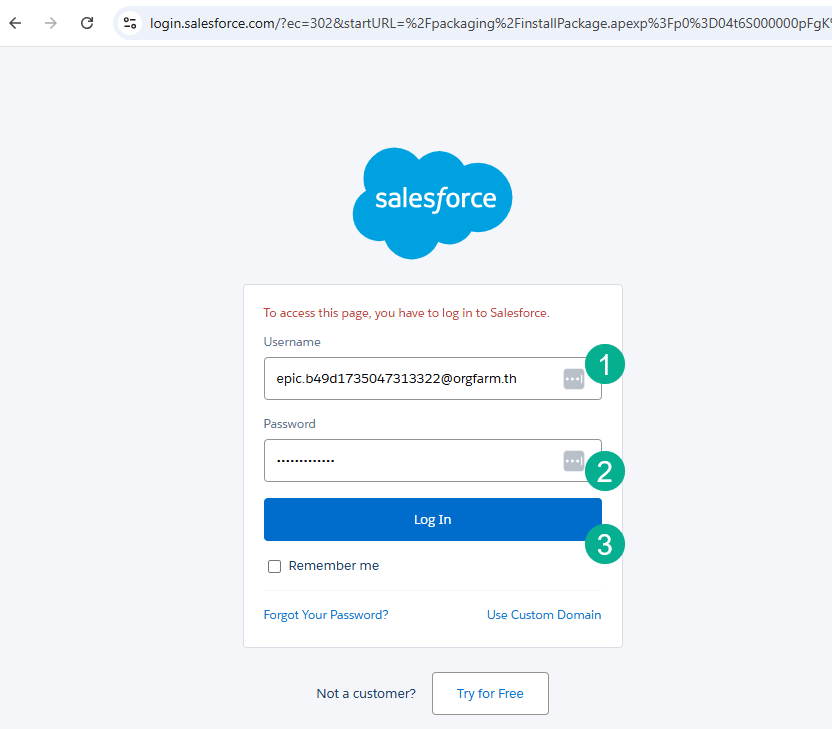
(1) You’ll need to enter in the User Name of the org that you created in the AgentForce Setup. For a walkthrough on how to set up an AgentForce org check out the blog at our sister site howtoagentforce.com: https://howtoagentforce.com/2024/12/26/how-to-get-set-up-with-agentforce/
(2) Enter in the password.
(3) Click Log In.
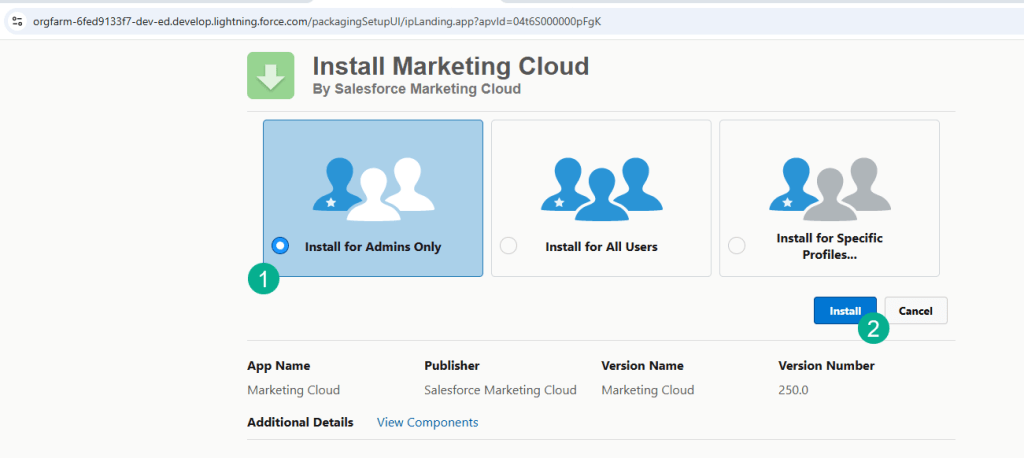
(1) Keep the default setting to set up for Admins only unless you want to open it up to all users or specific profiles.
(2) Click on the Install button.
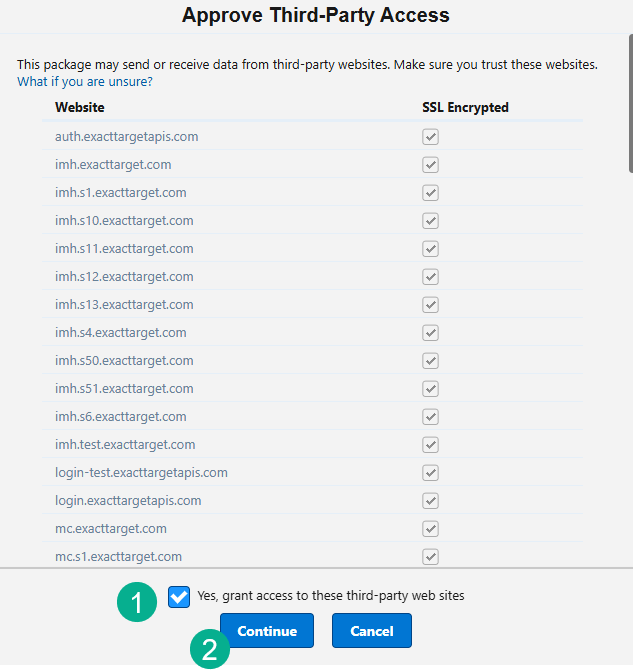
(1) Select the checkbox to grant access to third-party web sites.
(2) Select the Continue button.
Depending on how your org is set up you may encounter errors like the following.
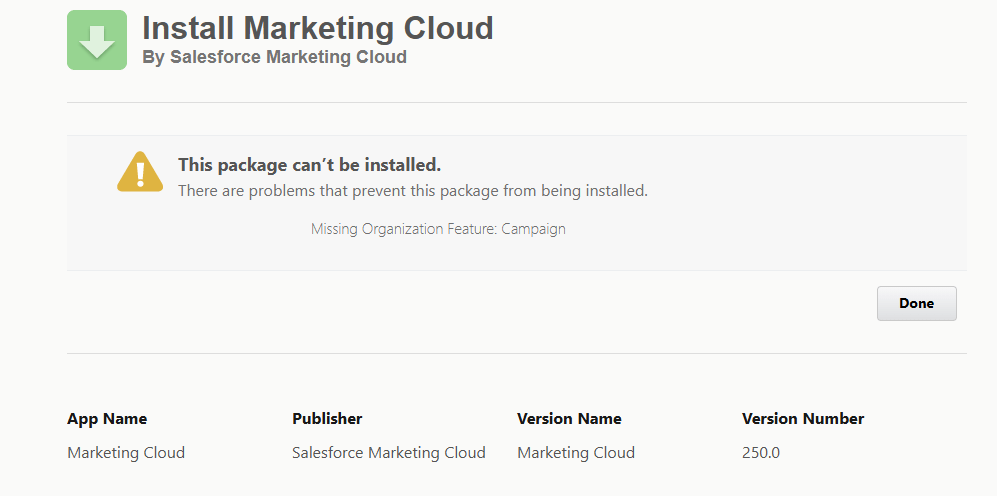
In this example the Salesforce org doesn’t have the Campaign object which is necessary for the connector setup.
Part II: Set up the Salesforce CRM connection settings
Step I: Modify User, Lead and Contact Page Layouts
In Setup navigate to Object Manager to edit the User page layout.
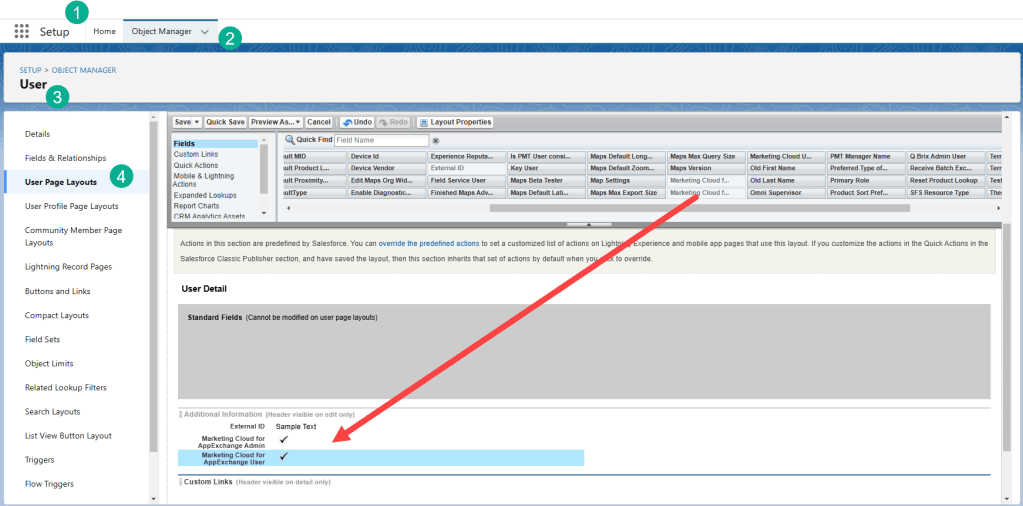
(1) In Setup in Sales Cloud.
(2) Select Object Manager.
(3) Search and select the User object.
(4) Select the page layout.
(5) Drag from the menu of fields Marketing Cloud for AppExchange User and Marketing Cloud for AppExchange Admin and click save.
Modify Lead Layout
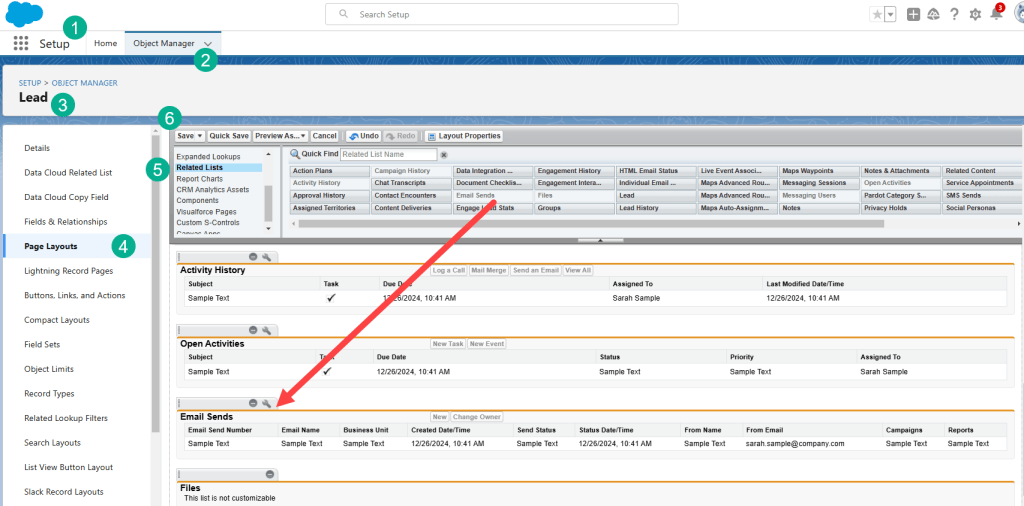
(1) Still in Setup.
(2) Select Object Manager.
(3) Select the Lead object.
(4) Select the lead page layout.
(5) Under Related Lists on the left pull down the Email Sends related list to the page layout.
(6) Click save.
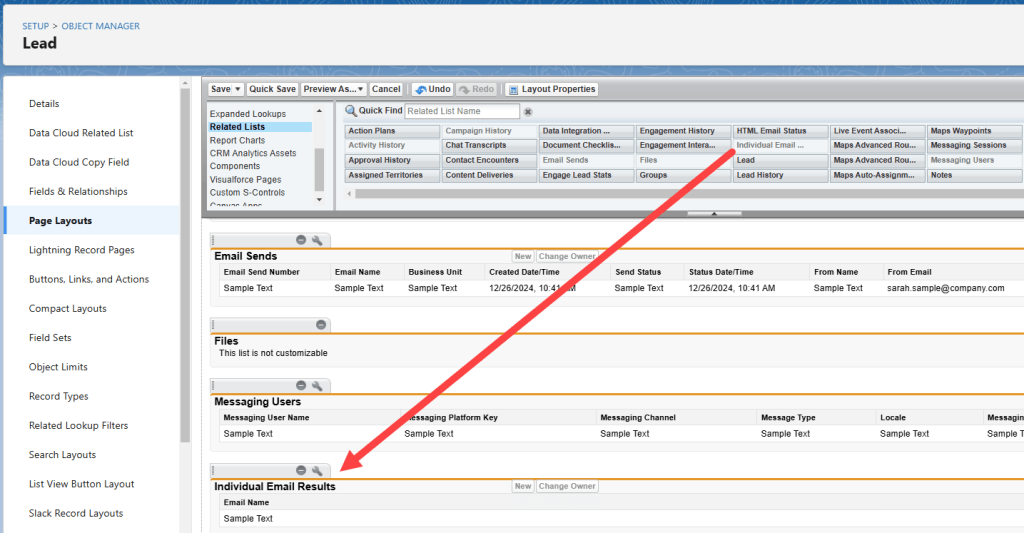
Next drag the Individual Email Results related list down to the bottom of the page layout.
Next you want to drag the LeadActions visualforce page to the page layout.
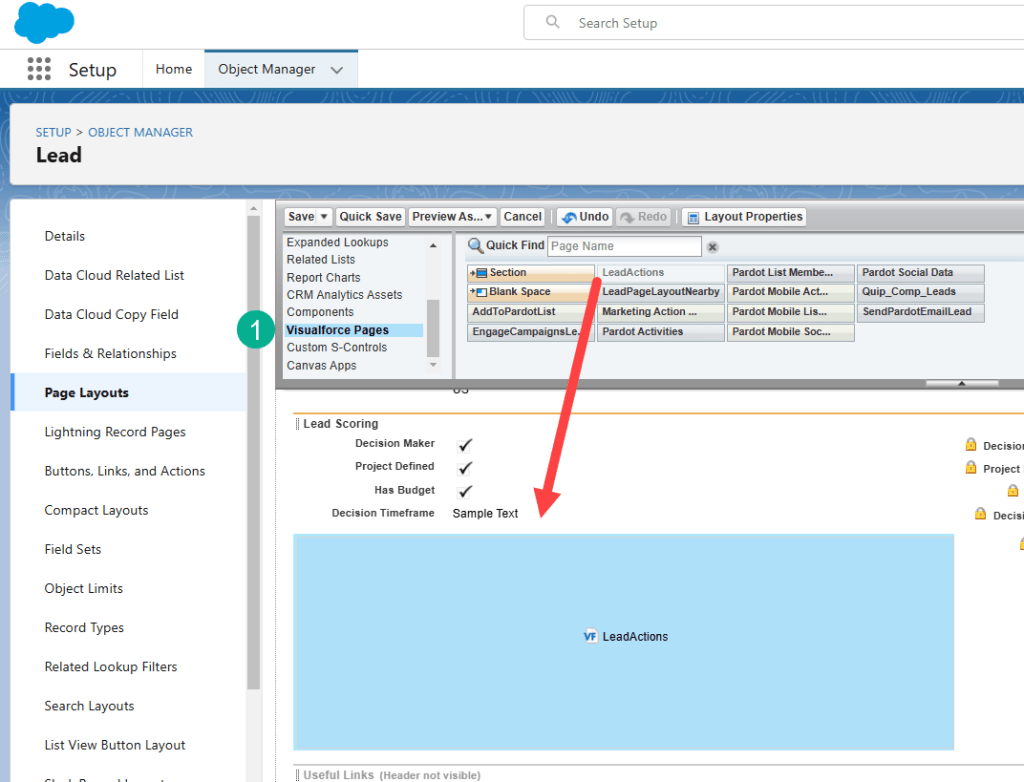
(1) Select VisualForce Pages from the menu on the left.
And drag the LeadActions field into the best spot for that field on your layout.
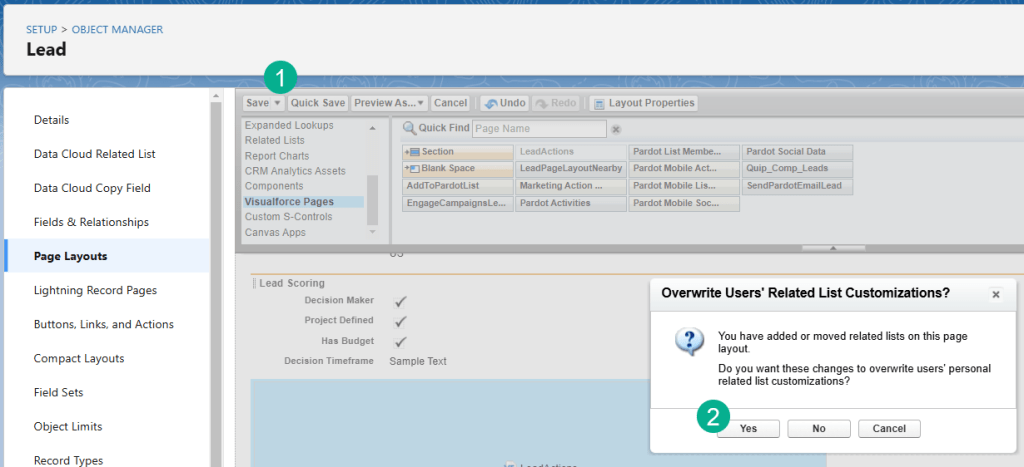
(1) Click Save.
(2) When the popup box that asks if you want these changes to overwrite, click “Yes”.
**Follow the same instructions as above but with the Contact object.
Step II: Grant Access to your Marketing Cloud Connect Admin
Navigate to the user that will be the Marketing Cloud admin which might be you.
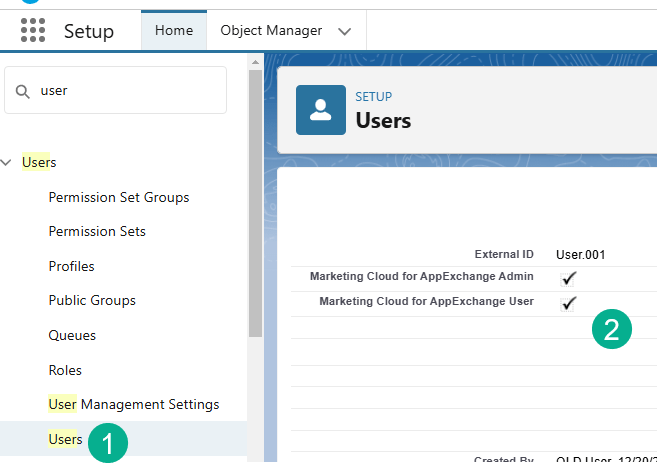
(1) Under Users in Setup.
(2) Make sure the checkboxes you’ve added above are checked for the designated Marketing Cloud admin user.
Step III: Set Up the CRM API User
Next you’ll want to create a CRM API user who will be connecting to Marketing Cloud.
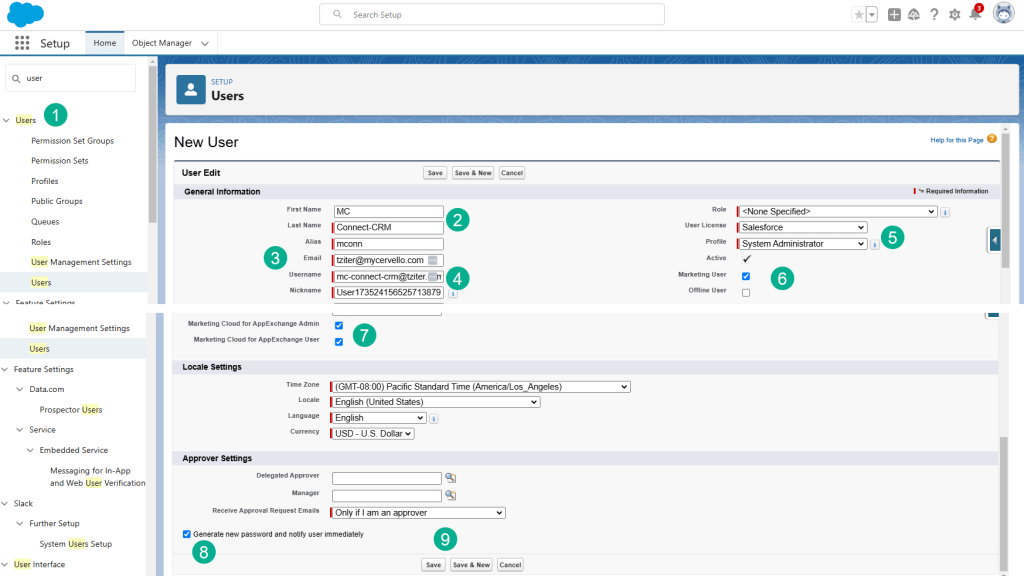
(1) Under Users select new user.
(2) Enter in first name: MC and Last Name: Connect-CRM
(3) Enter in an email address for someone who will be responsible for this API user, like your admin.
(4) Enter in a unique username, Salesforce recommends: mc-connnect-crm@yourname.com
(5) Select License: Salesforce, Profile: System Administrator
(6) Check the Marketing User checkbox.
(7) Check both of the Marketing Cloud for App Exchange User and Admin boxes.
(8) Check the box to generate new password.
(9) Click save.
You or your admin will receive an email to log in and set a password for the API user.
Step IV: Create a Permission Set in Salesforce CRM
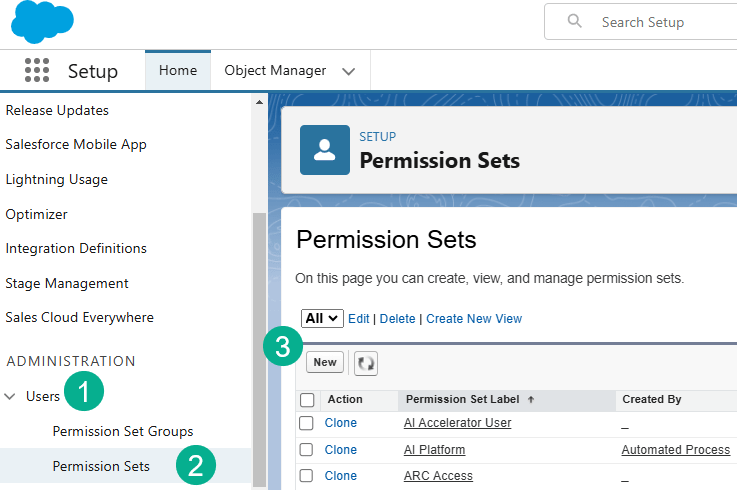
(1) Under Users.
(2) Permission Sets.
(3) Click on New.
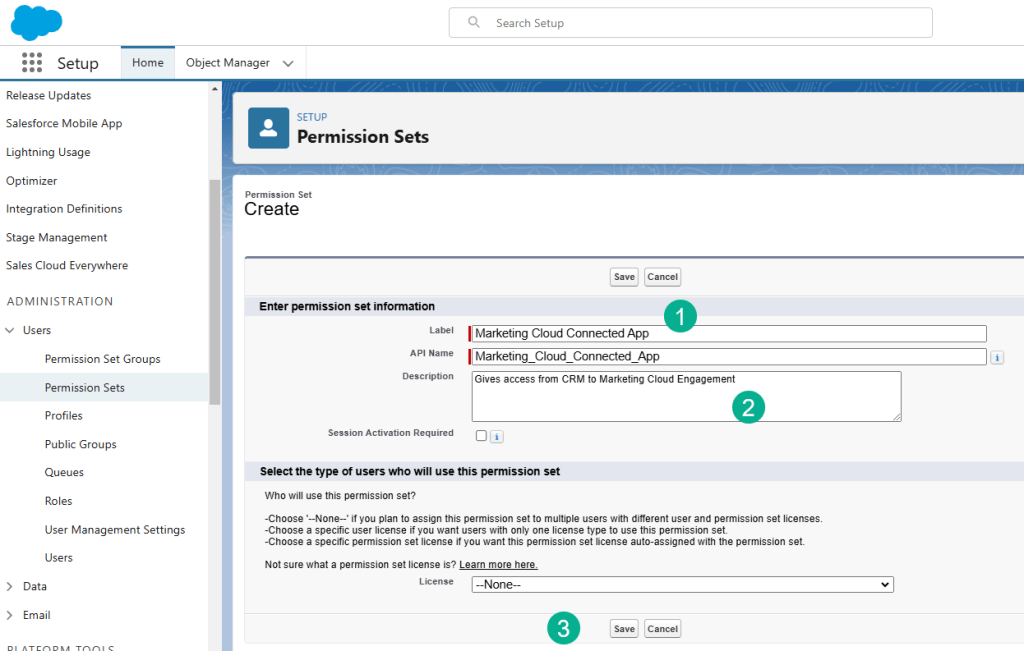
(1) Enter in: Marketing Cloud Connected App.
(2) Add in a description: Gives access from CRM to Marketing Cloud Engagement.
(3) And click Save.
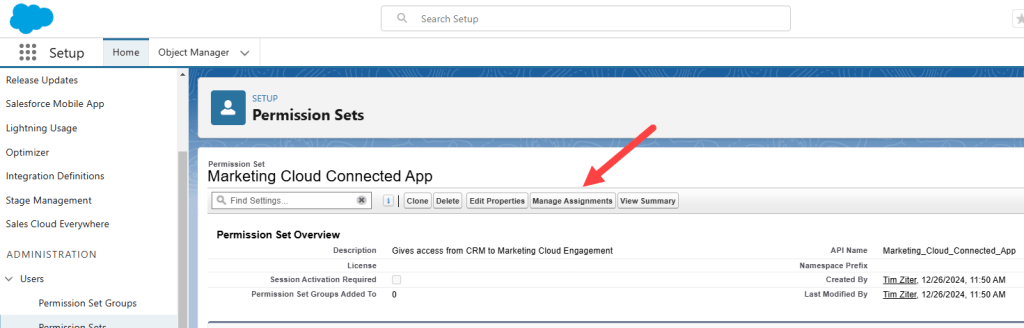
Click on Manage Assignments.

Add Assignment.
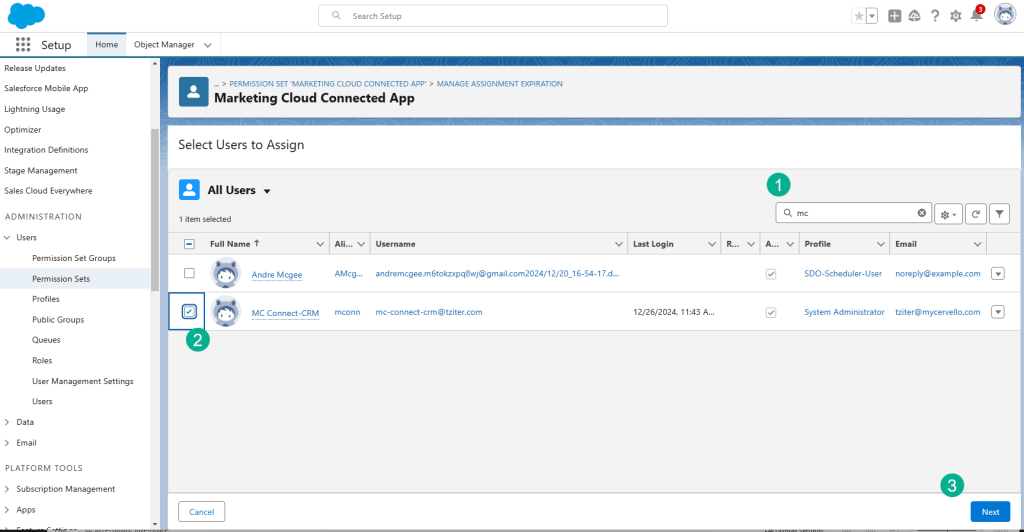
(1) Search for MC.
(2) Select the checkbox.
(3) Click on Next.

Click Assign.
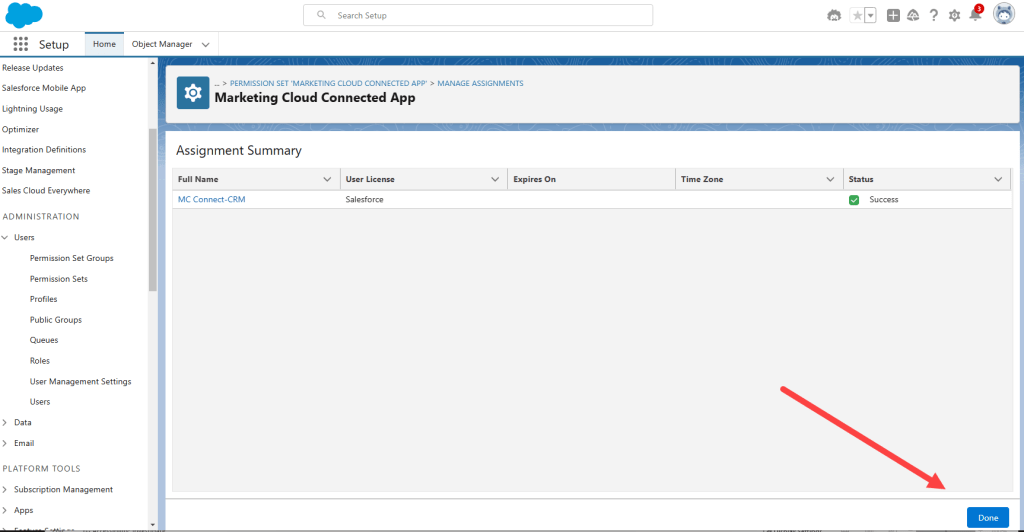
And Done.
Step V: Update Field-Level Security for Individual Email Results field on Leads & Contacts
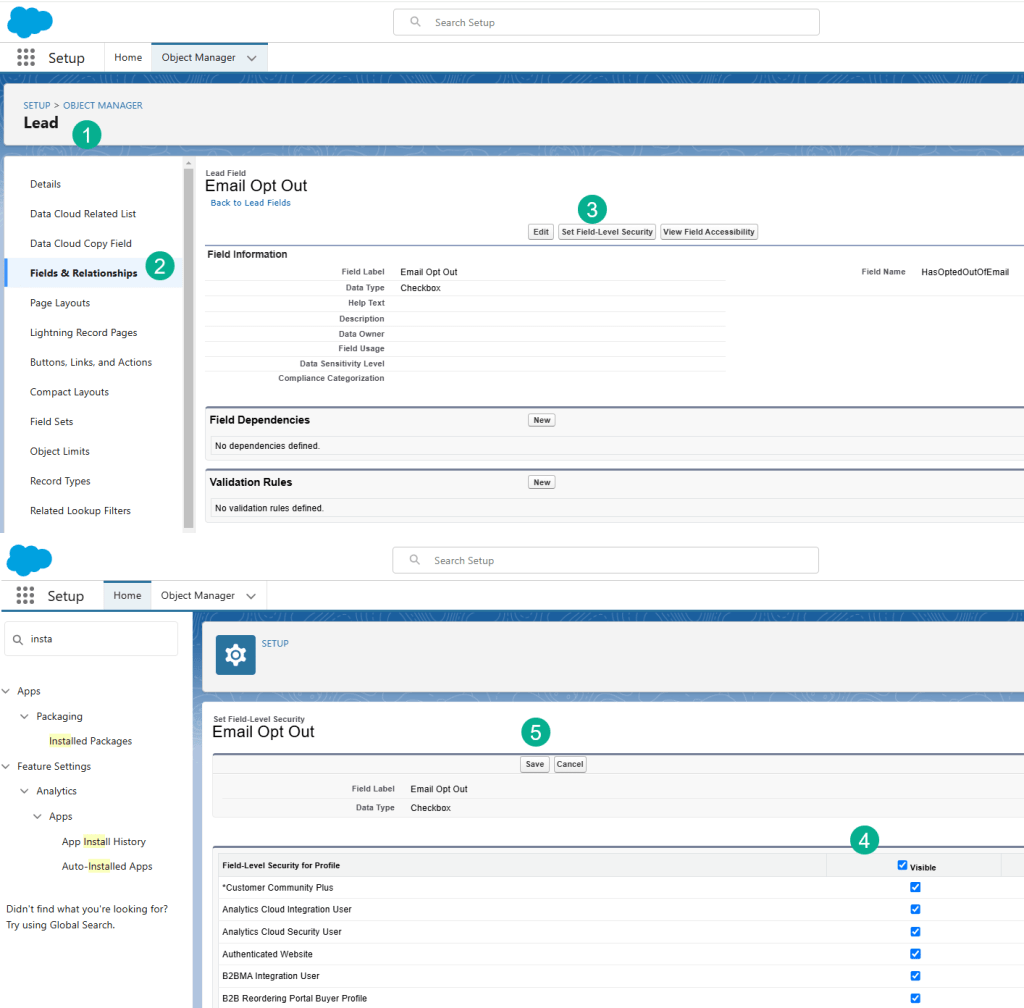
(1) Navigate to either the Lead or Contact.
(2) Select Fields & Relationships and navigate to the Email Opt Out field.
(3) Click Set Field Level Security button.
(4) Select the Visable checkbox to make it visible for all.
(5) Click Save.
Excellent and congratulations you’ve set up the CRM configuration for the Marketing Cloud Connector.
Next up:
| Topic | Link |
| Salesforce CRM Settings | https://handsonsfmc.com/how-to-set-up-the-marketing-cloud-connector-salesforce-crm-settings/ |
| Marketing Cloud Configuration settings and Connection! | https://handsonsfmc.com/how-to-set-up-the-marketing-cloud-connector-marketing-cloud-configuration/ |
| Connection testing & Validation | https://handsonsfmc.com/how-to-set-up-the-marketing-cloud-connector-connection-testing-validation/ |
