There are many different options to create customized, highly personalized notifications in Salesforce CRM and Marketing Cloud. In this notification walk through we will create a personalized task for sales reps in Salesforce CRM right from Marketing Cloud Journey Builder.
Before we start building the task creation functionality in Marketing Cloud, we’ll want to take a peek into Salesforce CRM via the “Object Manager” settings to understand the required fields to create Leads/Tasks.
To find required fields, select Task/Lead in Setup > Object Manager. Then select Page Layouts (the fields marked with a red star are required). A Task/Lead will not be generated unless all required fields are populated with a value in the Object Activity.
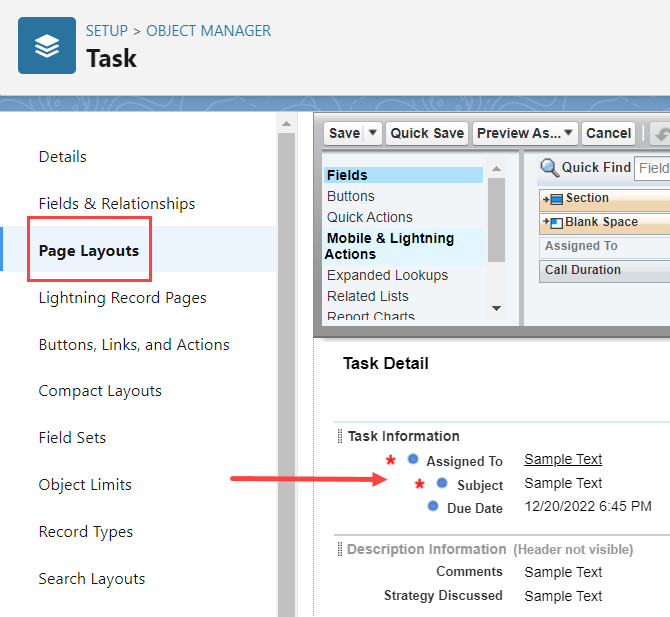
Create a list of those required and optional fields, capturing both their regular and API names. Watch out for custom or lookup field types as they can cause complications on the data synchronization end between both platforms.
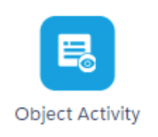
The Object Activity creates and updates objects in the Salesforce CRM environment. This walkthrough will go over how to set up the activity to create Task objects.
Select the Object Activity and select the Task.

(1) Type “Task” in the search and (2) select Task. You’ll want to “Create New” Task.
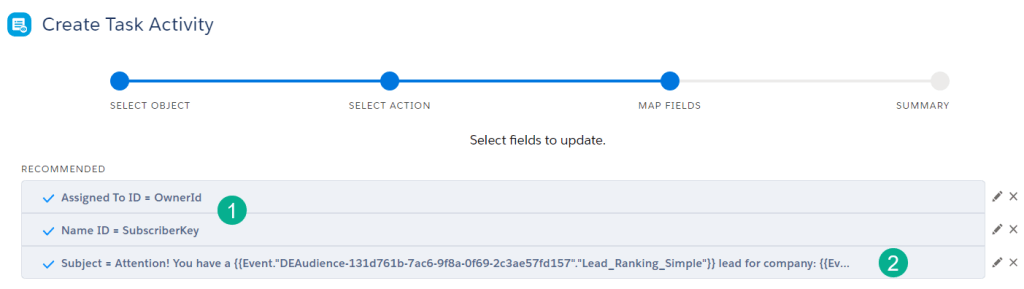
Then (1) fill in all required fields and utilize the data binding functionality to personalized fields where necessary.
For a higher complexity of field personalization (2) utilize what is called “data binding” in the Journey Builder UI to personalize each task and pull in the SalesWings Predictive score. To grab these “data bindings” for any variable to personalize follow these steps:
1. Create your subject line defining the variables that will be brought in to personalize: “Attention! you have a HOT Rank lead for Company: XYZ”.
2. In a separate document (like a notepad), create a template for the subject line identifying each of the variables needed to populate in your variable code.

3. Select the Subject field in the Task.
4. To create the handle bar “data binding” code for the SalesWings Predictive Score variable (1) Select the Journey Data dropdown, (2) select the variable, and then (3) the handle bar code will appear in the subject.
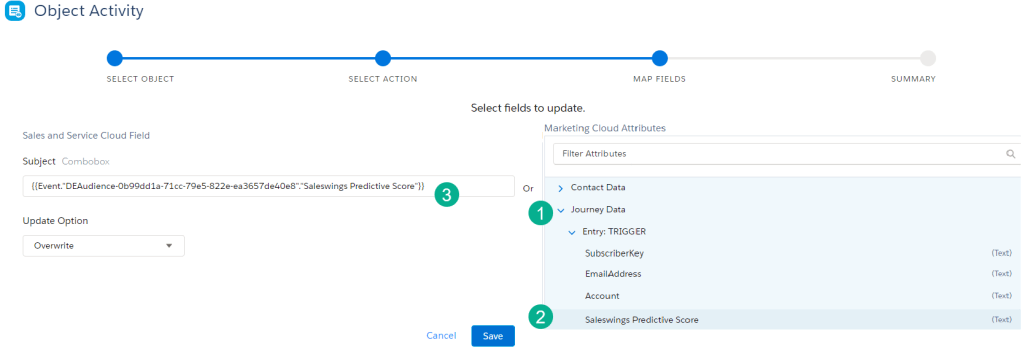
5. Copy the code and paste it into your notepad. Repeat the process for the Company and anyother variables to be personalized. The syntax in the notepad should look like the following:

6. Copy this line of code and paste it into the Subject Line space and Save.

When you generate a task it should look something like this:

7. Paste this syntax into the subject field to populate a custom 1-to-1 subject that will help the sales team cut through the clutter in all their tasks. Here’s an example of documentation on “data bindings”.
This content was featured on The Drip at SalesforceBen as part of the article created by the team titled: “Connect Marketing Cloud and Salesforce to Send Sales Team Notifications”. In partnership with our friends at Saleswings.
