An API Event Journey can be a powerful option in your marketing automation playbook as it allows you to fire a journey via an API call. In this blog we’ll cover the four major steps to setting up a basic API Entry Event and test the functionality.
Steps:
(1) Create a data extension to capture the data
(2) Create the Entry Event
(3) Create a basic journey and activate it
(4) Test sending data via an API using Postman
Step I: Create a data extension to capture the data
Before you can create the journey you need to build a data extension to capture the payload from the API call.

(1) In Email Studio in Marketing Cloud
(2) Select the Subscriber tab and select Data Extensions
(3) Select the folder you want to create a data extension
(4) Select create
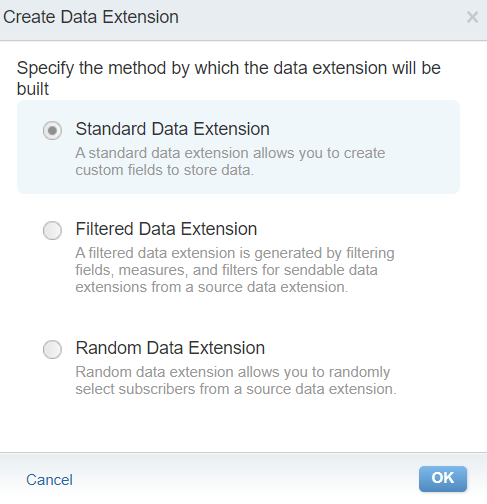
A standard data extension is fine.
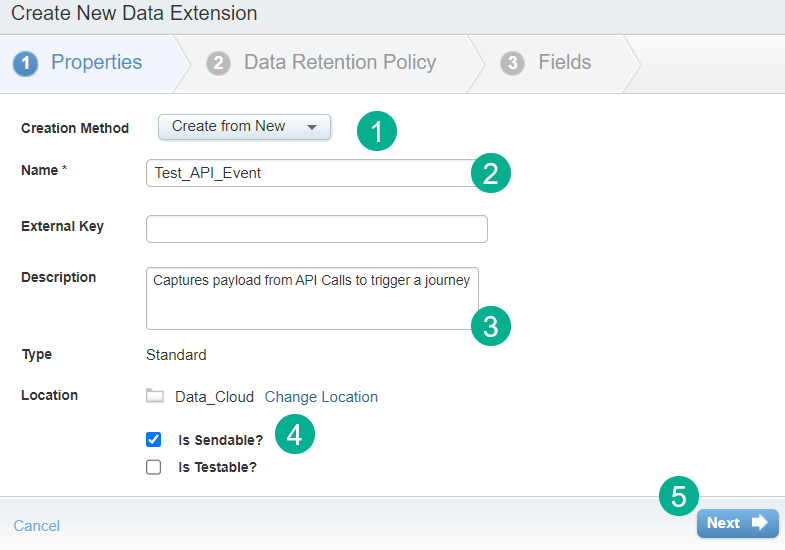
(1) Leave the creation method as is under “Create from New”.
(2) Add in a name for your data extension.
(3) Add a description so you’ll know what it’s for later on.
(4) Select Is Sendable or else Journey Builder won’t be able to find it.
(5) Select next.
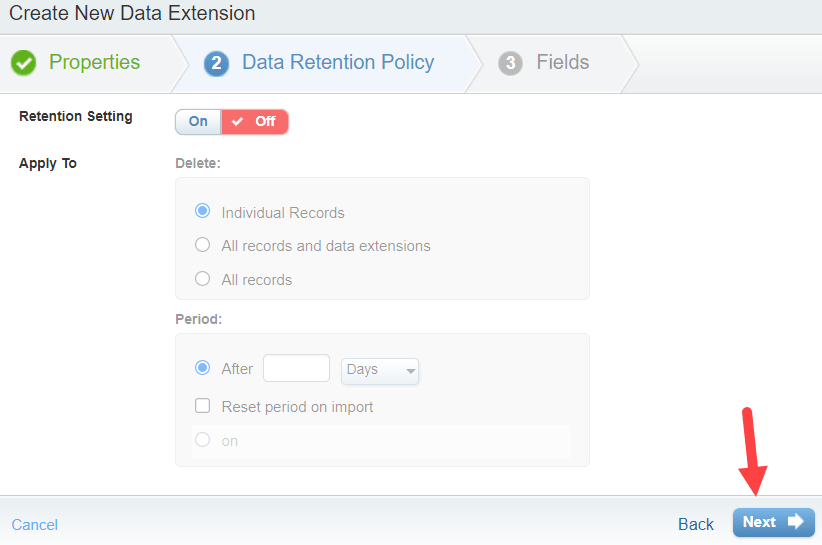
Depending on your instance turn on Retention settings. Or leave them off. and select Next.
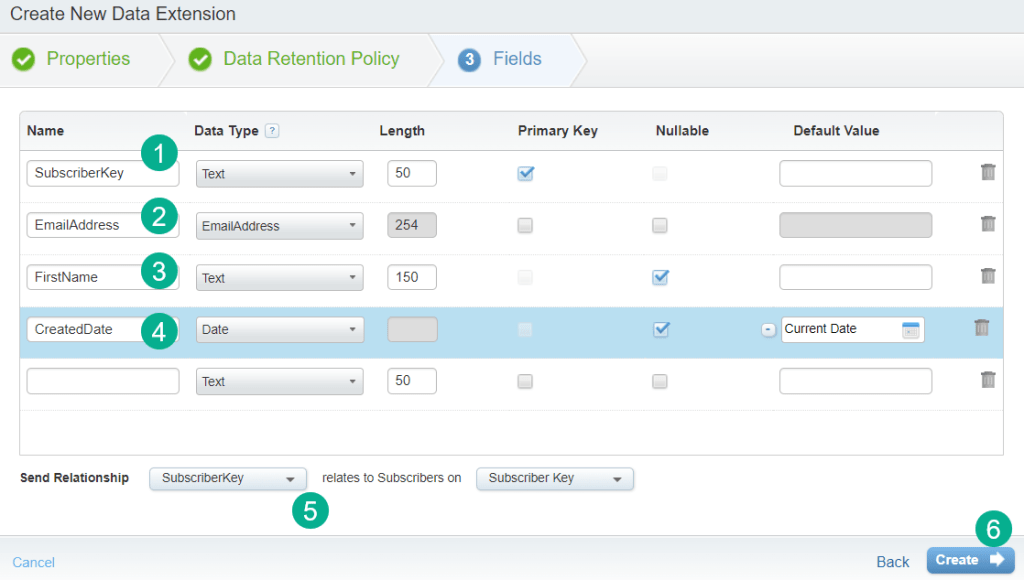
(1) Typically you’ll want to include a SubscriberKey. In our instance we’ll be using a contact ID from Sales Cloud as our SubscriberKey.
(2) The EmailAddress is needed if sending an email. Select the EmailAddress data type.
(3) We’ll add one personalization field as well.
(4) And a default CreatedDate field that will timestamp each time a record is added.
(5) Typically you’ll want to select the SubscriberKey as the Send Relationship vs the email address or any other field. This determines which field will become the subscriberkey in Marketing cloud or determine the unique record.
(6) Select Create.
This completes the creation of the data extension now we move onto building the API Event in Journey Builder.
Step II: Create the API Event in Journey Builder
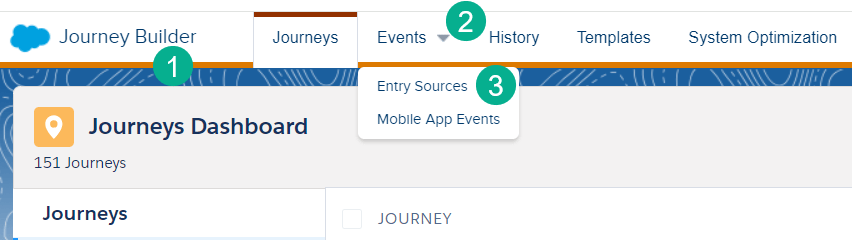
(1) In Journey Builder.
(2) Select the Events tab.
(3) And select Entry Sources.
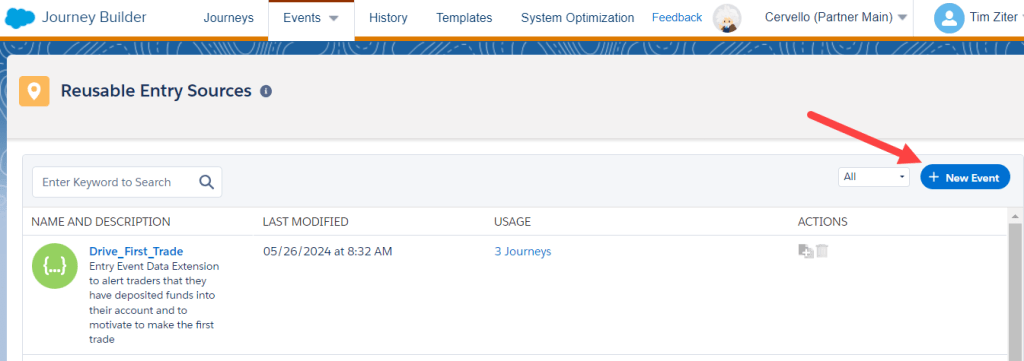
Select New Event
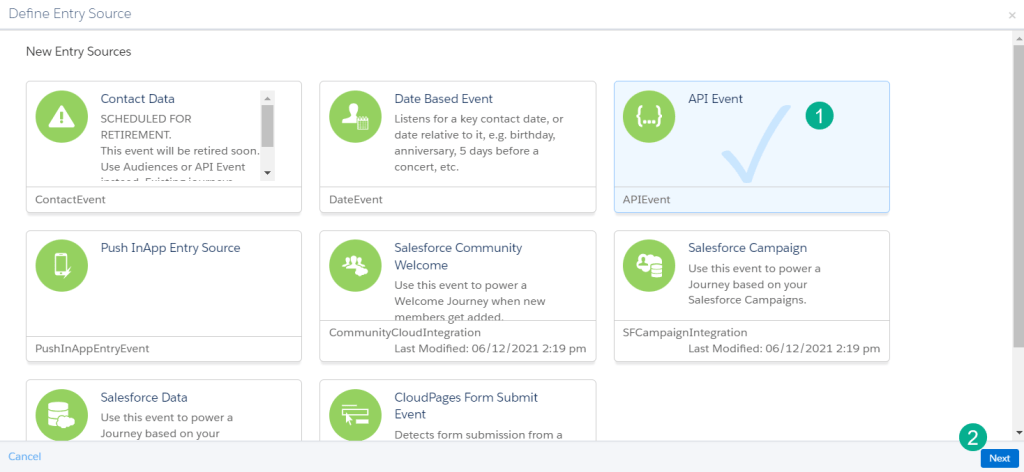
(1) Select API Event and
(2) Select Next.
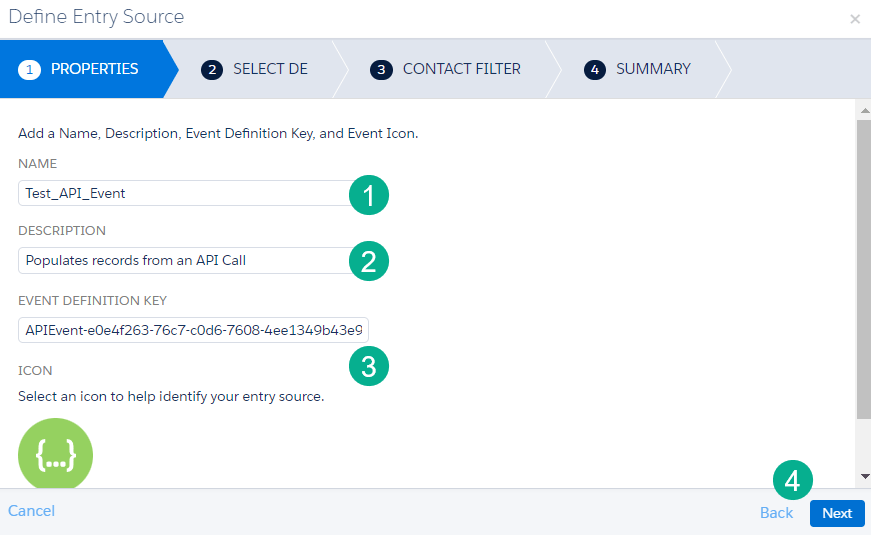
(1) Enter in a name.
(2) Add a description to remember the purpose of the event.
(3) Note the API Event Definition Key – we will use this in Postman later on in the article.
(4) Select Next.

(1) Navigate to the Data Extension you created above.
(2) Select Next.
Click Next and then Done and you are done creating an API Event hooked up to your data extension
Step III: Create a basic journey and activate it

(1) Navigate to Journey Builder.
(2) Select “Create New Journey”.
(3) Select a Multi-Step Journey.
(4) Click “Create”.

(1) Name your journey.
(2) Drag over an API Entry Event.
(3) Click Save.
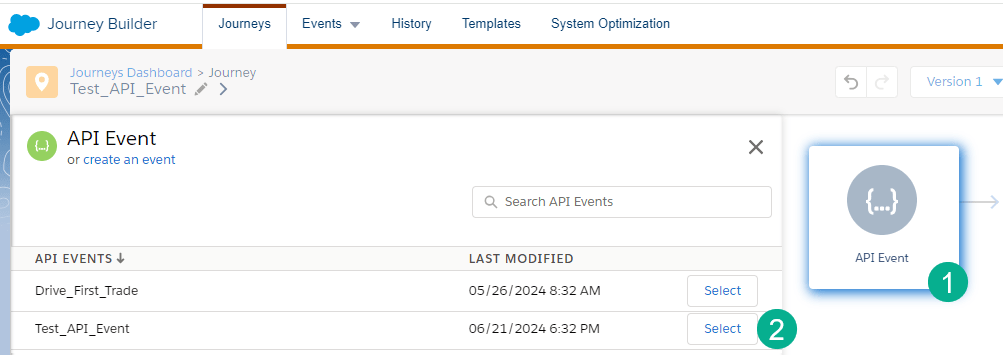
(1) Click into the API Event.
(2) Navigate to the Test_API_Event that you created and select it.
To test the API Event functionality all we are going to add is a decision split. We can add emails and other functionality later.
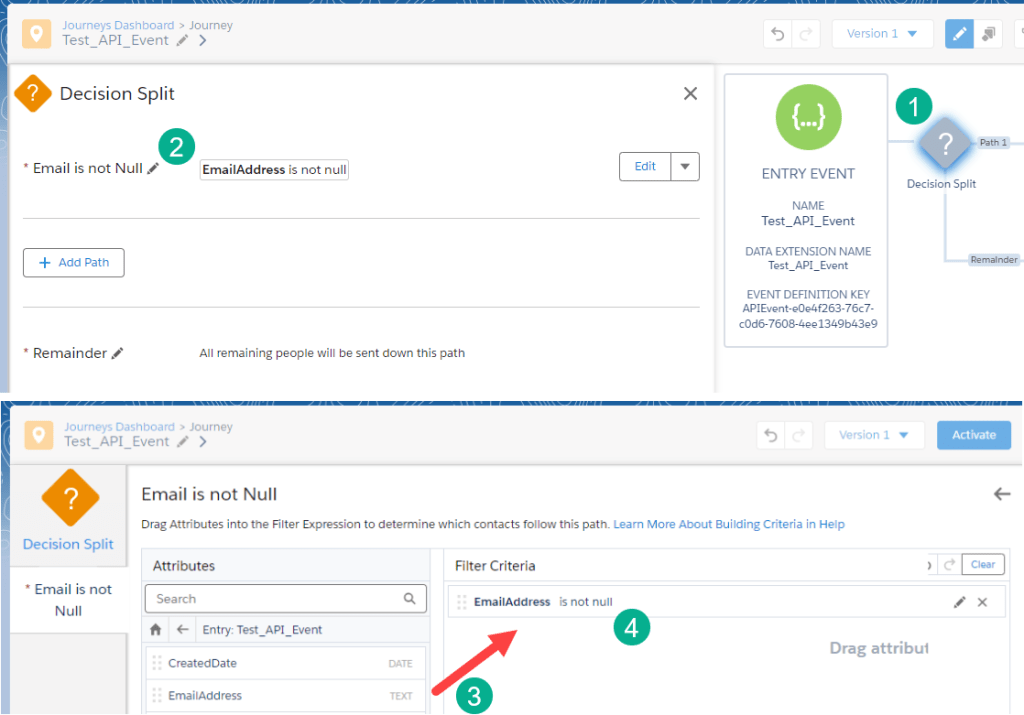
(1) Add a decision split to the Journey canvas.
(2) Name it something like “Email is not Null”.
(3) Edit the decision split and drag over the EmailAddress attribute.
(4) And set it to “is not null”.
Make a few more minor adjustments and then activate the journey.
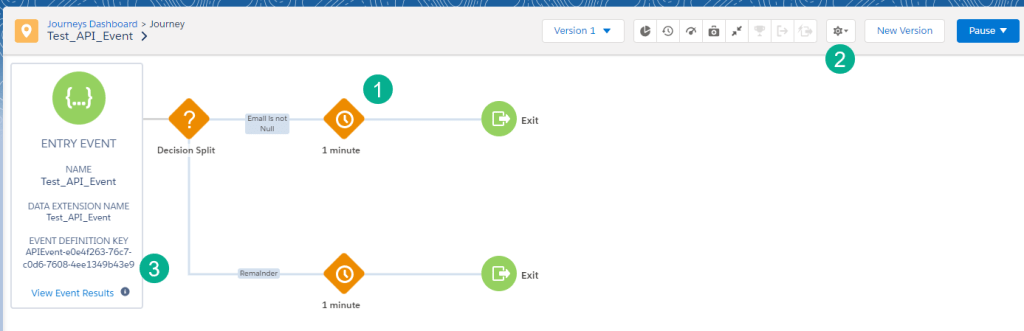
(1) Change the end wait steps to 1 minute so you don’t hold up contacts in the journey.
(2) Configure the journey settings, “Re-entry only after exiting” is standard practice.
(3) Note the Event Definition Key as this is what we’ll use in the next step to test triggering the journey.
Step IV: Test sending data via an API call using Postman
In out last step we’ll test the functionality of our configuration by sending an API call via Postman: https://www.postman.com/.
For reference on the configuration needed to make the API call please refer to the Marketing Cloud Programming Language reference documentation here:https://developer.salesforce.com/docs/marketing/marketing-cloud/references/mc_rest_interaction/postEvent.html
Here’s a setup in Postman. This assumes you’ve set up your Auth call to get a token connecting to an Installed Package in Marketing Cloud. For reference on how to set up an Auth call please refer to this HandsonSFMC page: https://handsonsfmc.com/ssjs-bootcamp-week-2-http-auth-call/

(1) In the URL first set it to POST and copy in the Rest Url from the installed package.
(2) Customize the Url based on the documentation to make an API Event call: interaction/v1/events.
(3) Choose a Subscriberkey for the contactkey data value.
(4) Enter in the Event Definition Key from the journey created above.
(5) Enter in the payload depending on your data extension configuration.
(6) Send your Auth call to generate a token
(7) Click back into your REST call configuration and add in the token (if it doesn’t already automatically populate).
(8) Click send in the Rest configuration.
(9) An EventInstanceID will appear in the results if the call was successful.
Checking back in the Journey we should see the subscriber enter in the journey and populate the payload into the data extension.

(1) The subscriber entered and completed the journey path.
(2) In the data extension all fields are populated as expected
Now that you know the pipes work you can build out the rest of the journey.
