Every Marketing Cloud accounts comes with a FTP, but you need to do a few steps in order to connect to the FTP. This blog article covers the following steps to connect to the FTP in your Marketing Cloud BU.
1.) Determine what stack your BU sits on
2.) Setup an FTP Account in Marketing Cloud
3.) Set up a FTP tool
4.) Connect to the Marketing Cloud FTP
Step I: Determine what stack your BU sits on
You’ll need your stack number to connect to the FTP so this makes sense as a first step. Navigate to the Salesforce Trust Site: https://trust.salesforce.com/?_ga=2.49435045.2091955978.1731278876-369948884.1722979853
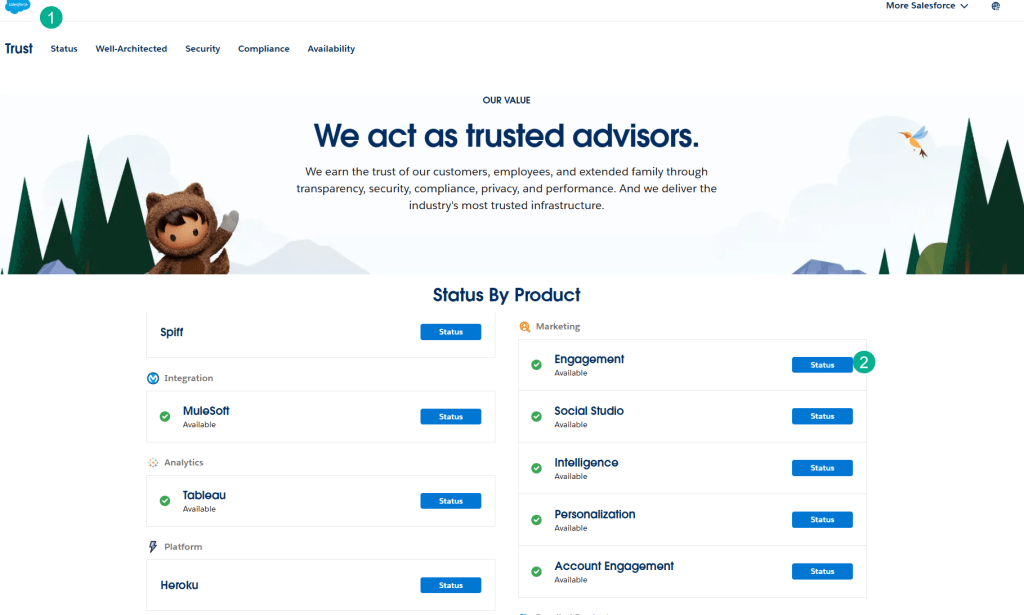
(1) Navigate to the Trust site.
(2) For general Marketing Cloud (Exact target) click on the Engagement Status button

(1) In the next Trust page screen.
(2) Enter in your MID from your parent BU
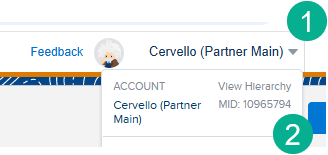
(1) To find your MID, in Marketing Cloud hover over the name of your BU.
(2) and copy the MID, you’ll want to select the main or parent BU.
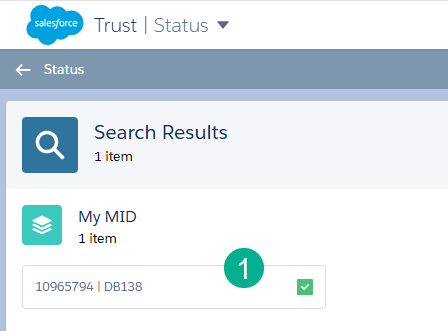
(1) When you enter your MID the following screen will appear and you cant to click on the box with your MID.
(1) Verify the MID.
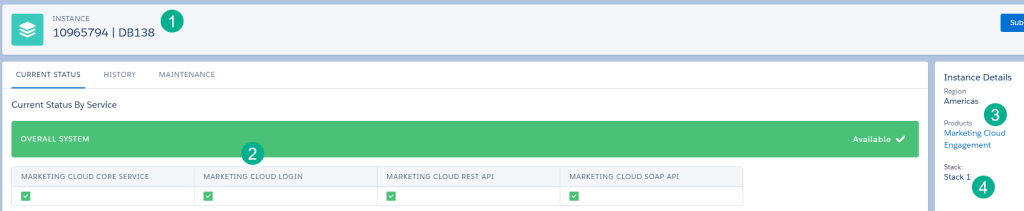
(2) You will be presented with a health check of the various areas of Marketing Cloud.
(3) The Overall product will be displayed.
(4) And the Stack will be identified, in our case it’s stack 1.
Step II: Setup an FTP Account in Marketing Cloud
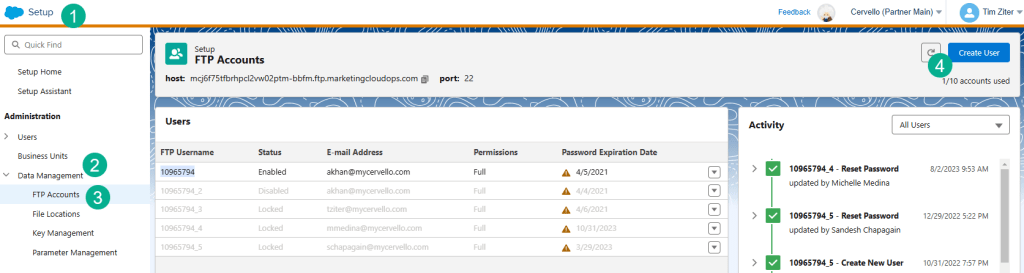
(1) Under Setup in Marketing Cloud.
(2) Under Data Management.
(3) Select FTP Accounts
(4) Click on the Create User Button.
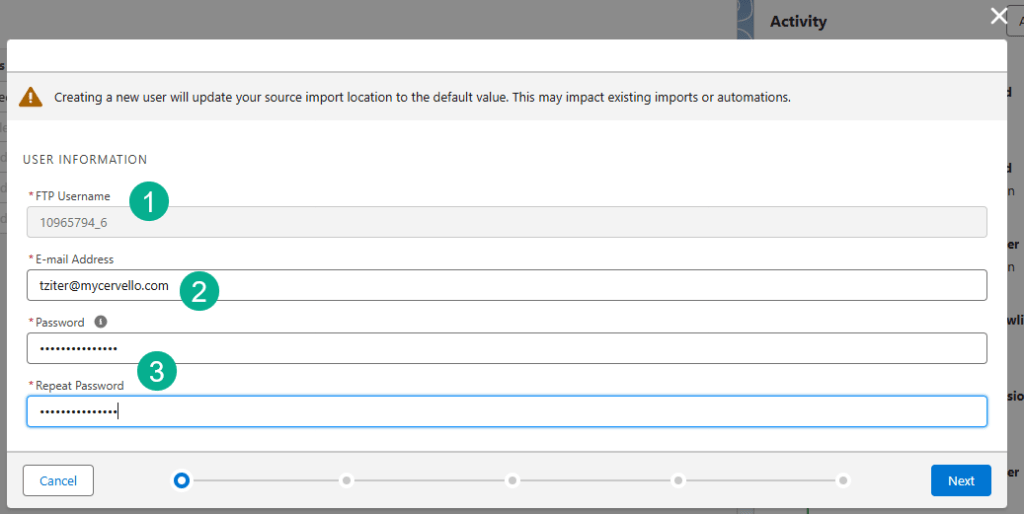
(1) A FTP Username will automatically populate on this field.
(2) Enter in your email address.
(3) Enter in a password and click on the Next Button.
Copy the UserName and Password in a notepad to connect with your FTP tool.
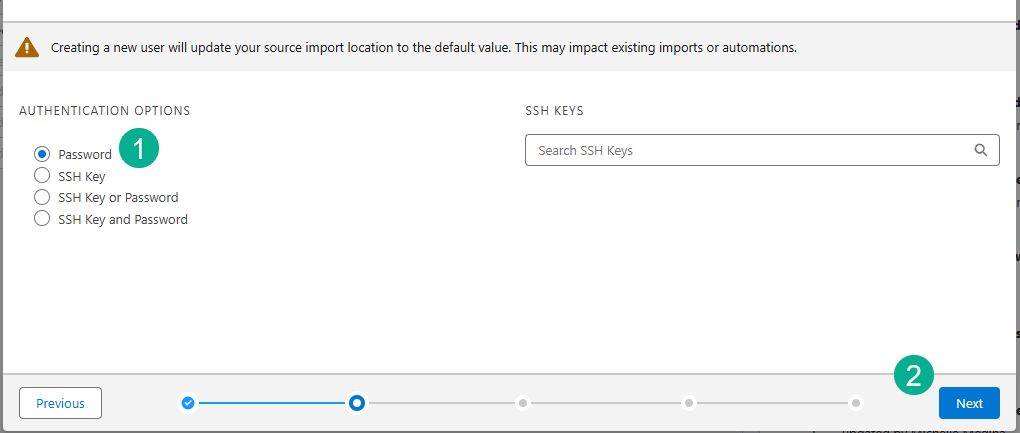
(1) Select the Password radio button.
(2) And select Next.
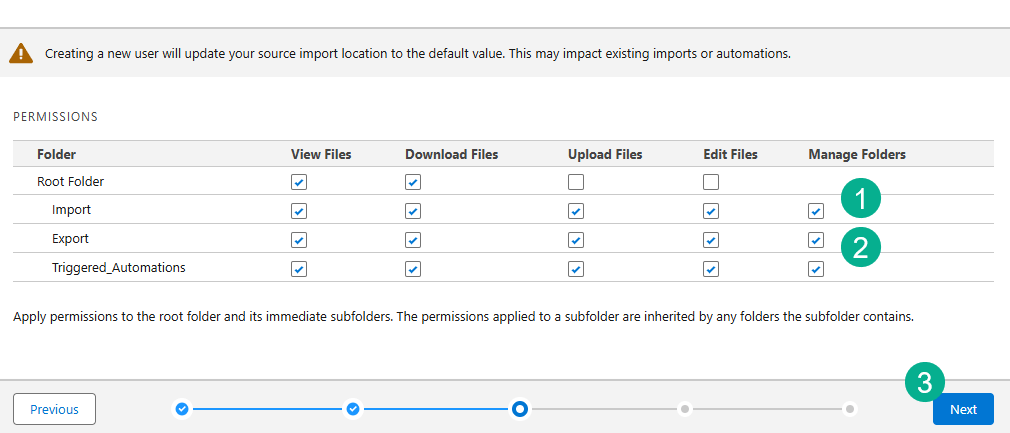
(1) and (2) Select the permissions on the key folders (Import and Export).
(3) Select Next.
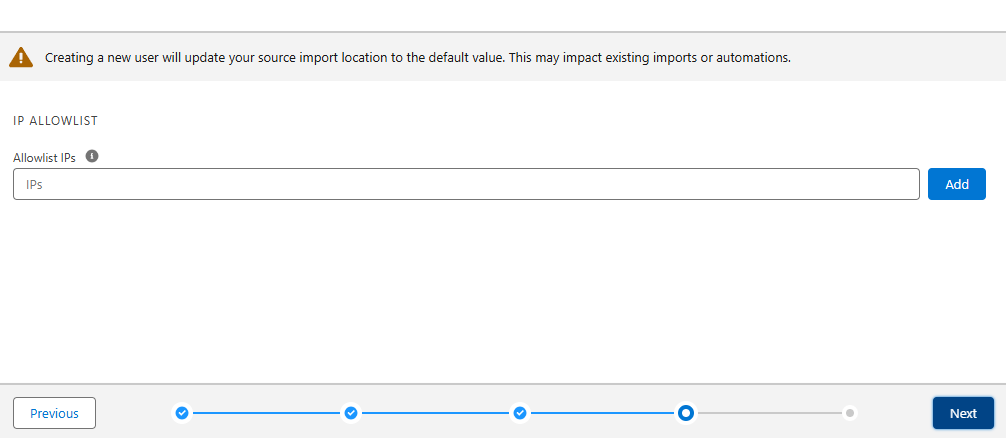
Add any IPs to allow and or click the Next button.
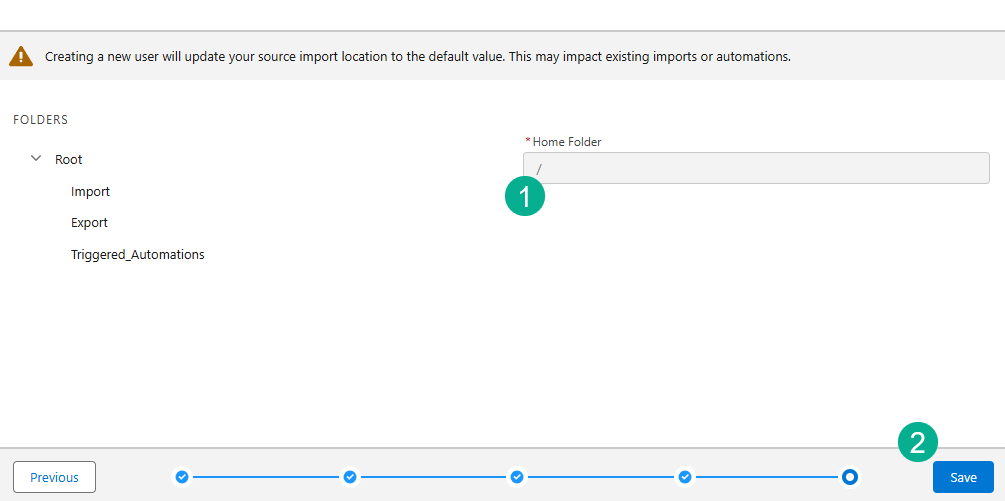
(1) No need to add a folder directory.
(2) Click the Save Button.
Step III: Set up a FTP tool
We like using the FTP tool Filezilla: https://filezilla-project.org/
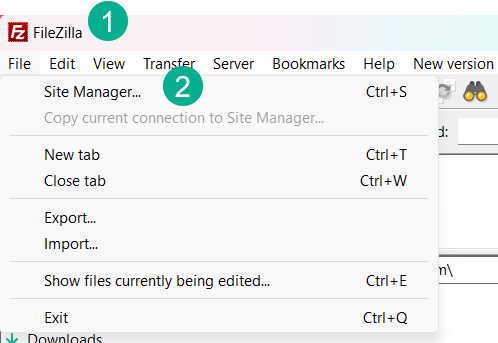
(1) In the FileZilla program
(2) Select the Site Manager.
Step IV: Connect to the Marketing Cloud FTP

(1) If you don’t have a site setup already, select New site.
(2) The new site will appear under My Sites.
(3) Select SFTP – SSH File Transfer Protocol under Protocol.
(4) Enter “ftp1.exacttarget.com, substituting your stack number.
(5) Enter the User you created in the section above.
(6) Enter the Password.
(7) And select Connect.
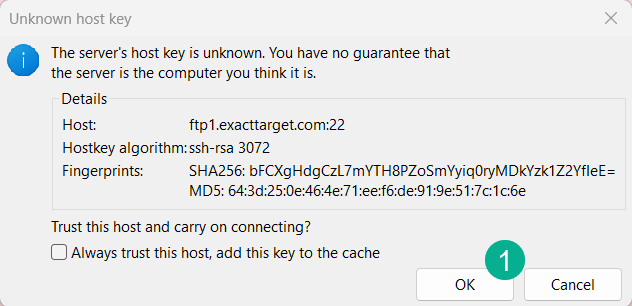
(1) Click the “Ok” button.
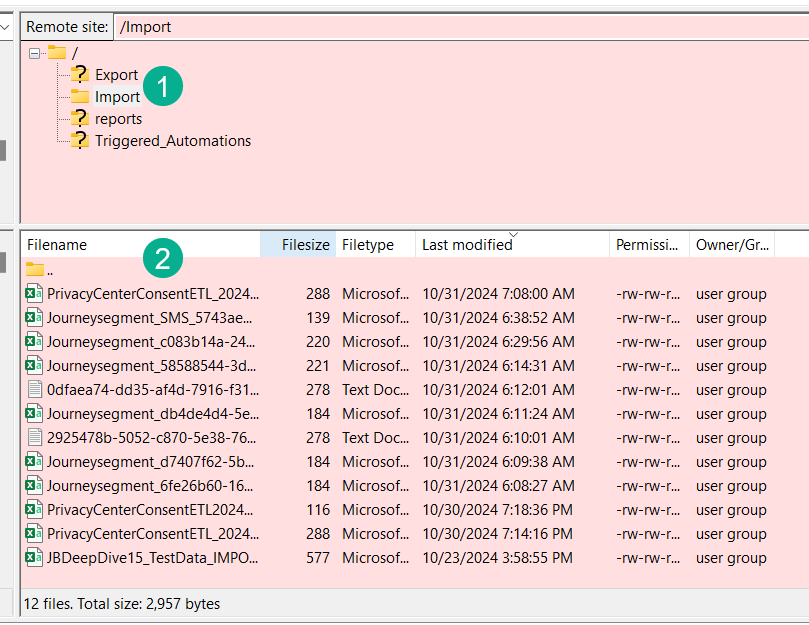
(1) FileZilla should connect and you should be able to see the folders in the FTP, if you select the Import folder.
(2) You can see all the files being dropped in either Import or Export folder.
Gaining access to the FTP is essential for any user of Marketing Cloud. Having visibility to the files in your Import/Export folders can be helpful to validate automated processes. For example in the automated updating of the All Subscribers database covered on this blog: https://handsonsfmc.com/how-to-set-up-an-automated-unsubscribe-process-in-marketing-cloud-part-i/ it can be helpful to see that file be populated in the Import folder before the Import Activity pulls in the file.
