Data Views are an amazing data resource in Marketing Cloud. They provide a wide array of engagement and subscriber information that can be helpful to drive marketing automation and visualize data.
The problem with Data Views: Limited to only 6 months of data
The only limitation of the Data View data set is that the data is available for most views is only available for the past 6 months.
Solution: Create an automation to capture key Data Views on a daily basis
We’ll walk through how to use queries to record the data from these views on a daily basis and store the data in data extensions.
Quick Look at Data Views:
Let’s take a peek at these amazing data views. A great resource for the views is at Mateusz Dabrowski’s site: https://mateuszdabrowski.pl/docs/config/sfmc-system-data-views/#_click
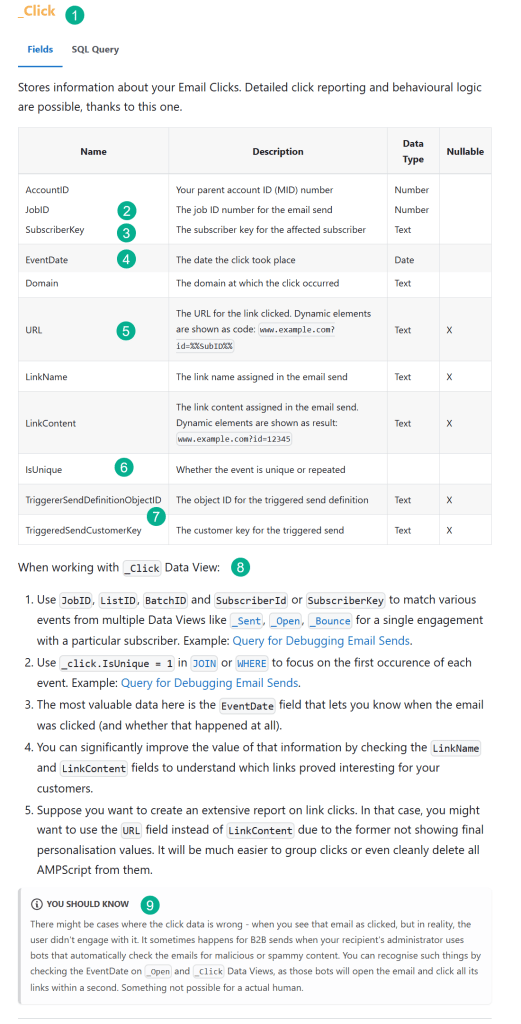
(1) For each data views this is the syntax you’ll use for the view in your query, _click
(2) There are a lot of key fields in each data view, in the Click data view the JobID allows you to connect to other views like _Job to open up more variables.
(3) SubscriberKey identifies the subscriber who clicked.
(4) EventDate identifies when the engagement occurred.
(5) The URL variable will provide helpful information to determine which link on the email was clicked.
(6) inUnique is helpful to remove those multiple clicks to not over-inflate stats.
(7) The TriggeredSend variable is another variable that you can connect to additional data points like determining trigger sends.
(8) Mateusz provides additional tips for each data view like using the isUnique to focus on the first occurence of the click.
(9) Mateusz also calls out more details related to click bots. For more information on how to handle Clickbots check out our blog here: https://handsonsfmc.com/how-to-detect-bot-clicks-in-marketing-cloud/
The Use Case:
Let’s say you want to pull a list of prospects or customers who have clicked on an email in the last 12 months. This is typically best practice to not email a subscriber who hasn’t engaged in an email after 12 months.
When you query the _Click data views you notice the problem in that it only identifies subscribers going back 6 months.
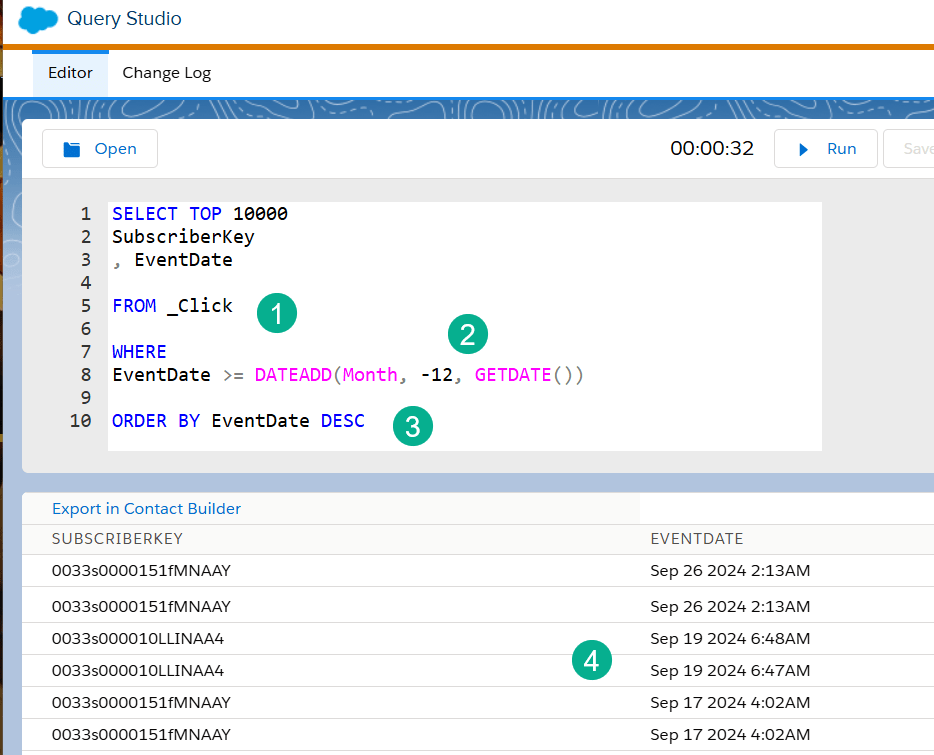
(1) Using the _Click data view.
(2) In our WHERE clause we are looking to pull in subscribers who have clicked in the past 12 months. NOTE: This query was run on January 11th.
(3) We’re using the ORDER BY function to sort the results the oldest first by using the DESC modifier.
(4) You can see by the EventDate that the last engagement data point was on September 26th.
The automation build – Planning
Before you start building out your Data View automation you need to consider the following areas.
(1) Which Data Views to capture data.
Mateusz breaks down the data views into six different groupings which is very helpful to consider when building your Data View Automation

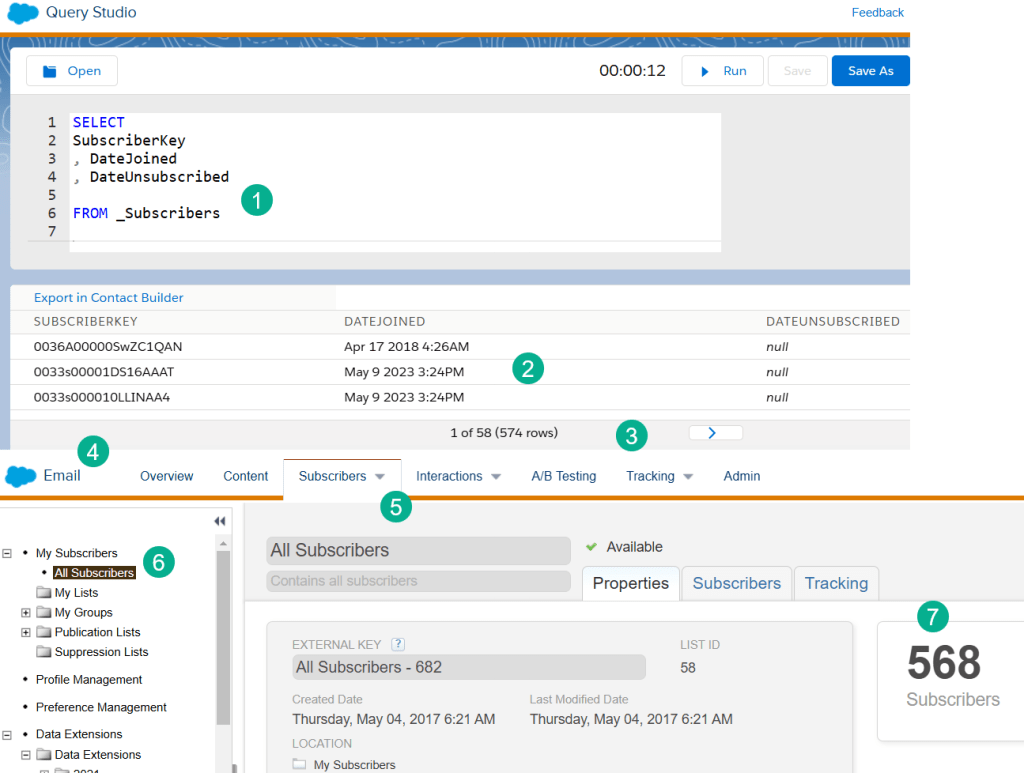
(1) The Subscriber Data View is an important data view, but the good thing is that the data on Subscribers is not limited to 6 months. Here’s how you can prove this out:
(1a) Build a query in Query Studio – Query Studio is a free application that is an essential tool in Marketing Cloud. https://appexchange.salesforce.com/appxListingDetail?listingId=a0N3A00000FP3yFUAT
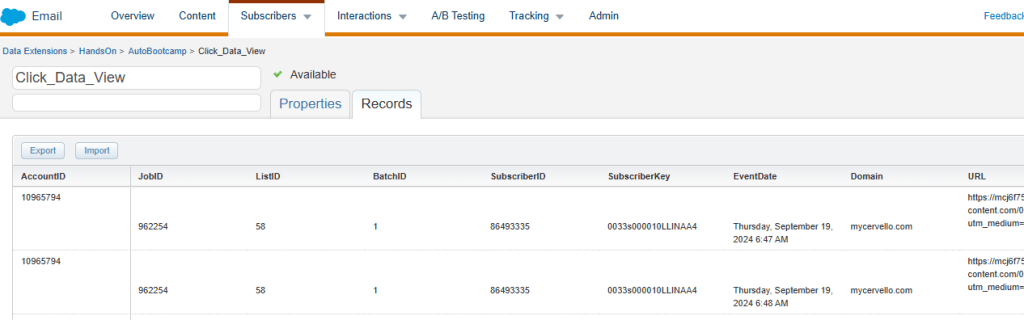
Query the _Subscribers data view without a Where statement to pull in what’s available data wise.
(2a) Running the query you can see the data goes way back, like the year 2018.
(3a) The query will give you a count which when you check All Subscribers (#7) will confirm that the data view includes all subscribers.
(4a) To validate in All Subscribers navigate to Email Studio.
(5a) Click on the Subscribers tab.
(6a) Click on All Subscribers.
(7a) Click on the properties tab
(2) Email Data Views – this should be the core of the data views automation.
(3) Subscription Data Views – Unsubscribes can be helpful to monitor if

(1a) Querying the _BusinessUnitUnsubscribes data view pulling in all records.
(2a) Validates that data isn’t limited to just the last six months. If a subscriber unsubscribes at the BU they will remain in this data view.
_Unsubscribe however does look like it’s limited to six months so it might be worth capturing in the data views automation depending on your use case.
(4) Journey Data Views can be helpful to add to your data view automation if your team relies heavily on Journeys. If not it might be better to leave them out for now to save on data storage.
(5) Automation Data Views might be on the fringe to consider. It might be best to use the six months data set and evaluate down the road.
(6) Custom Data Views – this set of data views are definitely worth considering. There’s an extra charge to add them to your org, but worth reaching out to your account rep to understand the full set of custom data views that are available.
The Build – How to Build a Data View Automation.
Step I: Build the Query in Query Studio
Let’s start with our first data view: _Click. Navigate to Mateusz’s site to get the entire list of all the _Click Data View fields. https://mateuszdabrowski.pl/docs/config/sfmc-system-data-views/#_click
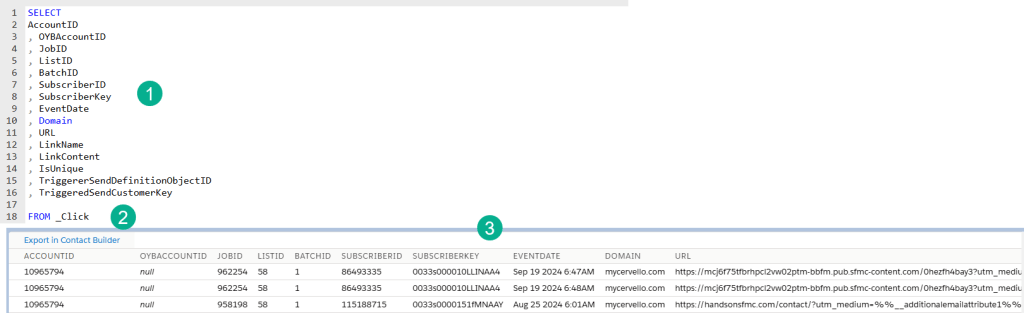
(1) Enter all the fields in your Select statement. You could consider doing SELECT * but this is no longer recommended by Salesforce to capture all fields in a data extension or data view.
(2) Your FROM will be just the _Click data view.
(3) Verify your output.
Step II: Build your data extension.
You’ll want to build a non-sendable data extension and focus on making sure you have the fields created correctly.
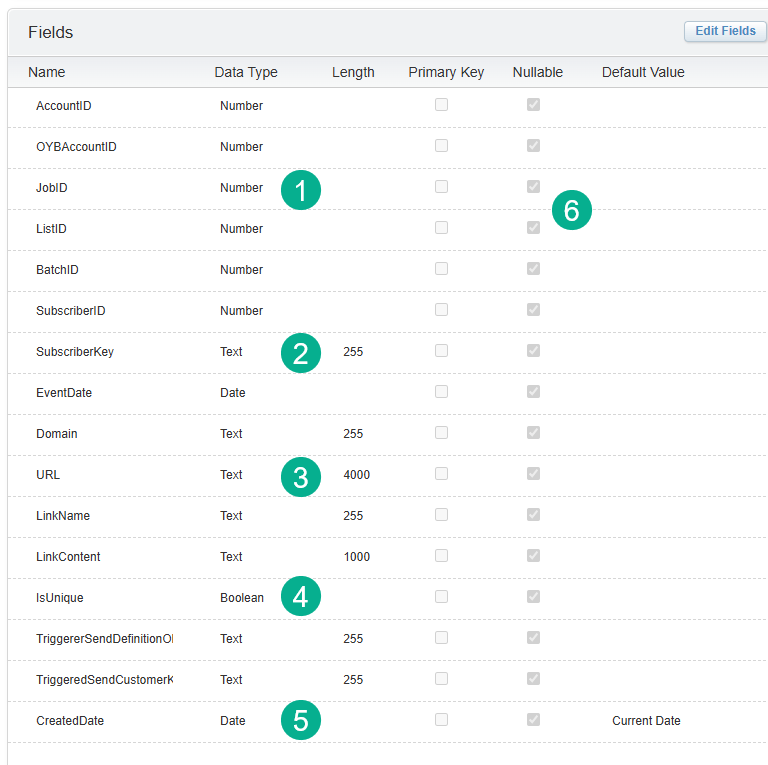
(1) Follow the data type guidelines provided by Mateusz or Salesforce.
(2) Think about your use case and make sure the length of each field is appropriate. You might use only a contact/lead ID as a subscriberkey which could have a length of 18 or it could be an email address with a length of 255.
(3) There will be fields in the data views that have long lengths like URLs so be mindful of your field lengths.
(4) Fields might not be tagged exactly so make sure you experiment with the data type. For instance on isUnique it’s not documented as a boolean, but that typically works.
(5) It might be helpful to add a CreatedDate field so that you have a record when the row was added to the data extension.
(6) It may make sense to have all fields be nullable just so the query doesn’t error if one field isn’t populated.
Step III. Build the Automation and run your query.
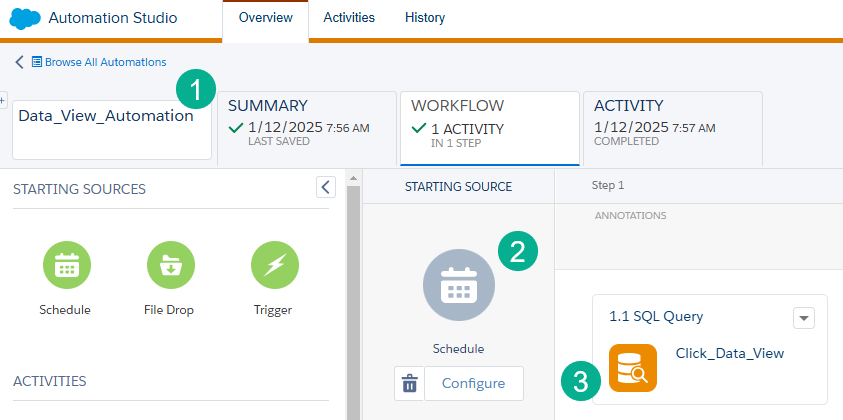
(1) Build out the Automation shell, possibly naming it Data_View_Automation.
(2) Most likely you will want the automation to be scheduled, typically running once a day.
(3) And start adding your queries.
Part I: Populate all data in the data views first
When building your query, first you want to pull in all the data view data before modifying the query to populate data added in the last 24 hours.
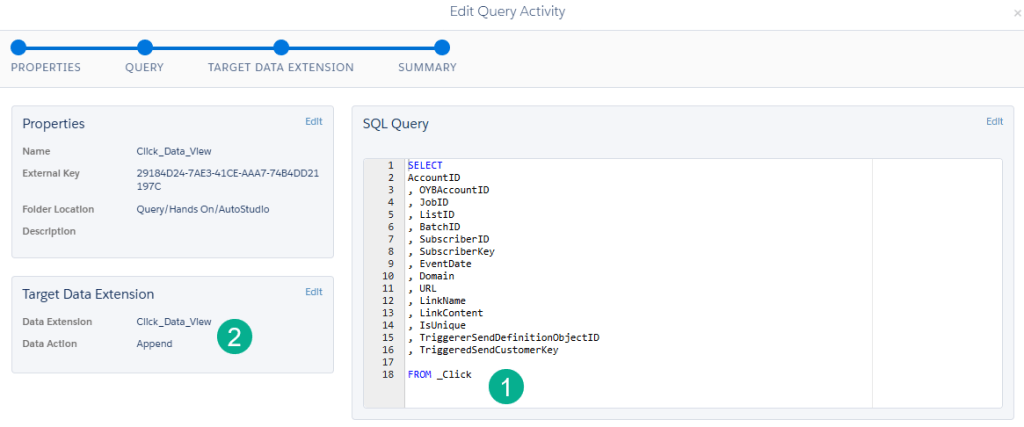
(1) Start with a query that doesn’t have a WHERE filter so that it brings in all the available data from the Data View.
(2) The Data Action will be Append as each day you’ll want to append the new rows of data.
Run the automation to populate the data extension with data.
Part II Modify the Query to pull in daily records ongoing
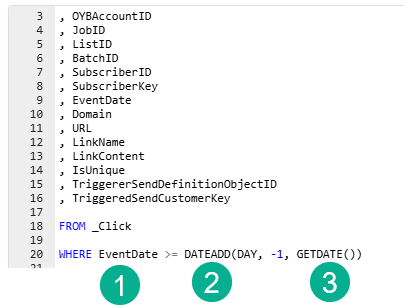
(1) The EventDate is a good field to determine the age of the data view record.
(2) Use the DATEADD function to isolate a specific time period.
(3) In this example we are pulling records from 1 day ago based on the current time GETDATE.
Step IV: Rinse and Repeat for all other Data Views and activate the Automation
Follow steps 1 through 3 for each data view so that:
(1) Each Data View data extension is created and populated with the full set of data.
(2) Each Query is set to pull in the daily query data.
(3) Your automation is set to run daily.
In a future blog we’ll walk through the complete build end to end. Or maybe you can share your Data View automation build!
Thanks for reading!
