Query Studio is such an amazing tool to help you visualize data in Marketing Cloud. But did you know it can also save you a few steps creating your Query once you’ve finalized your SQL code?
In this blog we’ll cover this handy trick to automatically create a query with only a few clicks. But first if you don’t have Query Studio please, please install it in your Marketing Cloud org. It’s free and it’s a Salesforce product: https://appexchange.salesforce.com/appxListingDetail?listingId=a0N3A00000FP3yFUAT
For a video walkthrough of the following steps please check out our Boston Salesforce Community Group Hands-On session where volunteer builder Orlando walks us through how to automatically create a query. Check it out at the 39:00 mark.
Step I: Finalize your Query in Query Studio
First step, build your query in Query Studio. Validate the data and fine tune everything so you are ready to create your assets.
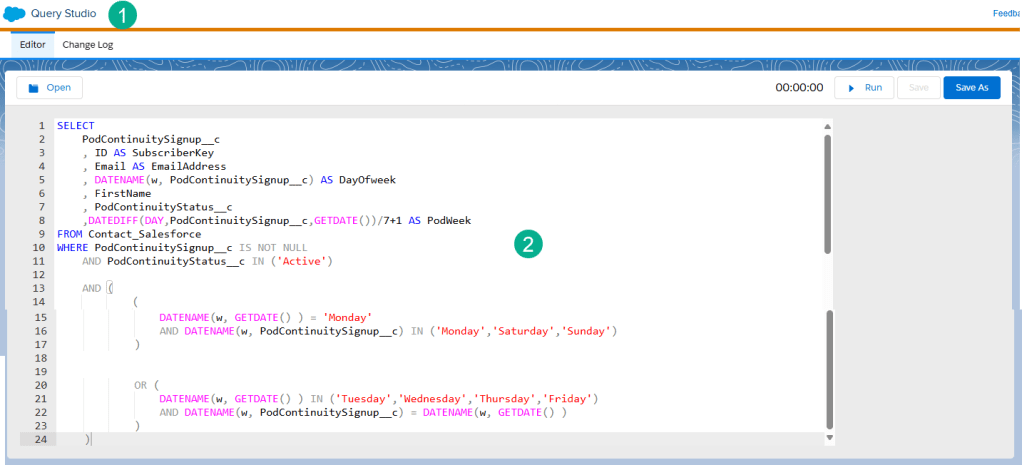
(1) In Query Studio
(2) Finalize your query. Don’t forget to save your query in a notepad as there isn’t any “Save” button in Query studio.
Step II: Build your Data Extension
Whether that’s in Email Studio or Contact Builder, build a data extension that will pull in data from your Select statement of your query.
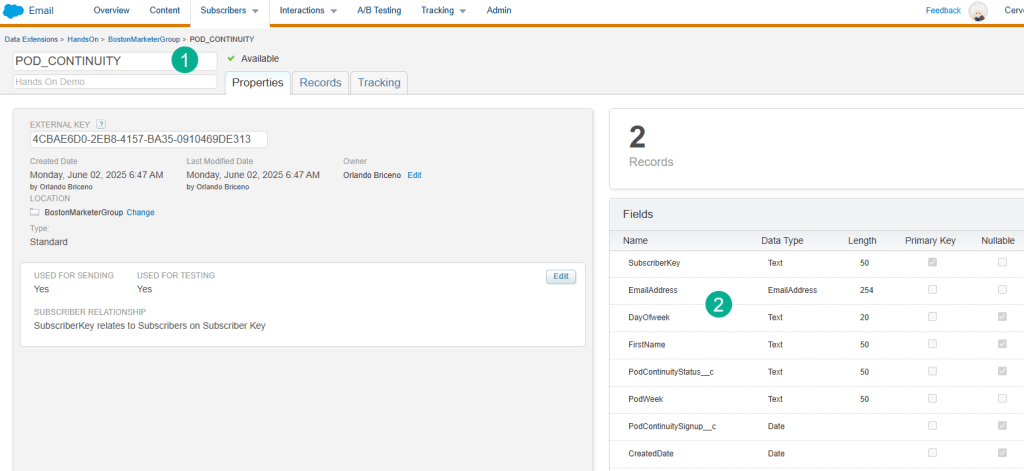
(1) Create a new Data Extension or copy from an existing data extension if fields will be consistent.
(2) Be mindful when creating your data extension fields so that they match your data values in your query.
For more on how to create data extensions please check out this article: https://handsonsfmc.com/how-to-create-a-data-extension-in-marketing-cloud/
Step III: Automatically Create your Query in Query Studio
Now for the fun part.
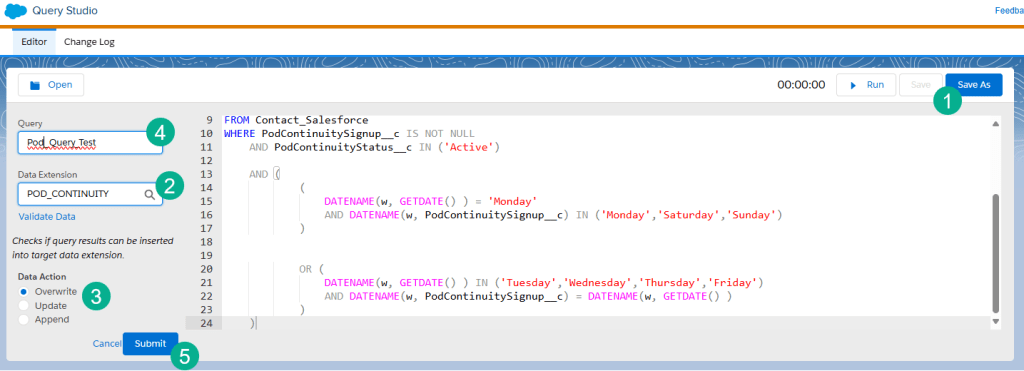
(1) Click on the Save As button.
(2) Select the data extension you just created.
(3) Select the Data Action for your query.
(4) Enter in the name of your query.
(5) Select Submit.
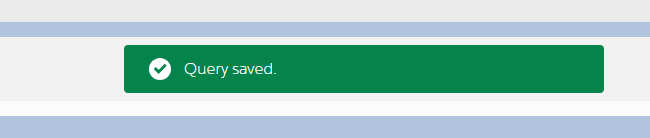
You should receive a success pop up message
Step IV: Find that Query and Drop it into the right folder
The one minor hiccup in this process is that you can’t select what folder for the Query to be created in. But it’s easy peasy.
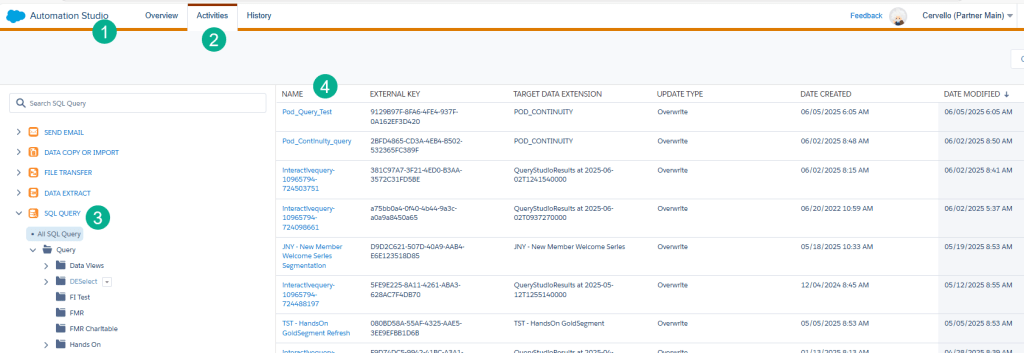
(1) Navigate to Automation Studio.
(2) Select the Activities tab.
(3) Select the All SQL Query.
(4) The query you just created should be at the top of the list.
Simply edit the query…
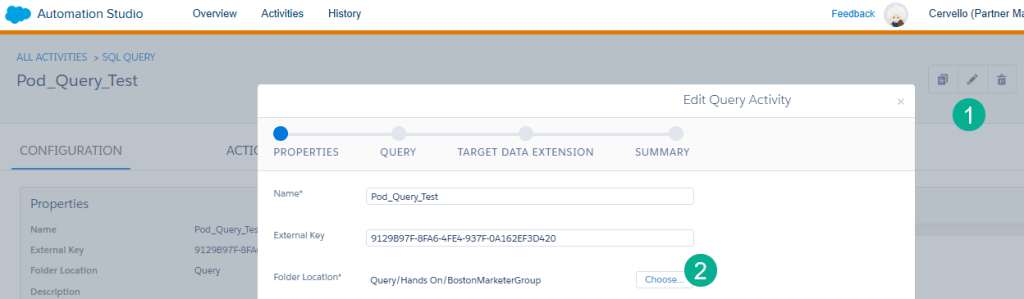
(1) Click on the pencil icon.
(2) Choose the right folder and save.
Have fun in Query Studio and use all the features and functionalities to help you and your team save a few steps as you build out your automations.
