As part of the ongoing SSJS Bootcamp we are hosting Hands On training sessions where anyone can gain access to our Marketing Cloud environment and build out solutions live.
These hands on training sessions are part of the Phoenix Marketer Group, please sign up here for future sessions: https://trailblazercommunitygroups.com/salesforce-marketer-group-marketing-cloud-phoenix-united-states/
If you are interested in being the volunteer builder in our sandbox environment please sign up here: https://handsonsfmc.com/contact
Here’s the full video of the first SSJS Hands On Session:
Our builder today will be Bruno Vetter who was brave enough to volunteer at the beginning of the session where first we granted him access to our Marketing Cloud sandbox environment.
Hands On Pre-work: Marketing Cloud Access
Before each Hands On session we typically grant access to the builder in advance. In this session we couldn’t sign up a volunteer in advance so we had to set up Bruno at the beginning of Hands On:

(1) In Marketing Cloud Setup
(2) Under Administration > Users
(3) Create a new user and make sure you enter the reply and notification email address accurately as this email address will receive password reset notifications.
(4) Enter in a user name. We use the @mcdemo user name for all of our users to provide consistency across all users.
(5) Any temporary password will do here, we use Password123$
Manage Business Units
Once the new user has been created you need to assign business users and grant level of access.
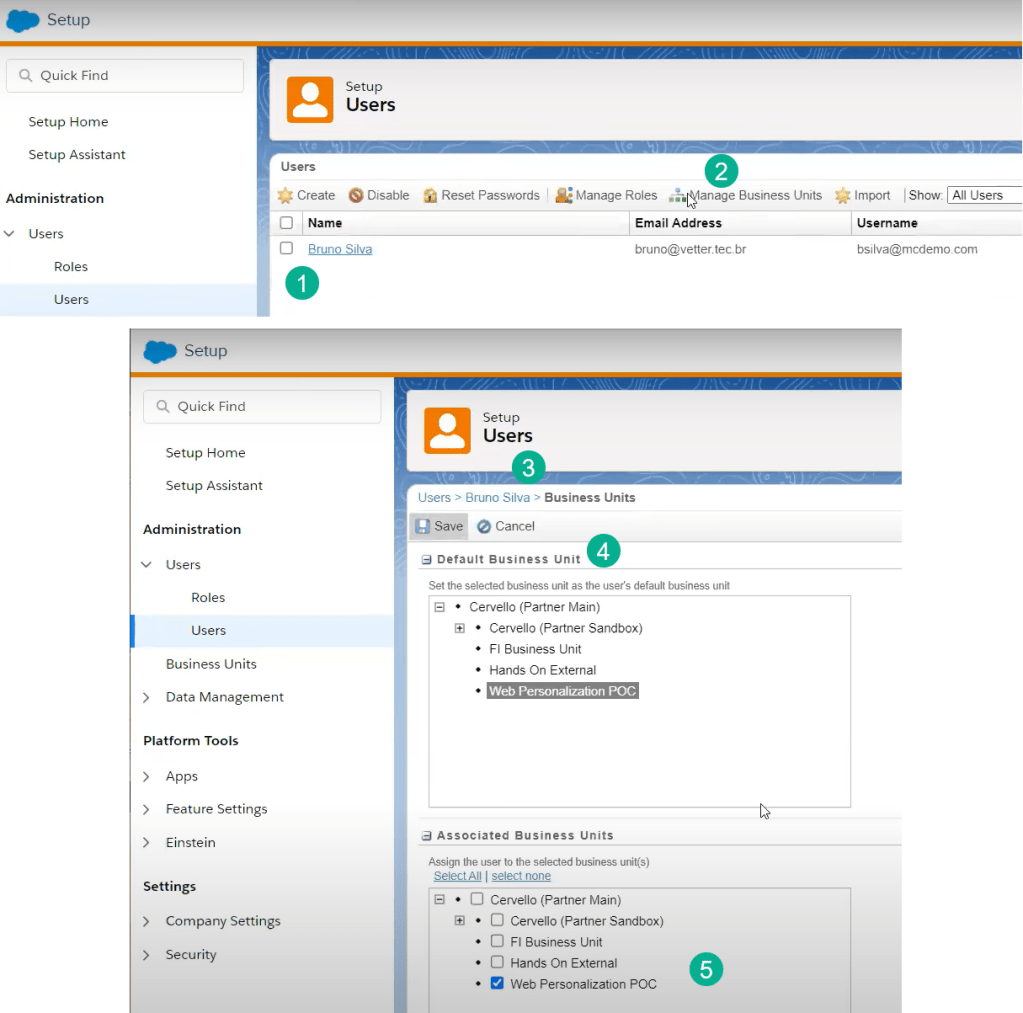
(1) Navigate to the new user that was set up click on the box to the left of their name and
(2) Select Manage Business Units
(3) The business units screen will pop up
(4) Select the default business unit that will pop up upon log in
(5) Grant access to as many business units, in our case we’re granting access to only the Web Personalization POC business unit
Adding a Role to the new user
Next we granted Bruno the appropriate role so that he could do all the building necessary for the Hands On session. We granted Bruno Administrator and Marketing Cloud Administrator roles so he could create an installed package but if this was in a real client situation we’d want to only grant Bruno the level of access needed for his role.

(1) Navigate to the new user that was set up click on the box to the left of their name and
(2) Select Manage Roles
(3) Choose whichever role makes sense for the user
Allow/Deny Permissions
Last step allow or deny the new user the appropriate set of permissions to accomplish their role. We’re selecting all permissions for Bruno to allow him full access given the work he’ll be doing in the session.

(1) Under Roles select Edit Permissions
(2) Allow or Deny the appropriate permissions
Send to your new user the following information:
User Name: bsilva@mcdemo.com
Password: Password123$
URL: https://mc.login.exacttarget.com/hub-cas/login
Hands On Tip
Remind new users to Marketing Cloud that the typical Salesforce login will not work and point them to the exacttarget.com url above.
As you can see from the video, logging in isn’t always simple so make sure you communicate the correct user and password.
Hands On Pre-work: Creating an Installed Package
In order for Bruno to send an API call from the cloud page using SSJS he first needs to create an installed package to obtain the key data points that will be used in the Auth and Rest/Post call.

(1) Under Setup and in the App folder
(2) Select Installed Packages
(3) and create a New package
(4) Add a name and description

(1) Add a new component
(2) There are a lot of different component options, for this use case select the API Integration
(3) For the Integration Type we are looking to use both a Client ID and Secret and since it’s not a Web App, Server-to-Server will be the best choice here.
Last select the scope access areas needed for this installed package. As you can see later in the video we were not able to connect to this installed package due to the team not selecting the right access areas. Check out our second SSJS Hands On session for details on this issue.

(1) Select the different scope areas that need access in the installed package
(2) Select save
Now that Bruno has created an installed package he has all the key data points to make the Auth API call.
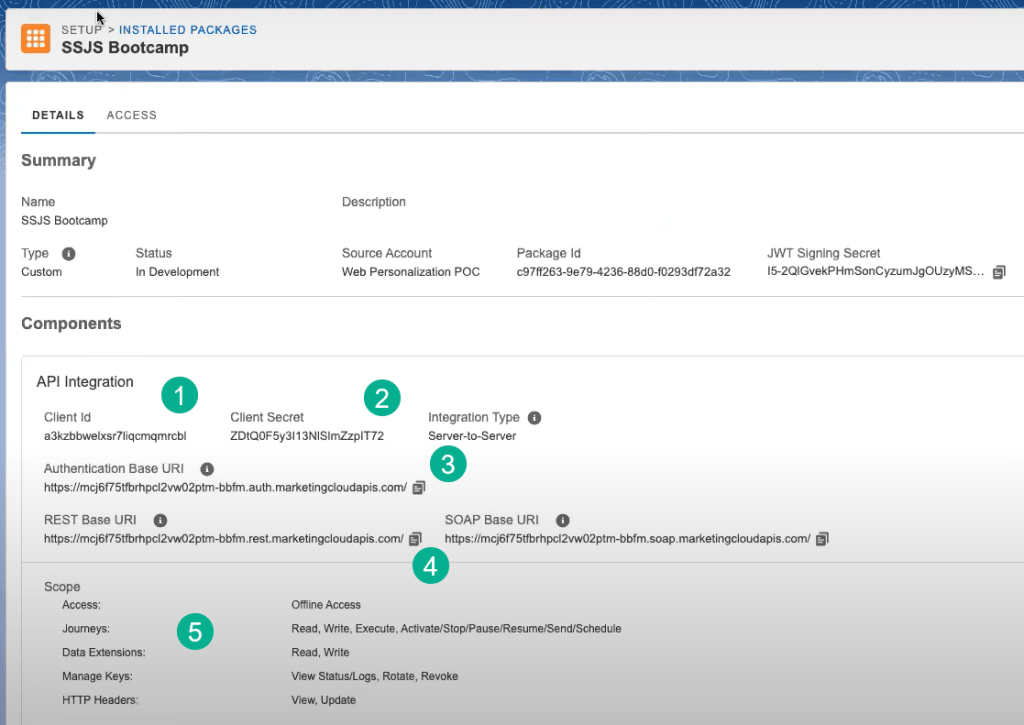
(1) Client ID
(2) Client Secret
(3) Auth URL
(4) Rest/Post URL
(5) Here’s a recap of the scope of the installed package
Hands On Pre-work: Auth Call Test in Postman
Before we build out our Auth call in SSJS on our cloud page first we recommend testing the Installed Package setup in Postman. To download this amazing API tool for free: https://www.postman.com/downloads/
Validating in Postman will do two things (1) it will help the team familiarize the basics of an API call to give perspective on what we’ll be coding in SSJS and (2) validate the connect as Postman will give the team more details on errors connecting than what the user will see on a cloud page.
Postman Walkthrough: Create a Collection
In Postman:
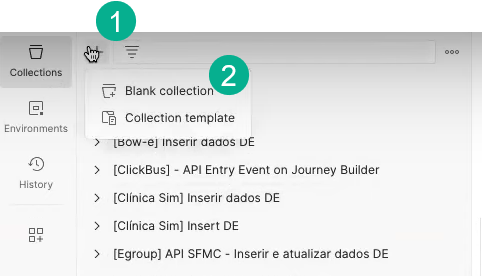
(1) Next to Collections select the plus sign to create
(2) a Blank Collection
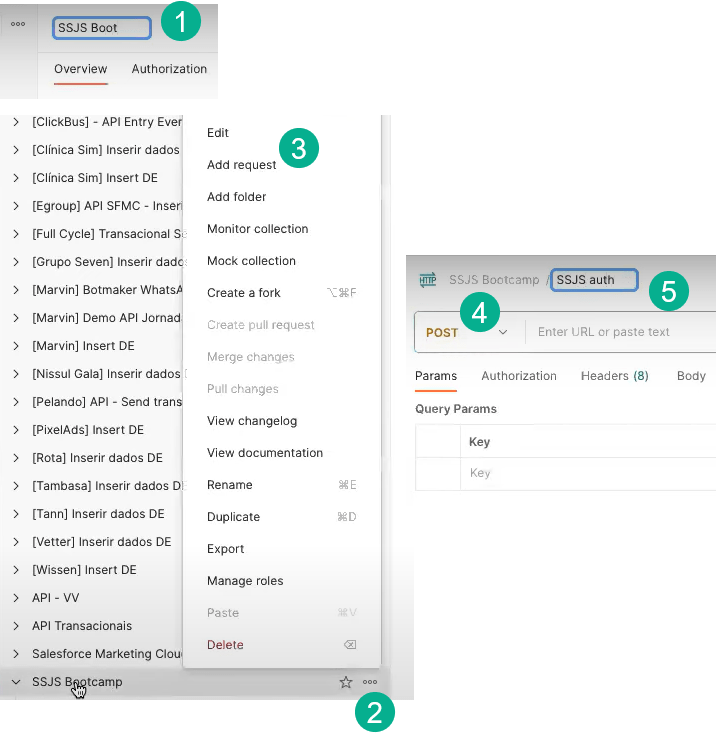
(1) Name the new Collection in our case SSJS Bootcamp
(2) Select the three dots to
(3) Add a request
(4) Select POST as the method
(5) And name the request something that contains AUTH so you know it is the Auth vs the rest/post call
Postman Auth Call Setup – Auth URL

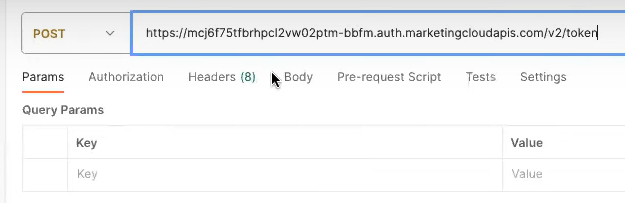
(1) Copy from the Installed Package setup above the Auth URL and paste it into the new request.
We’ll need to add syntax to the end of the URL for the Auth use case. Refer to the the developer documentation: https://developer.salesforce.com/docs/marketing/marketing-cloud/guide/access-token-s2s.html
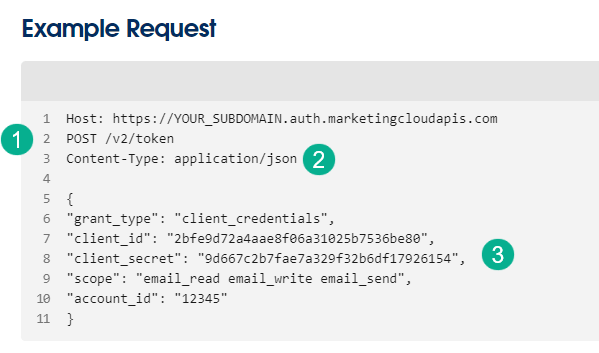
(1) Here the documentation details that it should be a POST and the additional url string to add to the end of the url.
(2) We’ll use the Content-Type in below as well as
(3) The payload
Here’s what the final Auth URL should look like:
Postman Auth Call Setup – The Payload
To prepare the “Body” or payload in Postman:
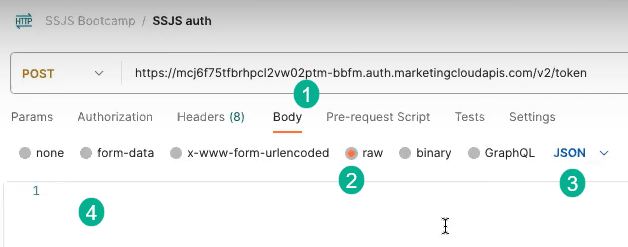
(1) Select “Body”
(2) Select “Raw”
(3) Select JSON formatting
(4) This is the canvas that you’ll be creating your payload which was reference above.
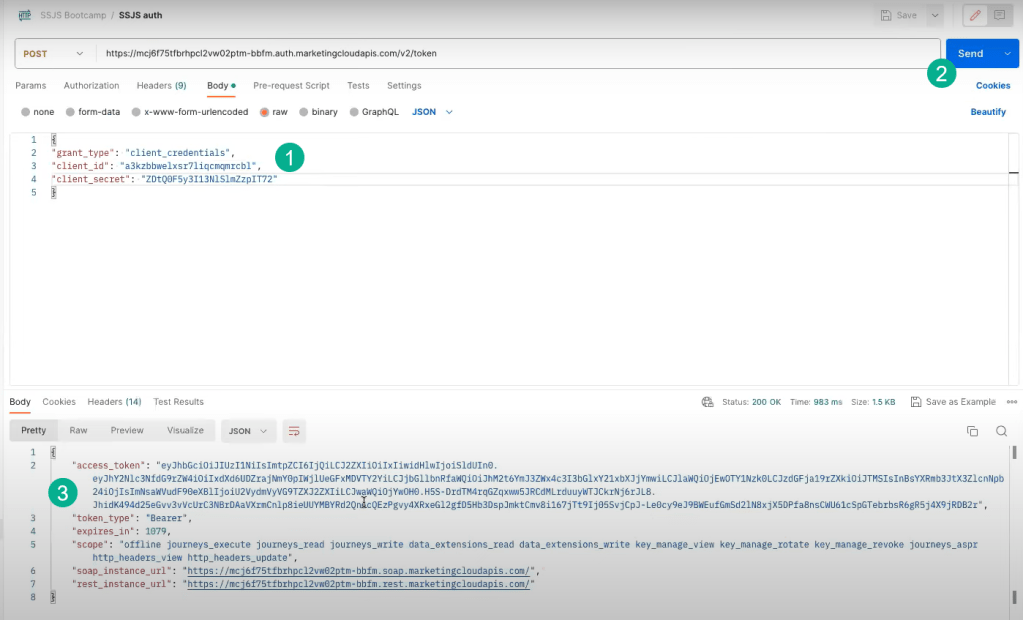
(1) Copy in the sample payload provided in the documentation:
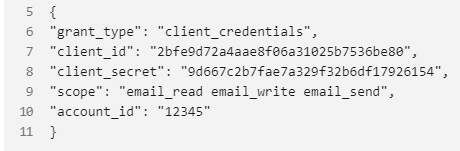
(a) Remove the “scope” and “account_id” as they aren’t necessary for this use case
(b) Paste in the client_id and client_secret from the installed package and the final payload should look like above.
In our Part II of this Hands On Session we’ll cover the Post/Rest API call to complete a full end to end API call in Postman which will set us up for the eventual build in SSJS in the Cloud Page.
