In this session the team continues highlighting essential areas of the Ampscript Bootcamp series hosted with the Phoenix Salesforce Marketing Group. In this session we dig into Sandesh’s simple but effective way to debug your Cloud Page ampscript coding.
For more information on the Phoenix Salesforce Marketer Group please follow this link to sign up: https://trailblazercommunitygroups.com/salesforce-marketer-group-marketing-cloud-phoenix-united-states/
PART I: DeBug Setup
The beauty of Sandesh’s Debug code is in its simplicity. By only adding a few lines of mixed HTML and Ampscript the user can quickly and easily validate key data points as they are developing their cloud pages.
Let’s take a deep dive into how Sandesh started us off with a simple code snippet block on the cloud page:

(1) Open up a P or paragraph tag outside of the ampscript block to create an outline of the Debug section in the cloud page. He closes his P tag on line 20.
(2) Utilize the V function to output the debug variable which will be set in step four.
(3) Declare the @debug variable and as much as possible use /* and */ to comment out your code to help future developers.
(4) Declare a variable to validate the data that’s being passed when a user submits the form in the cloud page. Utilize the RequestParameter function to call a named parameter variable which is highlighted below. And set the @debug variable to the data point looking to validate.
(5) Don’t forget to use those Code Snippet blocks when doing ampscript coding in an email or cloud page.
Let’s take a look at where Sandesh is setting that parameter by looking into the code for the cloud page:

(1) Here’s where the Submitted data point is being set. “Submitted” is a hidden field but will be populated upon submission.
(2) Later in this post we’ll use the “LastName” data point to illustrate another data point passed upon submission.
PART I: Testing
To validate the debug code let’s fill out the form that Sandesh had designed for this demo.
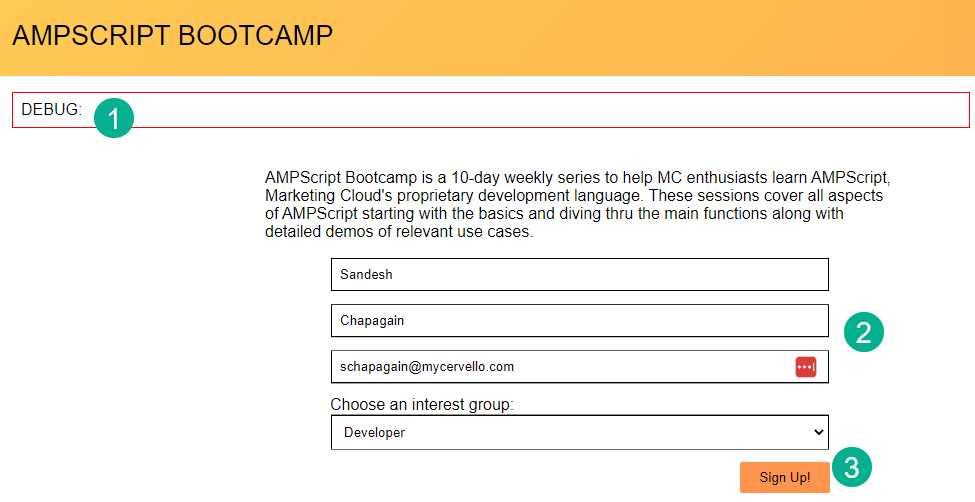
(1) Here’s that debug section that was set up with the P tag above and notice that the debug output is empty as nothing has been passed.
(2) Fill in test data
(3) Submit
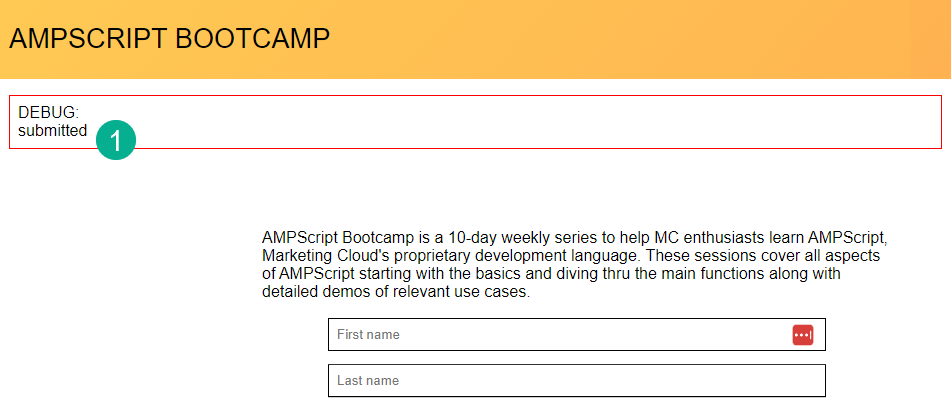
(1) Once the call to action button is clicked the form resets and the Debug variable is now set to “submitted” proving that a submission went through.
Let’s try this one more time setting one of the input variable instead:
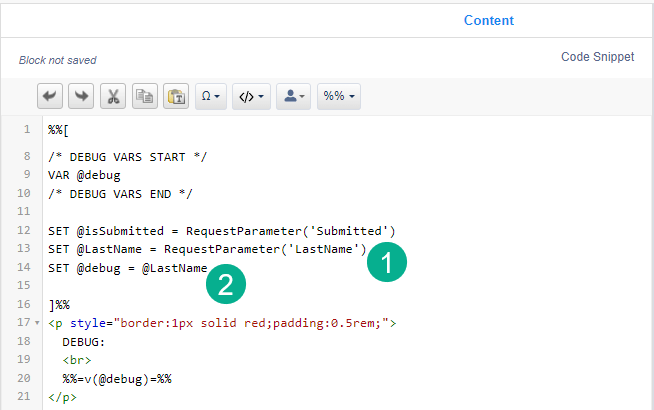
(1) Create a new variable setting it to the “LastName” data point highlighted above.
(2) Set the debug variable to the new @LastName variable
(3) Save and publish the cloud page
(4) Refresh the cloud page test screen and…
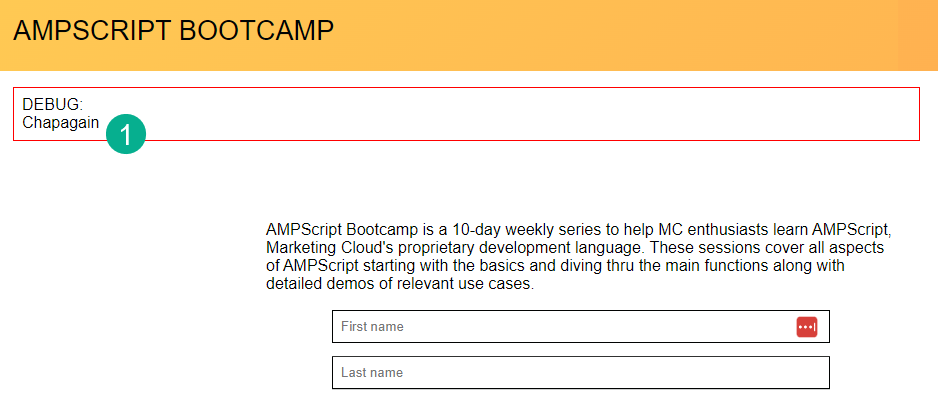
(1) The last name data point is validated.
Use this simple but effective code to set up a solid coding foundation while building each cloud page. With this in place you’ll be able to validate those key data points along the way to help identify issues that lead to errors.
<p style=”border:1px solid red;padding:0.5rem;”>
DEBUG:
%%=v(@debug)=%%
</p>
Join us in our next post as we dive in deeper to the cool code recommendations as part of the Ampscript bootcamp.
