Marketing Cloud’s A/B testing functionality is so simple for Ad Hoc sends there’s no excuse to not be A/B testing every time you send an email.
In this blog we’ll walk through an E2E test of the Subject Line A/B testing that you all should test and validate before you do a big send.
Prework: Create a test Data Extension and Email
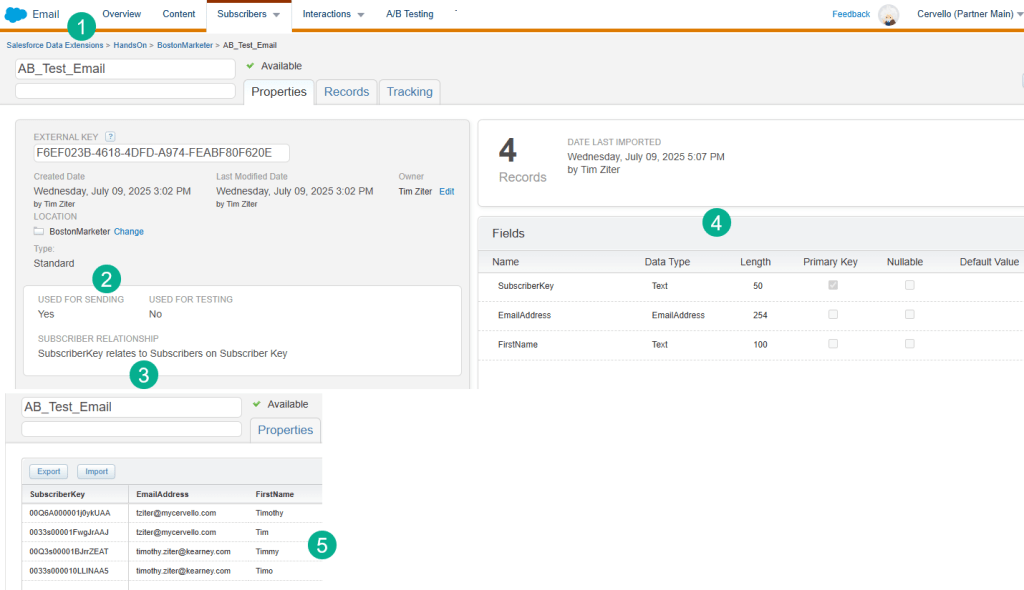
(1) In our use case we were sending a Salesforce data extension.
(2) You’ll want a data extension used for sending.
(3) And to make sure you configure the SubscriberKey field as the SubscriberKey vs say email address.
(4) Here’s a test set of fields which includes a SubscriberKey, Email Address and a personalization field.
(5) And sample data, here in this use case we are using the Contact or Lead ID as the SubscriberKey.
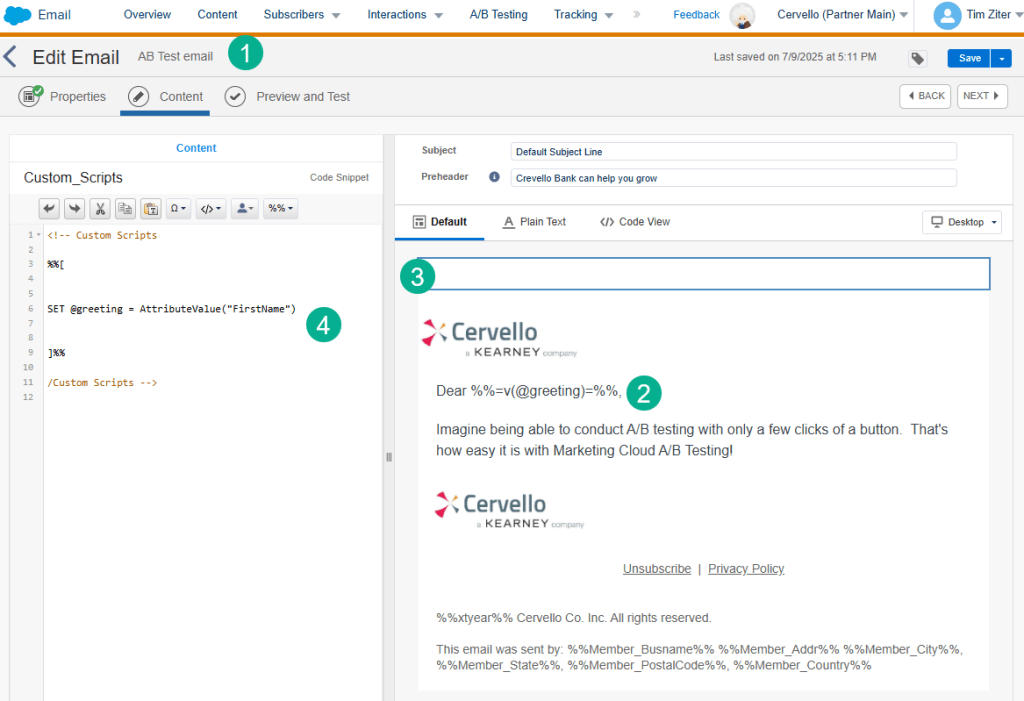
(1) Create a test email in Content Builder.
(2) The messaging can be pretty basic but always try to include personalization.
(3) And it’s best practice to use a code snippet block to declare your ampscript variables.
(4) Use the Attributevalue function to normalize your data and prevent errors.
Create a new A/B Test

(1) In Email Studio.
(2) Click on the A/B Testing tab.
(3) Select the “Create A/B Test” button
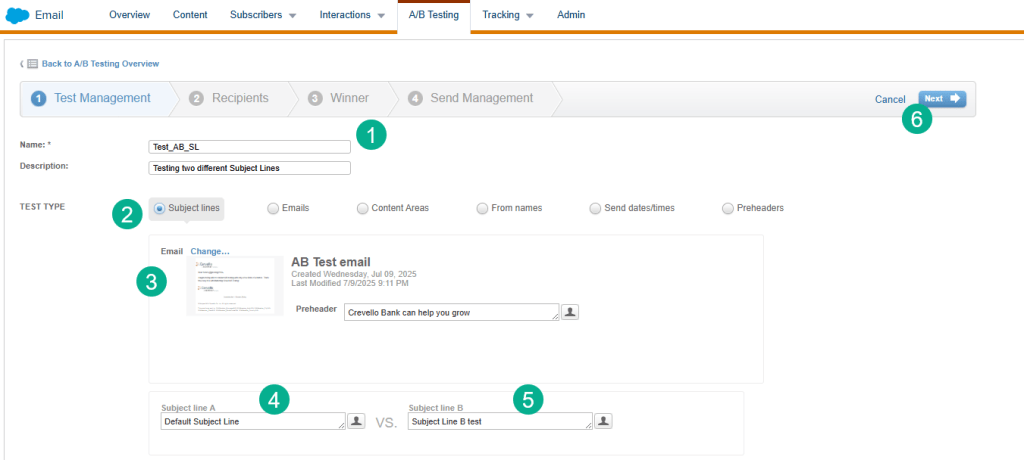
(1) Name your A/B test something that identifies the send and what you were testing.
(2) Select from a variety of A/B Test types, for this walkthrough we’ll cover the Subject Line variation.
(3) Select the email that you are looking to send.
(4) The default subject line from the email will appear here but you can replace it with a test Subject Line.
(5) Add in the other Subject Line.
(6) Select Next.
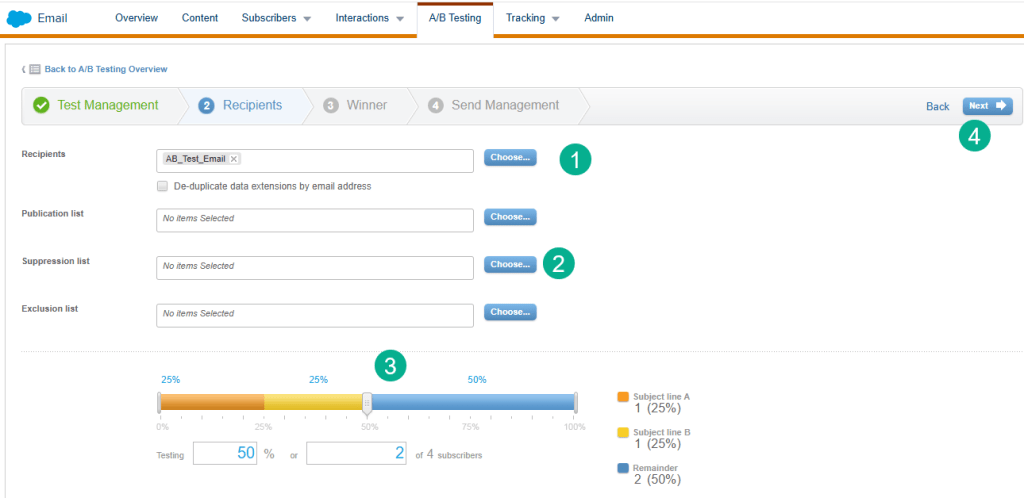
(1) Select the data extension that is the send list.
(2) Include other lists or DEs for exclusion or suppression.
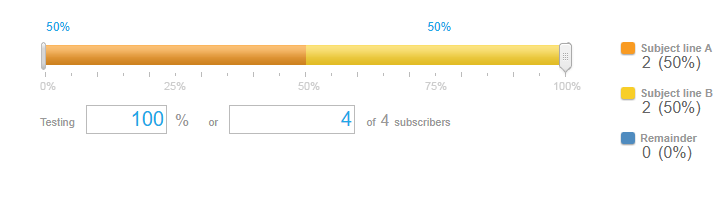
(3) Select how much of the send you’d like to test and then send the winning test. You can test 20% of the file and have the winner be used in the remaining 80% or you can test 50%/50% for the entire list.
(4) Select Next.
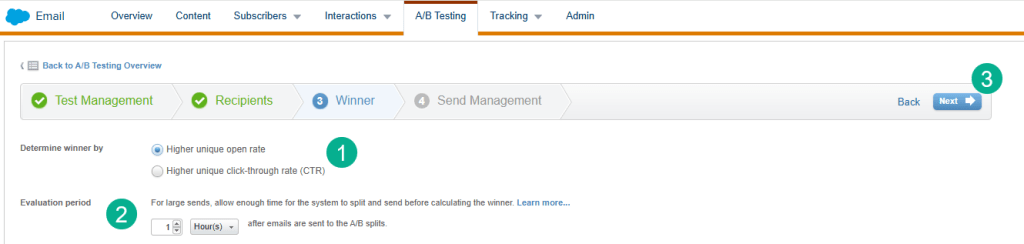
(1) Select the engagement field to determine the winner either opens or clicks.
(2) Select the time period, probably the minimum for opens should be 3 hours.
(3) Click Next.
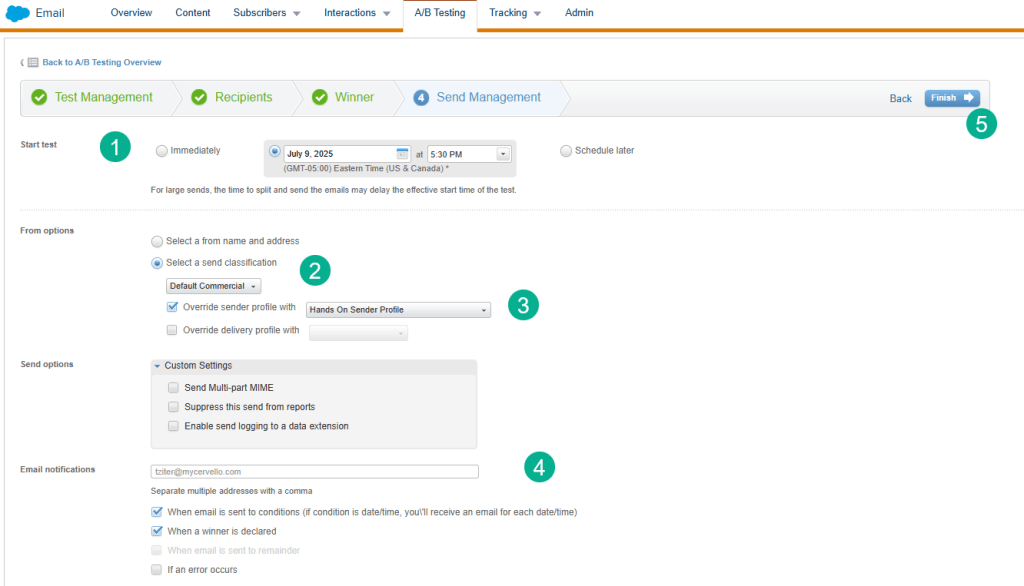
(1) Select when to deploy the test, either immediately or scheduled.
(2) Chose the Send Classification.
(3) And the Sender Profile.
(4) It will be helpful to use your email address for notifications. The rest of the settings you can leave as is unless they need to be modified.
(5) Select Finish.
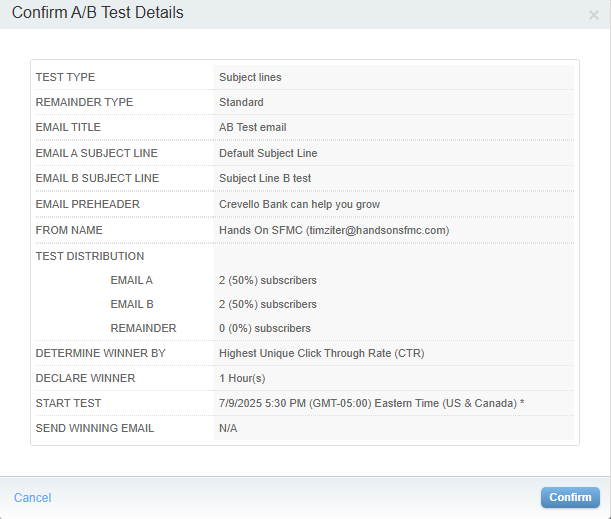
You will receive a confirmation popup window to confirm everything and then click “Confirm”.

Back in the A/B Test tab you can see your scheduled A/B Test.
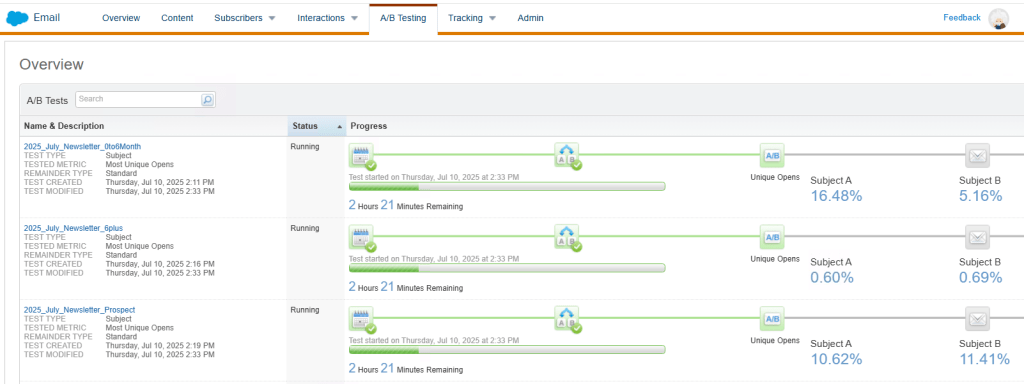
You can watch the performance of the A/B test live seeing which Subject Line is the highest performer.
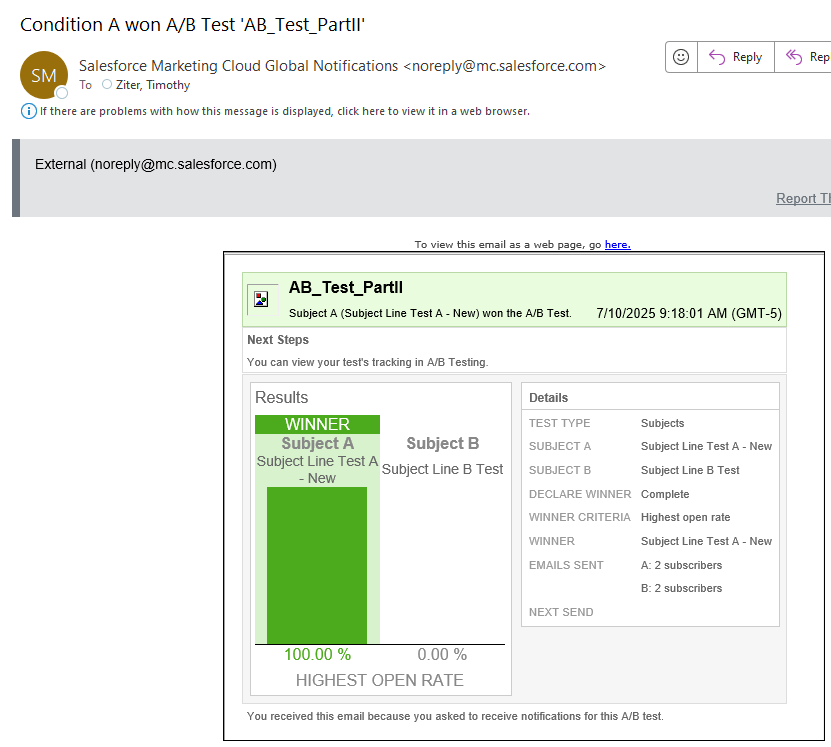
Lastly you’ll receive an email once the test is complete which will summarize the winning test.
The Marketing Cloud A/B test functionality is so easy to use and provides such helpful alerts and updates along the way.
Have fun running a ton of A/B tests in your environment!

Leave a comment