Here at Hands-On SFMC we are not just Marketing Cloud as you’ve seen in other walkthroughs and hands-on sessions on Data Cloud, Sales Cloud and more.
We’re bringing into the fold the impressive data privacy platform in Salesforce called Privacy Center. We’ll be bringing more walkthroughs in the coming week, hopefully at least once a month as data privacy and consent management is a critical topic in Marketing Automation.
In this demo we will be looking at portability policies, specifically the DSAR (Data Subject Access Request) policy. A DSAR is a request from a prospect, customer or employee where they want to identify what PII (Personally Identifiable Information) that your system stores about them.
This walkthrough can also be viewed on Youtube:
Let’s walk through how to view an existing DSAR policy:

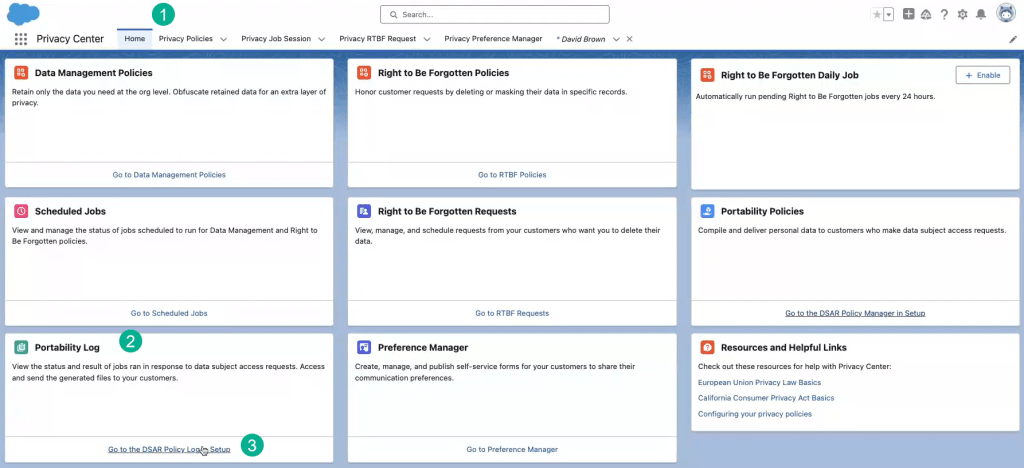
(1) Navigate to the Privacy Center App.
(2) Click on the Home tab.
(3) Select the “Go to the DSAR Policy Manager in Setup” link under the Portability Policies tile on the home screen.

(1) Under Portability Policy we see a policy that was already created.
(2) click on the button to the right.
(3) And let’s click Edit to take a closer look at this Policy.
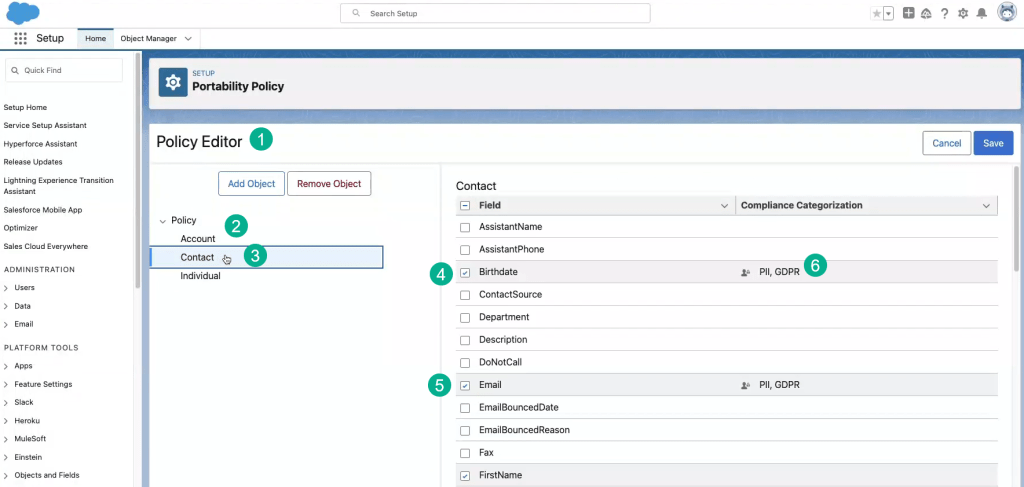
(1) In the Policy Editor.
(2) You have three options to create a policy, at the Account, Contact or Individual level.
(3) For this policy we’ve used Contact.
(4) And you can see a few boxes check that identify the PII data.
(5) Like Email, Birthdate, FirstName, etc.
(6) If your fields are already determined for PII the Compliance Categorization will automatically select these fields.
Activate/Run the DSAR Policy
Now that we have a DSAR Policy created we are going to run or active this policy on a specific contact.

(1) In the Portability Policy screen.
(2) Select the action button on the right for the policy.
(3) And select Activate.
Next we’ll want to identify a Contact in CRM.
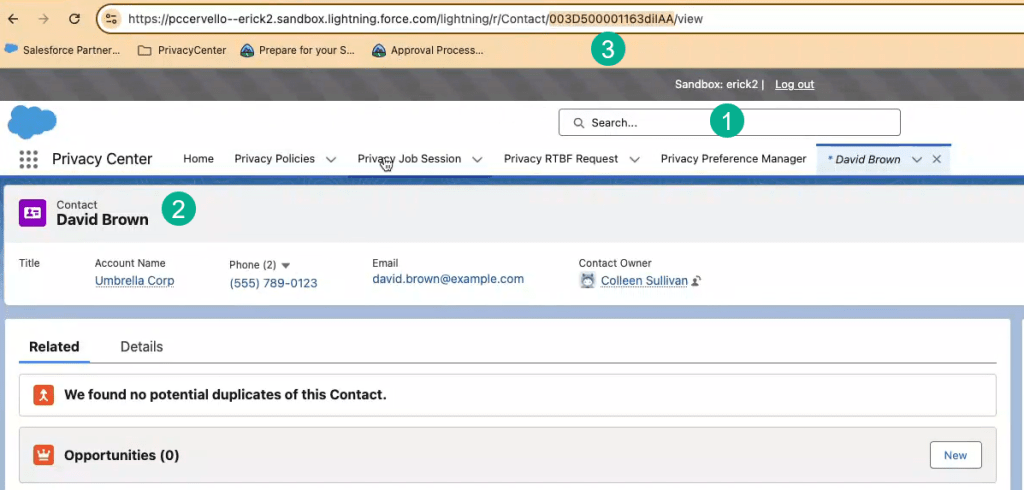
(1) In the Salesforce search window search for a contact.
(2) In this example we are using David Brown.
(3) You’ll need the contact ID for David so select the 18 digit Salesforce ID in the URL, the ID begins with 003.
Once I have the Contact ID I’m going to navigate back to the DSAR Policy:
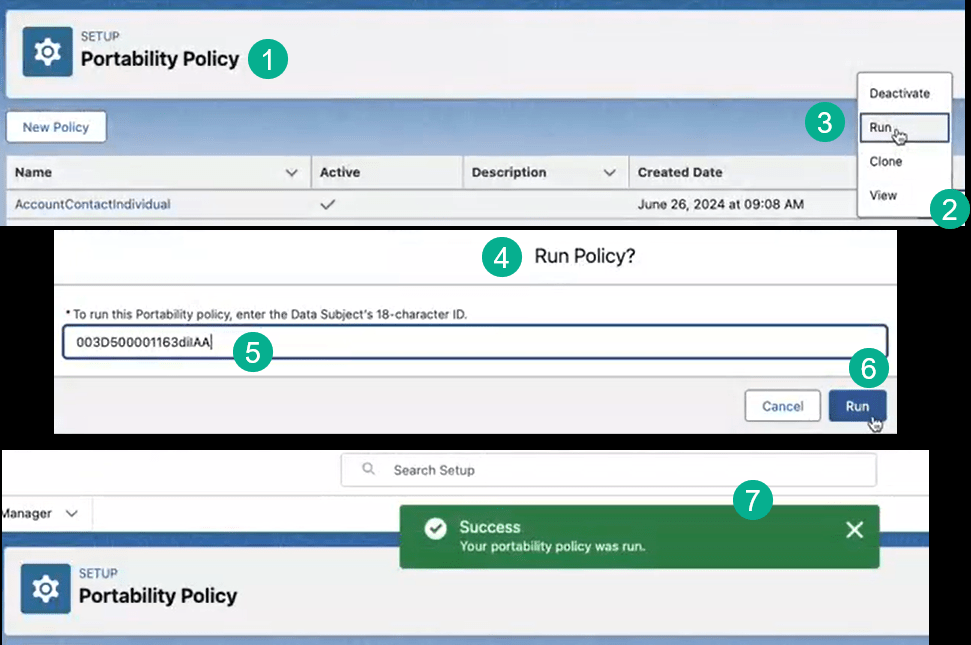
(1) Back in the Portability Policy screen.
(2) I’m going to select the policy and the action button on the right.
(3) Select Run.
(4) A popup window will appear.
(5) Paste in the contact ID.
(6) And select Run.
(7) A Success pop up will appear.
How to view the DSAR output to provide to an individual
To view the output of the DSAR policy navigate to the Portability Log tile.
(1) Navigate to the Privacy Center home screen.
(2) Under the Portability Log tile.
(3) Click on the “Go to the DSAR Policy Log in Setup”.

(1) The link will take you to the Portability Log screen in Setup.
(2) You’ll see all of the logged processing of policies.
(3) Click on the File URL for the policy that was just created.
(4) This will download the file to your browser.
(5) Click on the file.
(6) The file will open up in a window.
(7) You can see that it contains the details for the contact we processed.
(8) And all the PII information selected in the Policy.
Coming soon from Privacy Center will be different formats for this output as well as different capabilities to download this information securely and send directly to a customer.
To learn more about Salesforce Privacy Center and how Cervello can help navigate the complexities of data privacy: Data Privacy | Cervello (mycervello.com)

Leave a comment