The Engagement Split is a helpful Journey activity to determine paths for your subscribers based on their engagement with emails. In this blog post we’ll cover the following steps of how to configure an Engagement Split:
(1) Place your Engagement Split after the email and wait step
(2) Select the correct email
(3) Choose engagement options: opens, clicks or bounces
(4) Test to validate the configuration works as expected
(5) What to do when your link doesn’t appear to select: known issue
I. Place your Engagement Split after the email and wait step activities
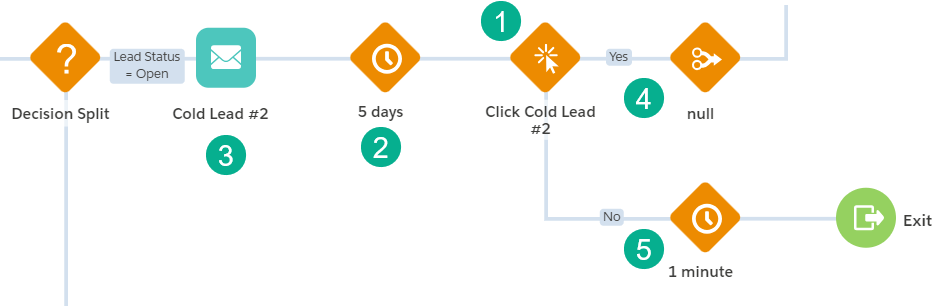
(1) Place your Engagement Split after the Wait Step.
(2) You’ll want to give the recipient time to engage with the email 5+ days is best practice but can be longer or shorter depending on your use case.
(3) You’ll want an Engagement Split after each email in your Journey.
(4) Once placed it will create two paths, a “Yes” path.
(5) And a “No” Path.
II. Select the correct email
This can be very tricky especially if your Journey has more than one email. Each email is typically added to the left of the last email. Make sure you name your emails clearly to aid in selecting the correct email.
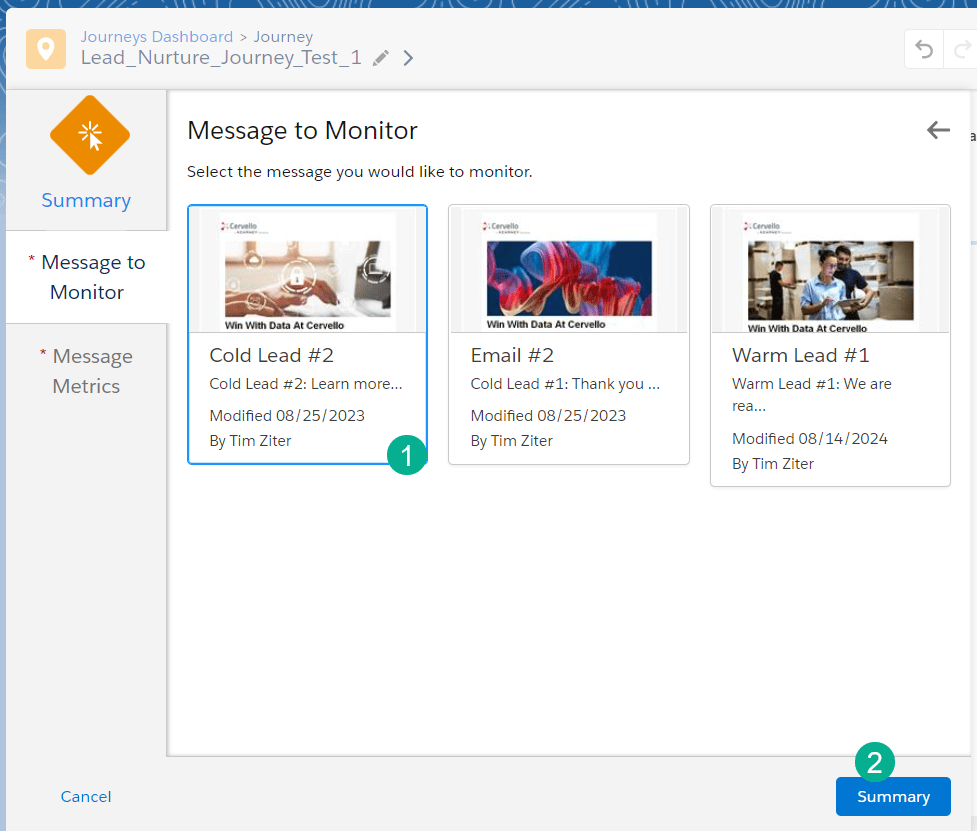
(1) Select the correct email!
(2) Click on Summary
III. Choose engagement options: opens, clicks or bounces
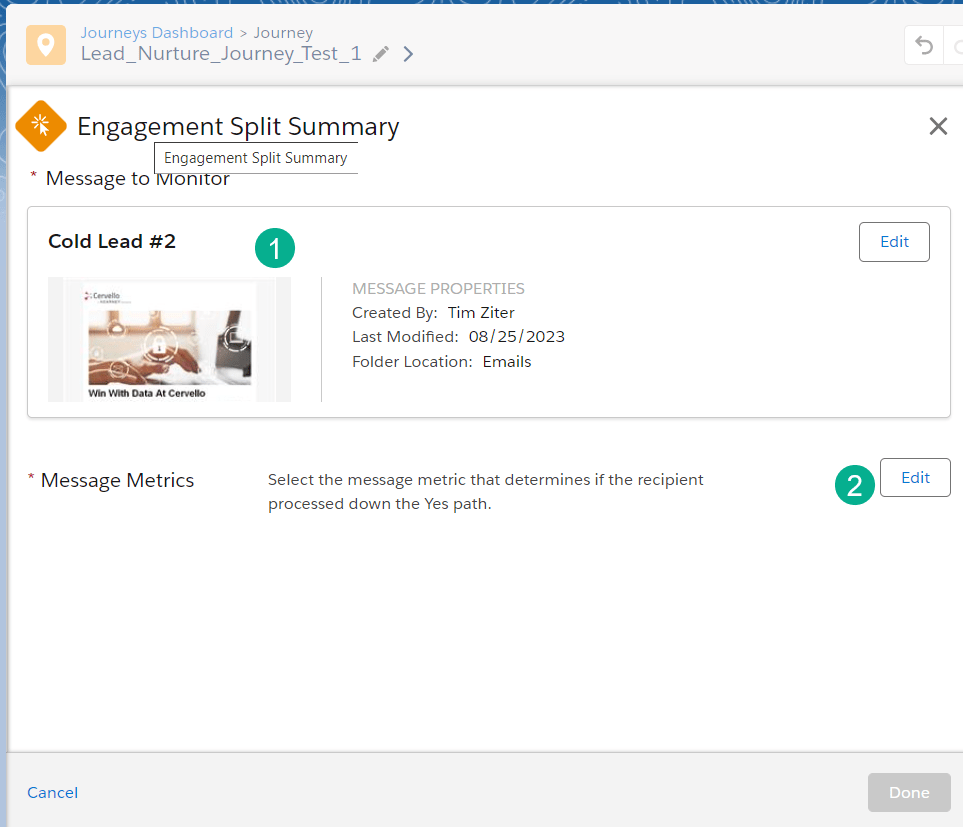
(1) Confirm you’ve selected the correct email.
(2) Click in Edit to select the appropriate engagement options.

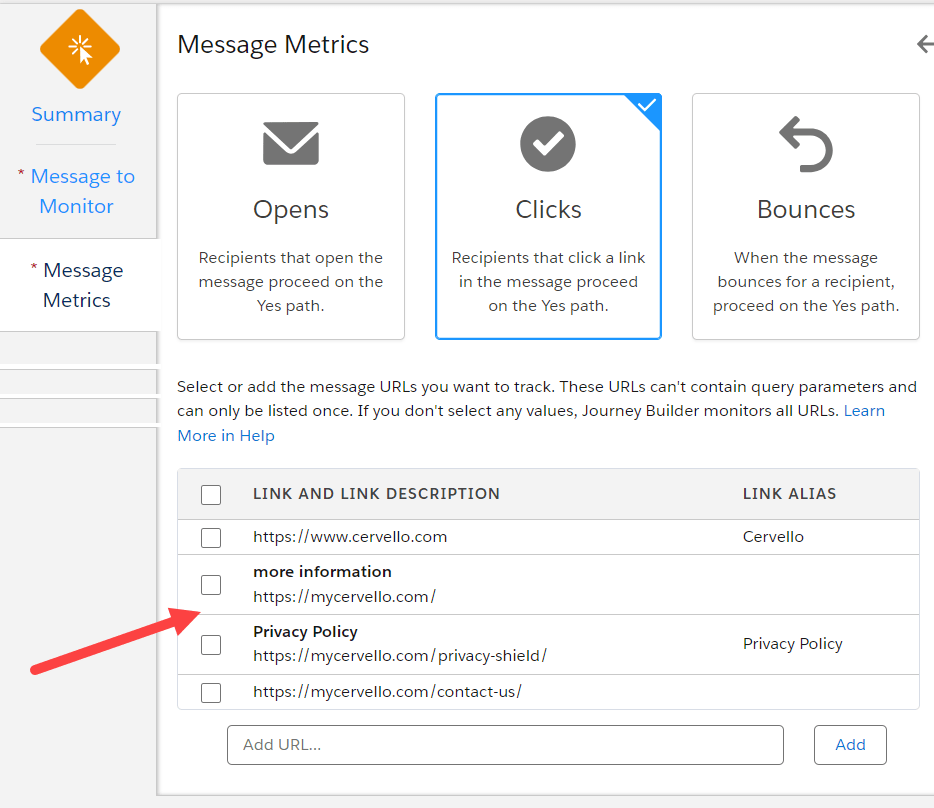
(1) Journey Builder gives you three options, typically Clicks will be more accurate than Opens. Bounces can be useful if you want to identify those subscribers who never received an email.
(2) Select the link or links you want to monitor.
(3) And select Summary.
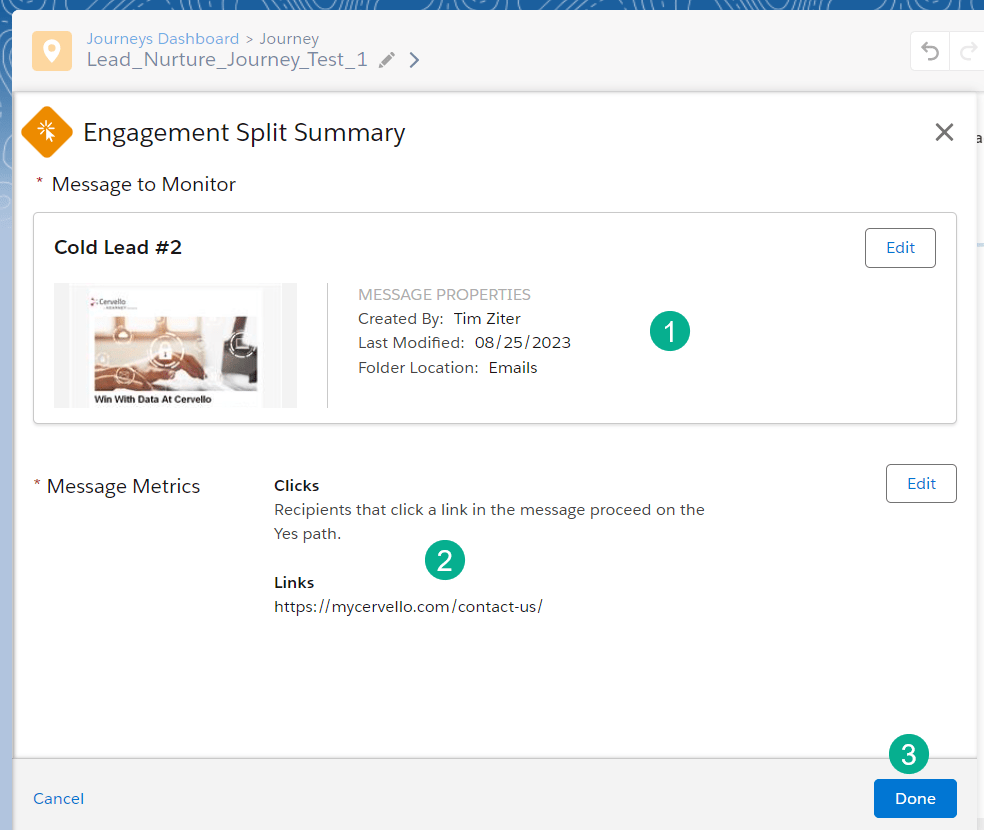
(1) Validate the email.
(2) Validate the links selected.
(3) Click Done.
IV. Test to validate the configuration works as expected
Here are a few thoughts on how to successfully test the Engagement Split functionality.
(1) Utilize a test environment to validate the functionality.
If you have a separate Marketing Cloud test BU setup you can test the Engagement Split functionality replicating the email and journey.
(2) Isolate the Engagement Split functionality for testing if this is the first time you’re using the activity. Avoid building the entire journey and testing everything all at once. Create small testing journeys to validate the functionality first then bring it all together.
(3) Add a decision split to only allow test records through the journey if testing in Production. You could use something like all emails need to end with @mycervello.com or whatever your internal email domain.
(4) Don’t forget to allow enough time in the wait steps before the Engagement Split activity to give you time to receive and click on the email, 5-10 minutes is usually enough.
V. What to do when your link doesn’t appear to select: known issue
When you configure your Engagement Split you might notice that all links don’t appear. That’s because Engagement Splits can’t recognize any links that use ampscript.
Say for example you have a call to action button that lands on your contact us form but you want to pass the subscriber key as a parameter. You might configure that call to action button in ampscript:
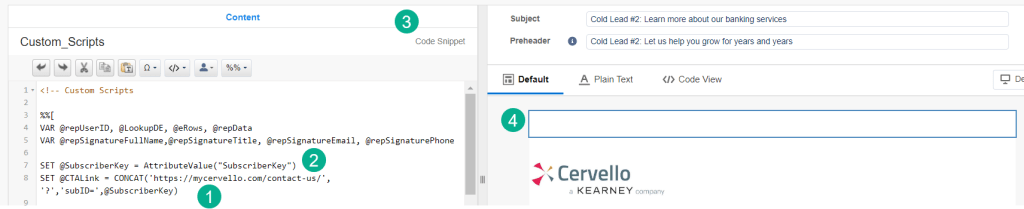
(1) Using the CONCAT ampscript function: https://ampscript.guide/concat/ assigned to an ampscript variables you can combine the url for the link with the subscriberkey for the email send.
(2) Here’s where the subscriber key is set to a variable using the attributevalue ampscript function: https://ampscript.guide/attributevalue/
(3) Just to call out this ampscript code is captured in a code snippet block as part of the email which is utilizing an email design system. An email design system utilizes a template and a series of content blocks that can be dragged and drop onto the template.
(4) Here’s where the code snippet code script content sits on the email, at the top.
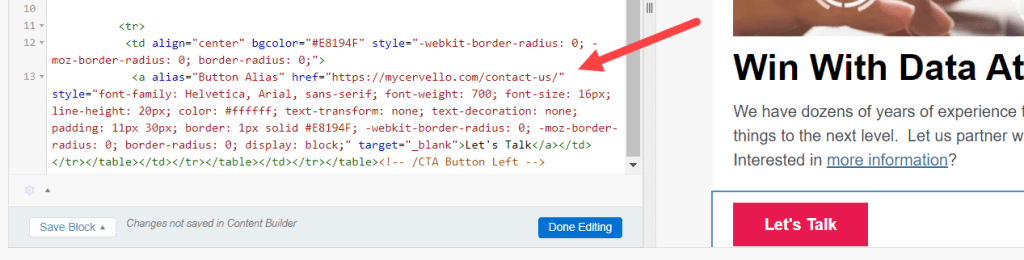
Unfortunately, the Engagement Split activity can’t capture the link in the activity because that link is essentially unknown upon configuration.
It simply doesn’t appear on the list.
Three solutions to this problem:
(1) Simplify your links in emails. For those links that are needed to drive Engagement Splits have static urls. This populates the link in the Engagement Split but doesn’t solve the problem of adding a dynamic parameter on the link.
Here are two solutions that require significant coding and configuration but will allow you to keep a dynamic url link.
(2) Use an automation to capture clicks via the _Click dataview.
Utilize a decision split that calls contact data populated by _click data view data.
The community has posted this issue and there are plans for Salesforce to fix the problem. To view the details of this issue click here: https://ideas.salesforce.com/s/idea/a0B8W00000GditdUAB/engagement-split-click-enable-dynamic-links-to-be-monitored
In the notes of this issue they do offer a workaround and a Trail Head trail that covers the solution in detail: https://trailhead.salesforce.com/content/learn/modules/engagement-splits-in-journey-builder-using-ampscript
(3) Utilize the Wait Until Event activity.
Use the Wait Until Even activity instead of the Engagement Split activity will not only allow you to use a dynamic url, but also will improve the engagement monitoring to real time.
There’s a significant amount of coding and configuration to enable the Wait Until Event to work however. You’ll need to have the page where the subscriber lands send an api call back to the Wait Until Event activity to move the subscriber to the next step.
We cover how to set this up in several articles on this site. I’d start here, configuring a cloud page to make an api call back to the Wait Until Event activity: https://handsonsfmc.com/ssjs-bootcamp-week-2-http-auth-call/
Have fun utilizing the Engagement Split activity in Journey builder. Outside of the known custom url issue, the activity can be very useful for standard journeys.

Leave a comment