
Use Case – Need to Update Entry Event
You’ve created your Salesforce Data Entry Event Journey in Marketing Cloud and have launched the journey and entrants are funneling through. Marketing and Sales reach out and want to add an additional personalization point in the email which requires another data point to be pulled into the entry event.
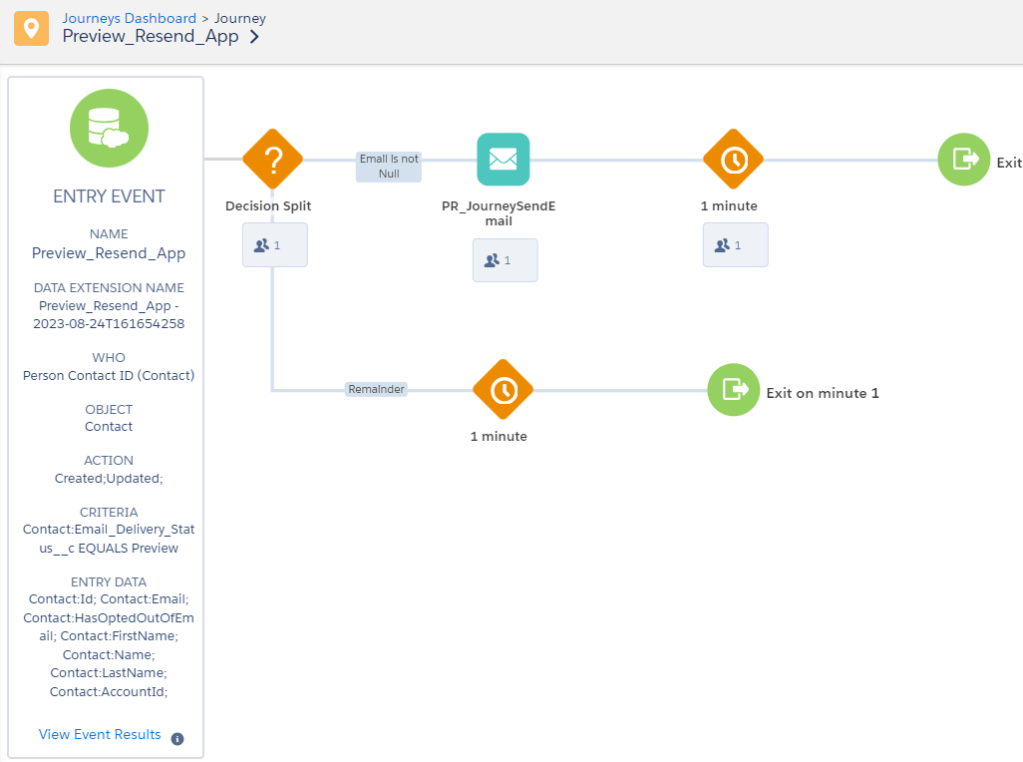
For this walkthrough we are going to illustrate with the following Journey. We are pulling in any contact that is either created or updated with the text “Preview” in the Email Delivery Status field.
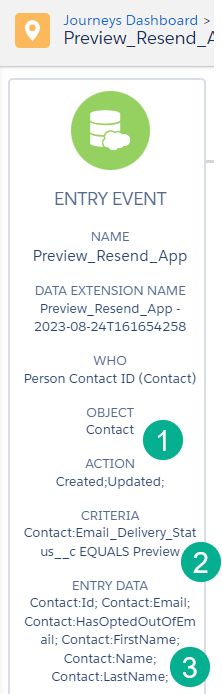
(1) Contact Object and Action: Whenever Created or Updated
(2) Email Delivery Status field in Salesforce Sales Cloud must equal “Preview”.
(3) We need to display the Account name in the email and we validate that field is not currently on the list.
For more details on how to set up a Salesforce Data Entry Event please click here: https://handsonsfmc.com/how-to-create-a-salesforce-data-entry-event/
The Problem: The entry even can’t be edited
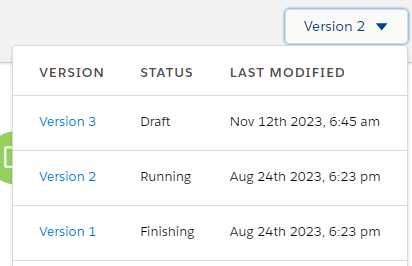
You follow the usual steps in Journey Builder by creating a new version of the Journey to edit the non running journey:
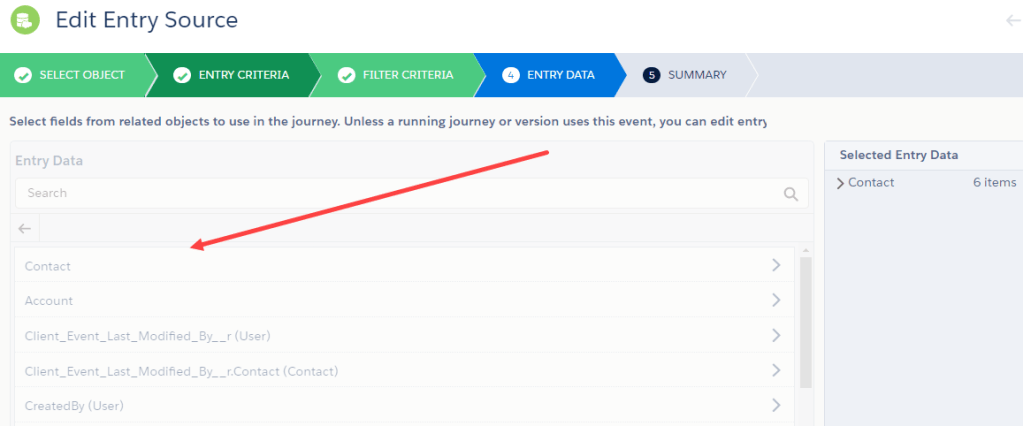
And when you edit the Entry Event and try to add the account name or ID in the contact object all the field are ghosted out and can’t be edited…
The Solution: Stop the Previous Running Journey
For some reason in Draft mode the settings in the Entry Event aren’t available to edit unless the previous journey is in a stopped state. If your journey doesn’t have any active entrants you can simply stop all journeys. You’ll need to be in a running journey to have the option below appear.
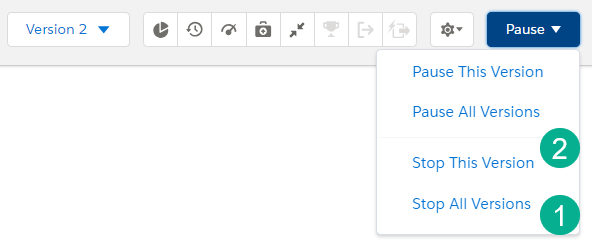
(1) Stop all versions works if you don’t have any active entrants in the journey.
(2) If you do have active entrants then activate the draft of the journey and immediately stop the journey. This will allow journey entrants to continue in a “finishing” state in your existing journey and create a stopped journey for editing.
Edit Entry Event – Adding Data Points
When you go back to edit the Entry Event all objects are available to be edited:
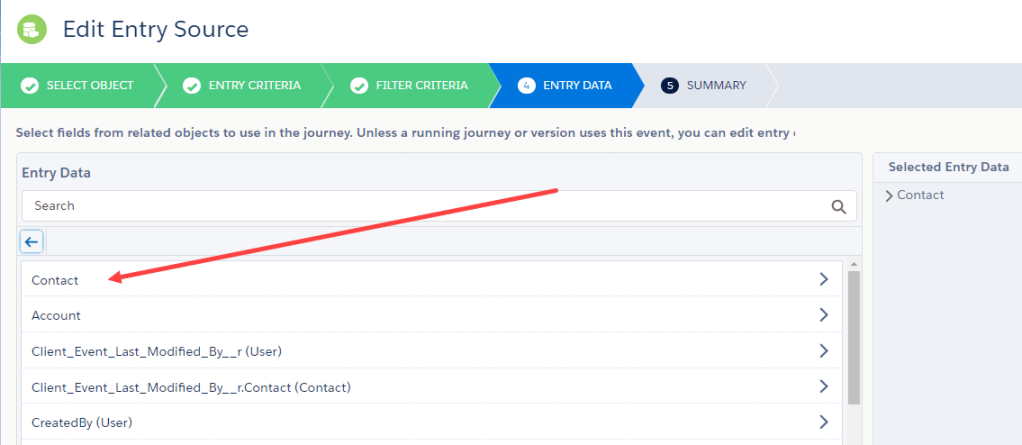
Select the Contact object and our case we are adding the Account ID field.
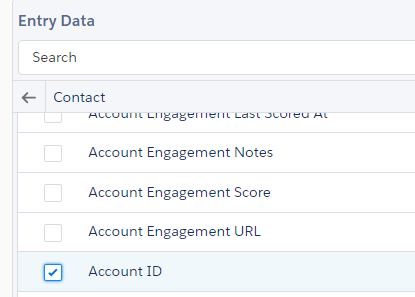
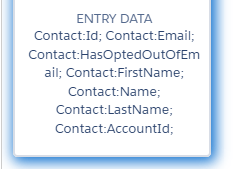
And this new data point will now be available in the Entry Event, Contact:AccountID.
How to personalized email content with a SF Data Entry Event data point
Now that we have this new field let’s personalized our email with the goal of displaying the name of the company for this contact.
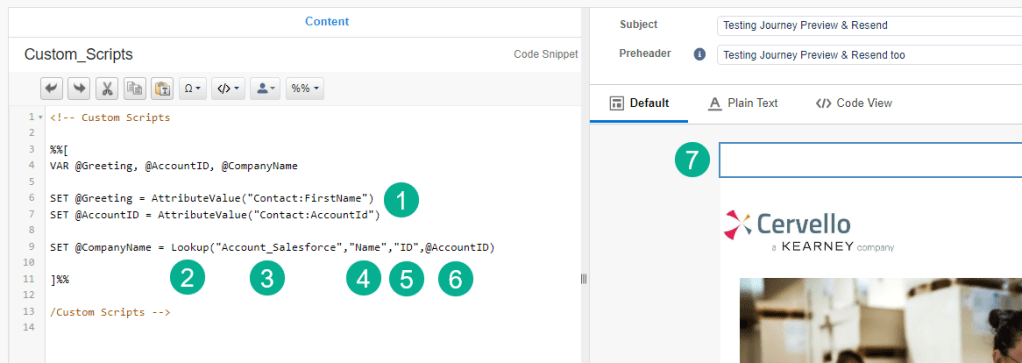
(1) First use the attributevalue function: https://ampscript.guide/attributevalue/ to set the new AccountID variable.
(2) Since we have an Account ID and not the account or company name we need to use the Lookup function: https://ampscript.guide/lookup/ to lookup up the Account based on the Account ID to find the company name.
(3) The first field in the Lookup function is the name of the data extension that we want to lookup. Under Contact Builder and synchronized data extensions we find our Account synched DE.
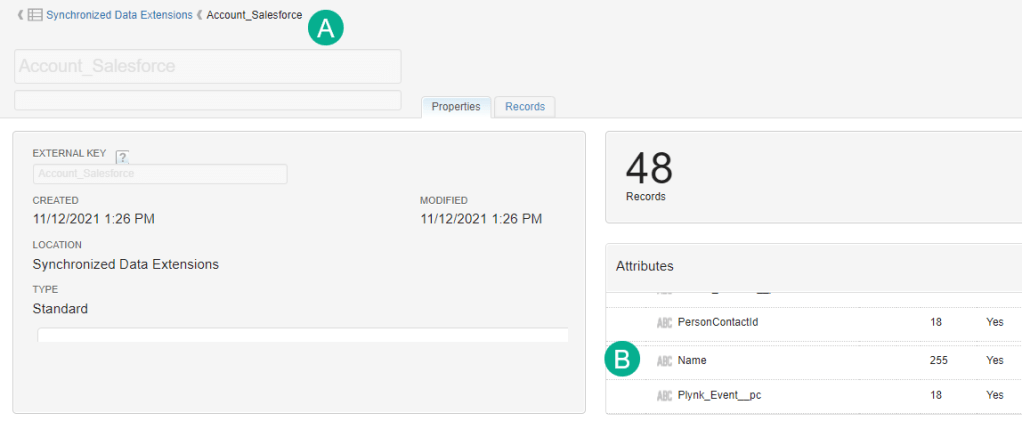
(A) The name of the Account synched DE to used in field #1
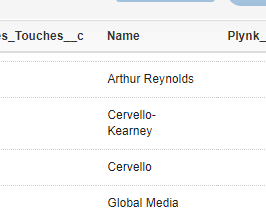
(4) The second field we need to populate in the function is the value that we want to return for the lookup. In this case it’s the Name as we click Records in the data extension to validate the Name field contains the name of the company.
(5) The third field is the value in the Account synched DE that identifies the row, in our case that’s the Account ID or in the DE, “ID”.
(6) And last the ID that we just set above will provide the ID to lookup.
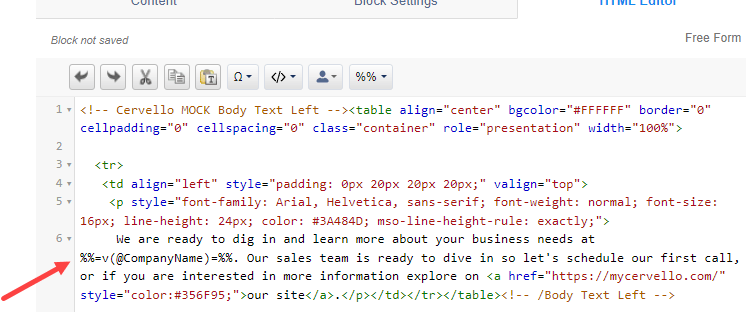
(7) Lastly we wanted to point out this block is a code snippet content block that is dropped into the top of the email.
With the company name variable set the only thing left to do is add it in line in the email content.
Testing/validating the update
In Salesforce Sales Cloud we update a record adding “Preview” to the Email Delivery Status field.
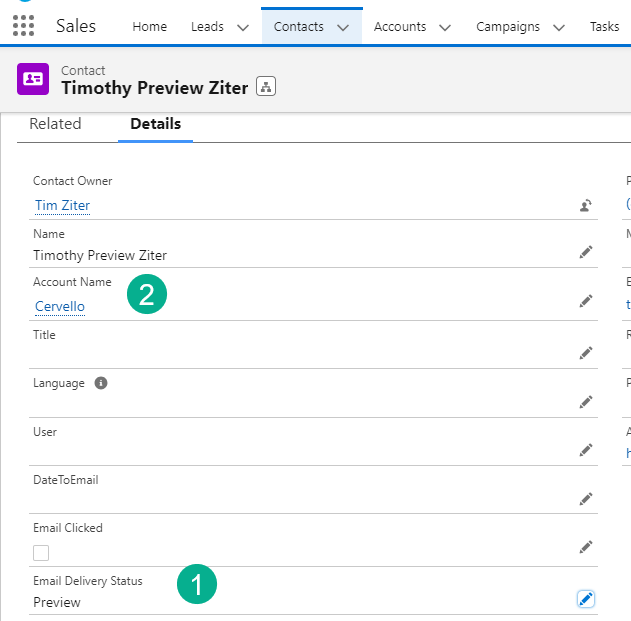
(1) Adding “Preview”
(2) This test record has an account named “Cervello”
A minute or so later the journey entrant enters the journey sending the email.
And the email is received with the personalization of the company added.

For more Journey Builder tips and tricks please visit: https://handsonsfmc.com/journey-builder-tips/

Leave a comment