
We will be covering the teams presentation on Templates featured in the week 9 Marketing Cloud Personalization Bootcamp that is hosted and created by Jyothsna Bitra as part of the Phoenix Salesforce Marketer Group.
For more information on the Phoenix Salesforce Marketer Group please follow this link to sign up: https://trailblazercommunitygroups.com/salesforce-marketer-group-marketing-cloud-phoenix-united-states/
Pre-Build – Organizing for the Developer
Templates are the building blocks of Marketing Cloud Personalization. They drive the logic that will display the custom content. Before you jump into building those templates make sure you’ve planned ahead to build those design assets to ensure an efficient development process.
For a breakdown of how to organize those key assets please review our previous MCP Bootcamp session: https://handsonsfmc.com/marketing-cloud-personalization-bootcamp-campaign-development/

Utilize a table like above to identify the templates to build for each custom content area (columns) and for each segment (rows.)
Let’s take the Hero Zone content area for example.
Content Zone: Where the customization will occur on the page. Providing a visual guide for the developer will help them understand the area to customize.
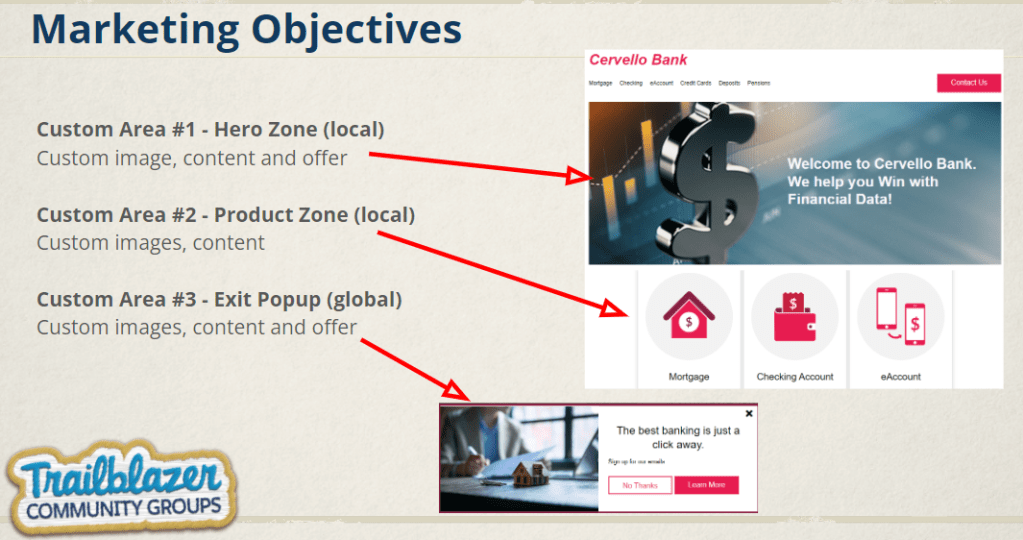
The slide above is a rough mock up that details the three different content zones. Each of these zones will need to added to the sitemap. It might be helpful to also indicate whether the content zones will be global or local. In our case the Hero and Product recommender zones are local where as the exit popup will be local.
Template: The template for each of the three segments will need to be unique as it will feature custom images, texts and links. The design assets needed will be the image URLs, content, HTML styling like CSS styles and link urls.
Campaign: If the templates are set up correctly a single campaign can deliver the custom content experiences.
Pre-Build: Marketing Cloud Personalization setup
Let’s get logged in successfully in Marketing Cloud Personalization
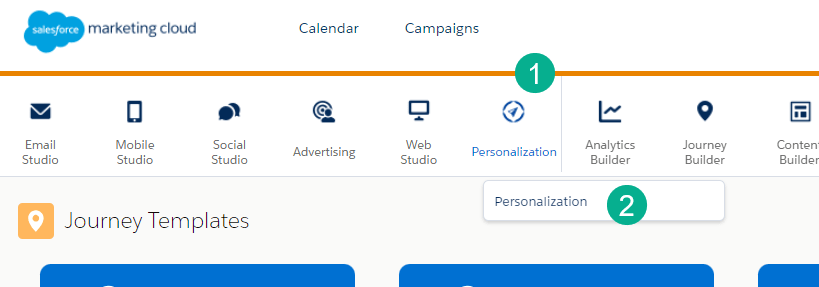
(1) Navigate to the Personalization icon and
(2) Click on Personalization in the drop down
Make sure you select the correct data set

(1) Select the Data Set dropdown
(2) Select the correct data set
Add the Salesforce Interactions SDK launcher extension to your browser (we are using Chrome) while on the website you are looking to modify.
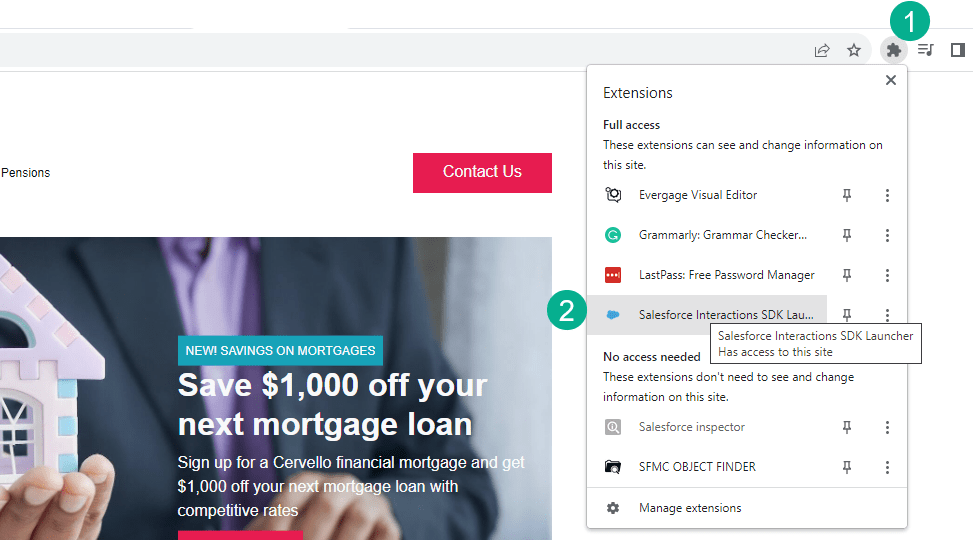
(1) Select the extensions for your browser
(2) Select the SDK launcher

(1) Hopefully the dataset will appear as you selected it in MCP
(2) Turn on the visual editor by sliding the bar over
The MCP flywheel should appear in the lower right hand corner and our first stop will be:
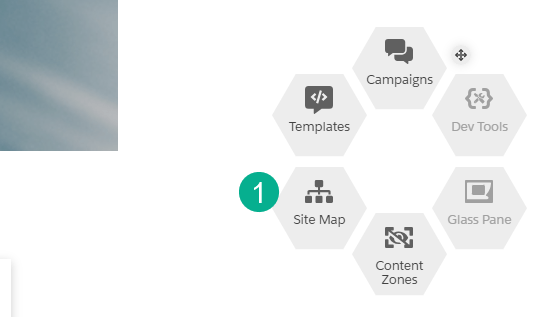
(1) The Site Map: Adding Content Zones
Adding content zones is relatively easy. Let’s take a look at the syntax for Content Zones in the demo sitemap.

(1) In this example we are editing the home page. Be aware of which page is selected as those local changes will only appear on that page.
(2) Here’s a handy listing of the global and local content zones
(3) After the (4) last listener add the following syntax to identify the content zone, in this example our exit popup is a global content zone
And a few lines of code we’ve got our local content zones


(1) You can verify the content zones by hovering over the section of the page
(2) It should correspond with the content zone coding
Templates – Creating New
In the flywheel select templates and create a “New Template”

The basic new template starts the user off with a foundation to customize the experience.
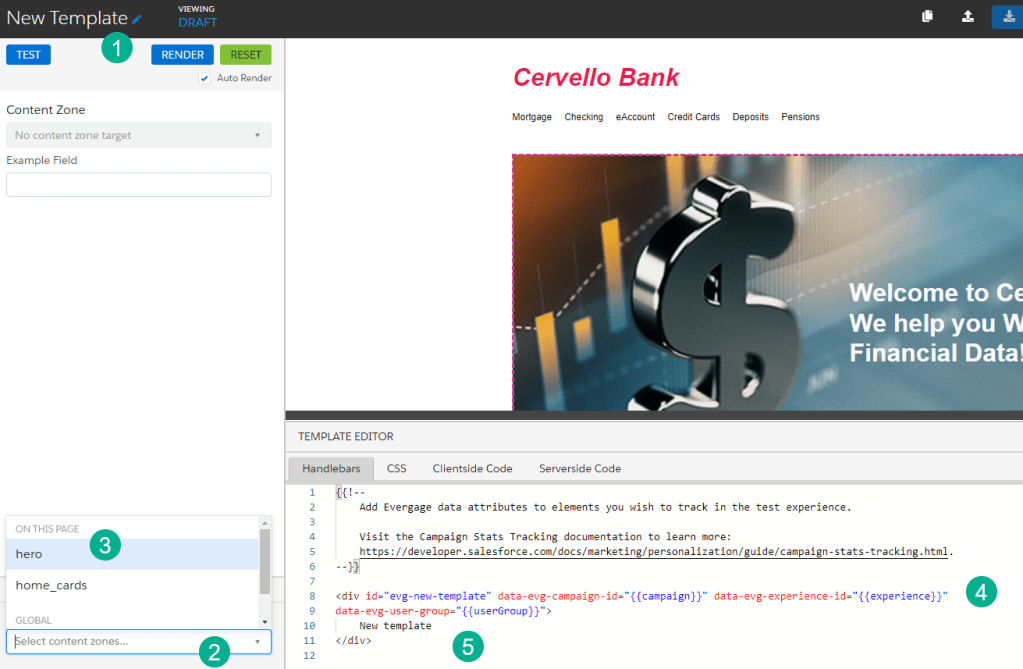
(1) Start off with creating a name for the template – make sure it is descriptive like Mortgage Hero as you’ll be selecting the template from a drop down when creating the campaign.
(2) Select a content zone in this case we are creating a content zone for the home page hero(3).
(4) Marketing Cloud Personalization provides base coding that will enable the custom content functionality.
(5) Here’s where your developer can add the HTML and CSS styling for each template.
Taking a look at the Mortgage template:

(1) The image tag that will display the mortage focused image
(2) CSS and HTML for the body of the hero with different styling for the headline and other text areas.
Taking a look at the product recommender template it’s set up the same way, only the HTML and CSS are different as this content block is displaying three
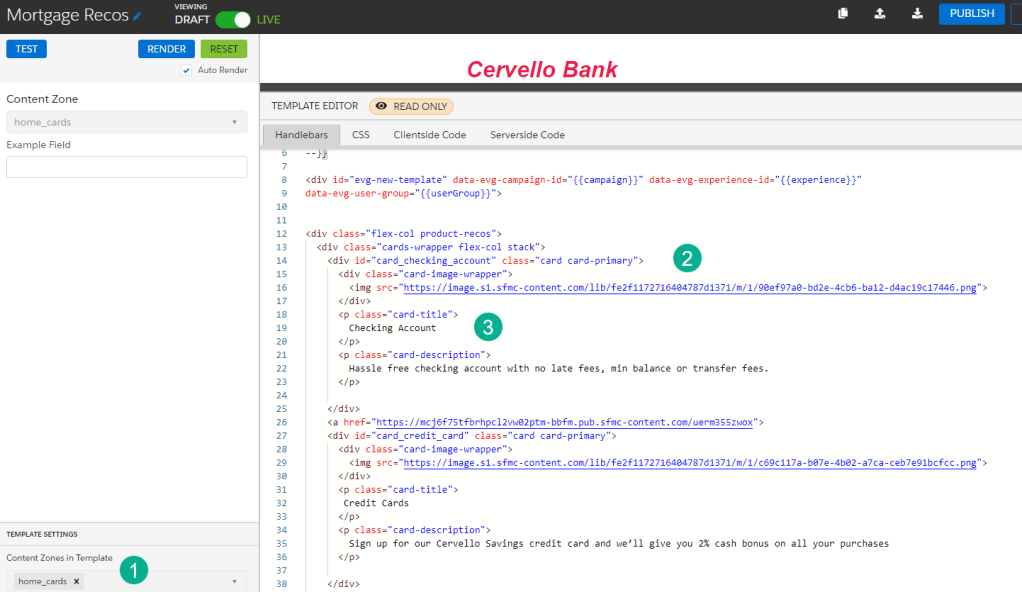
(1) Selecting the Home Cards content zone to correspond to the area where the product recommender will be placed.
(2) Three distinct areas are included in the HTML coding with the image tag
(3) And body copy coding
Templates – Using Global Templates
For our last template, the exit popup we are leveraging the vast library of existing templates that Marketing Cloud Personalization provides.


(1) Add the appropriate content zone
(2) These drop down options will appear when setting up the campaign, this block populates the image.
(3) The following blocks populate the text in the popup
(4) Customize the OOB template to fit your needs.
Hopefully this gives you a quick tour of how to set up new and leveraging existing templates.

Leave a comment