
In this session the team builds out an installed package to enable an API call from the cloud page to the Journey Builder API event.
Build Components
| Asset | Notes/tips |
| Setup | How to create an Installed package |
| API essentials | URL, Client ID and Client Secret |
How to create an installed package
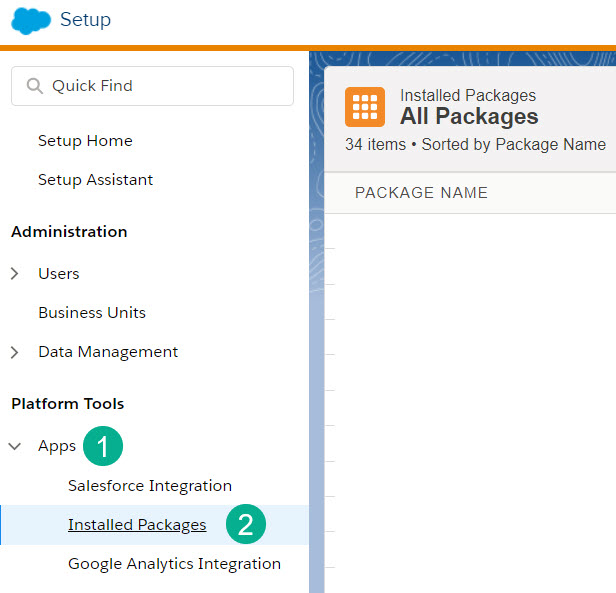
In the Marketing Cloud main menu select your name in the upper right hand corner (1). A menu will pop up and select “setup”

Under Platform tools select (1) Apps. Then select (2) Installed packages.
Create a new package:

Add a name and a description. It’s important to be detailed in your description so you can determine what the installed package is being used for quickly and easily. Click “Save”.

Add a Component (1) under the Component Section:

In the next step there are several choices. For most API integrations choose the default “API Integration” option and click Next.

For most API integrations select the Server-to-Server option that will provide client credentials and the Client ID and Client Secret

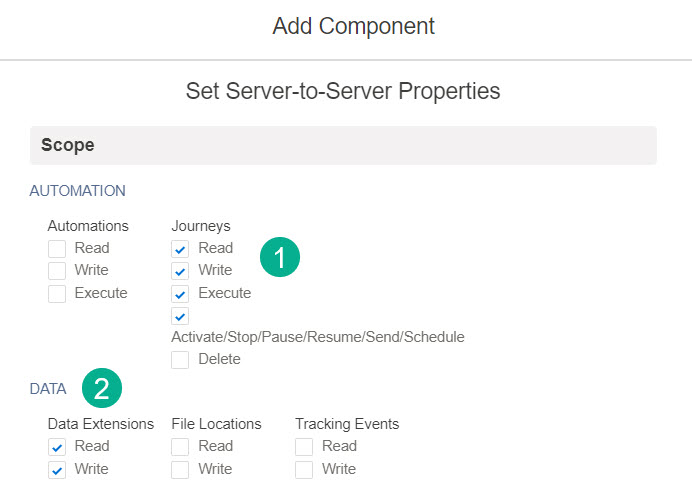
Select the areas in Marketing Cloud that you want this API user to have rights to read, write, etc. For this use case we’ll only need rights to Journeys and Data Extensions. Try to limit access as much as possible. Click Save
Your Installed package is ready!

(1) Here’s your Authentication URL
(2) here’s the REST URL
(3) Client Client ID
(4) Client Secret
(5) List of properties that the Installed package has access/rights

Leave a comment